
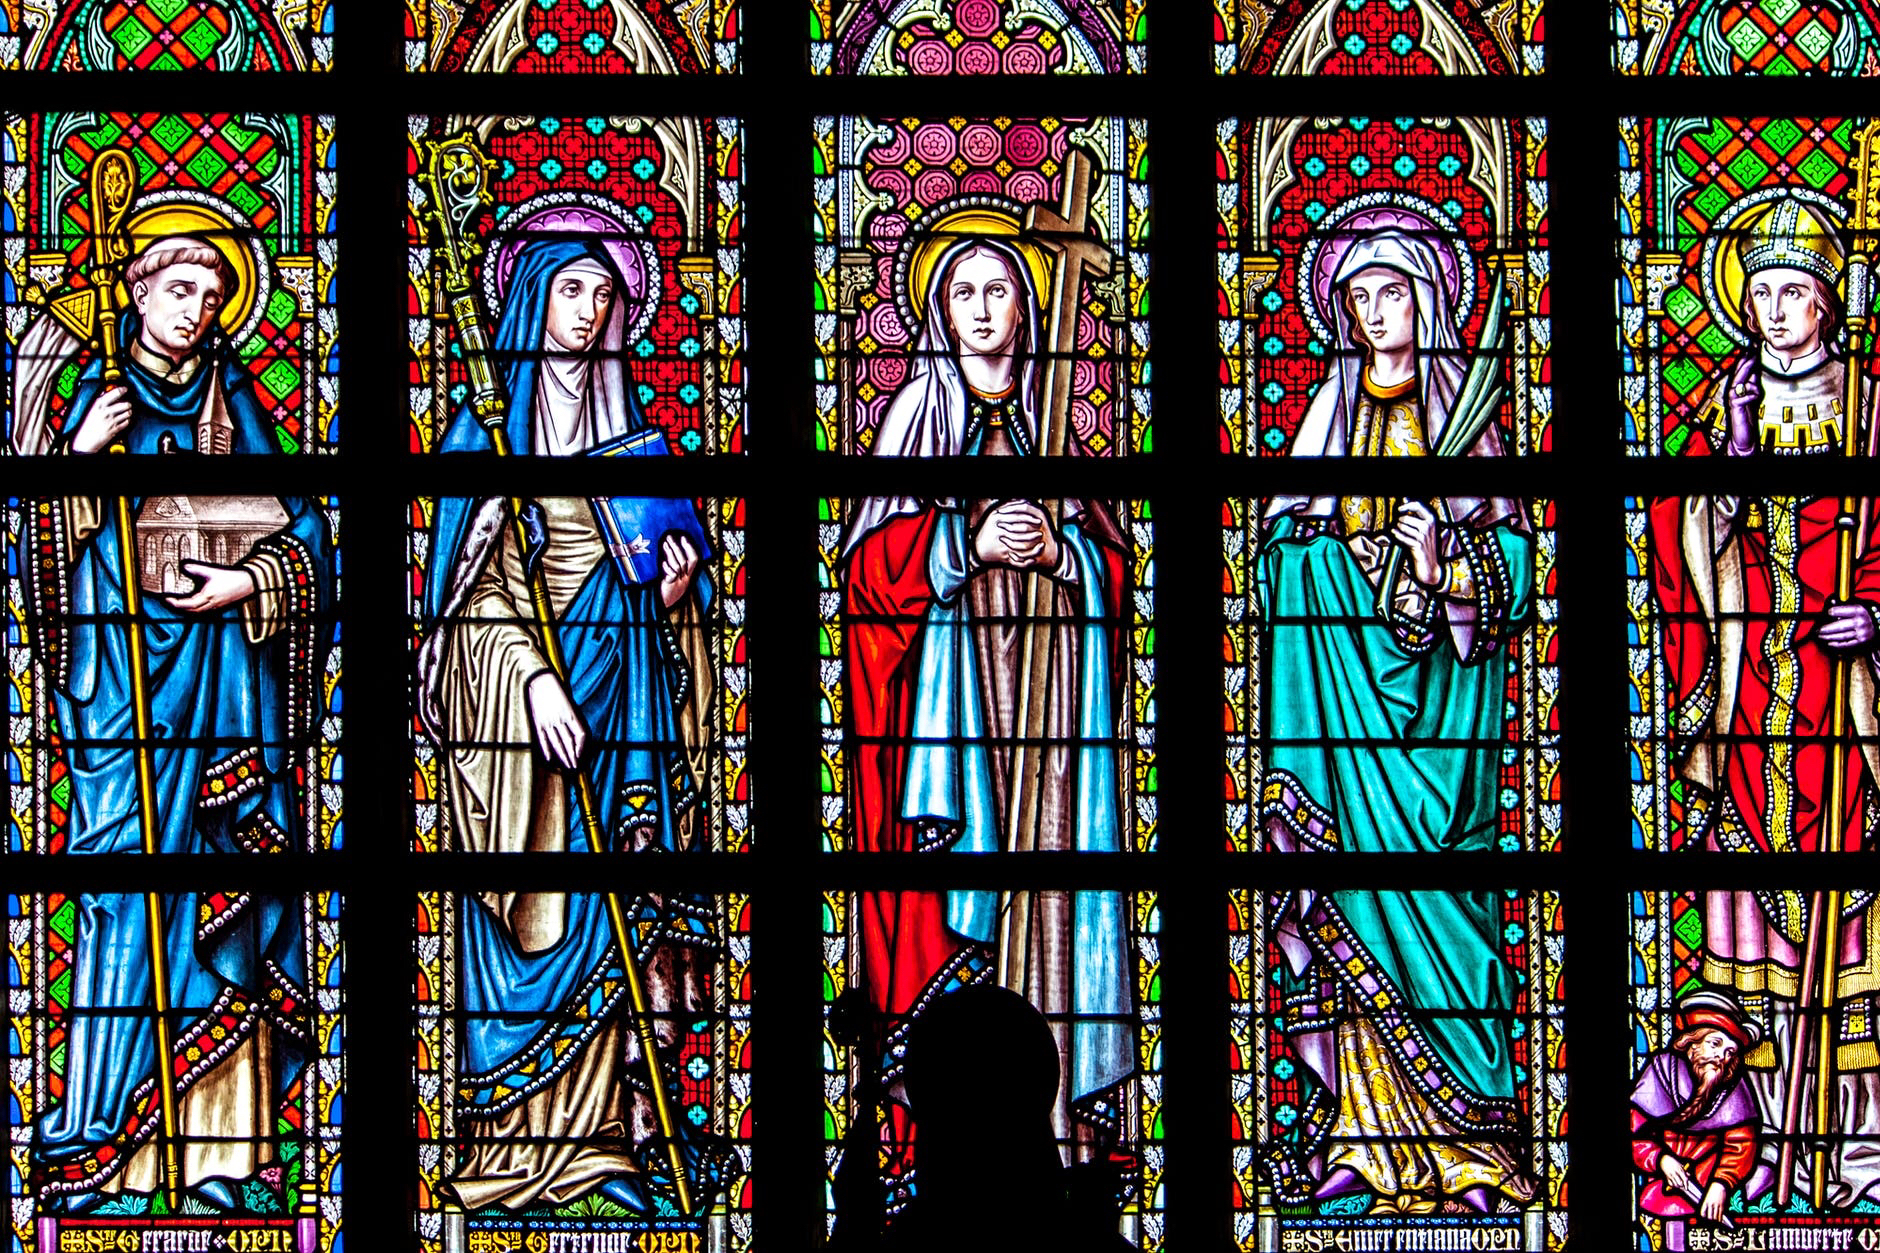
Large panels of coloured glass at the Church, is where I probably saw stained glass paintings for the very first time. Most of them are florals or abstracts. Some of the best works I have seen share stories of the church. This art form is very ancient and people have been doing it for years. A striking point of the design is the blocks or parts of the painting and the translucent colours. Have you noticed it?


The motifs and panels are large, the larger the better. But they can be used in our homes too. I painted a mirror for my dressing room with this method. I also designed the acrylic ceiling for my bathroom using the same technique. Yes! We also get DIY kits with simple designs for kids to paint. I clearly remember, back during my school days stained glass painting had become a fad. There is a chance almost all of my creative friends would have tried it at least once.

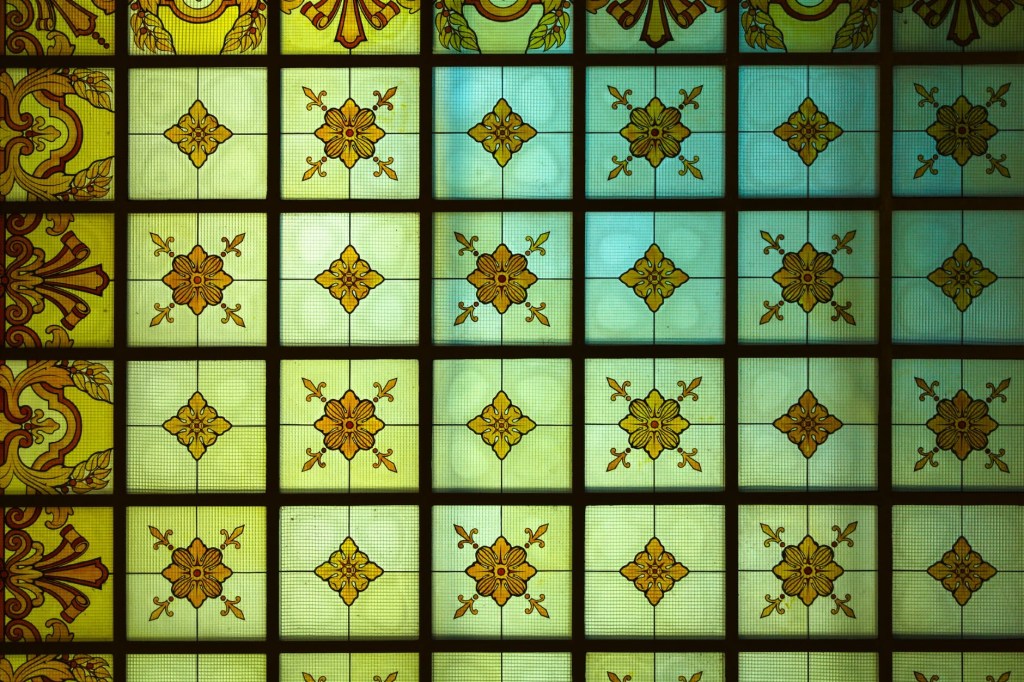
Notice how the dresses of the human figures have been sketched as blocks? The drawing is never one single large piece in a stained glass painting. Even after so many lines it looks beautiful, isn’t it? Also, from what I understand this painting is five panels joined and set in a single window. The black horizontal lines are the frame.
The painting process is very simple. Two steps 1) Create the Outline and 2) Fill the colours. The skilled part is in doing it. And like they say, you have to do it to know it. The texture that you see is the original texture of the glass. We select the glass based on the type we want. The material except the glass isn’t very expensive. The colours in a set are enough to make two or three glass panels. So if you want to re-use or recycle a piece of glass from the renovation, consider stained glass painting. It will give a fresh and majestic look to your decor.
The Paint used for ‘Stained Glass Painting’ is very different from others. It is translucent and self-setting. It is available in small bottles with droppers or changeable caps. A box of glass paints by ‘Fevicryl’ has a black outliner tube and 5-6 basic colours. This is enough for a beginner. Red, Yellow, Orange, Brown, Green and Blue create pretty designs. It is amazing how we can create such beautiful artworks using barely a few minimum shades.
The Black outliner has a pointed nozzle with cap for precision or can be transferred to a cone. The bottles have a dropper. I don’t know if you understood what that means. It means we do not need a paintbrush. The colour is dropped into the blocks created. However just like most artists I also prefer to use a brush to spread the colour evenly or create shading. We need to be careful because if the paint is old and thicker than needed, it will not give a smooth finish.

I shall try to explain this with a detailed process of creating a stained glass panel. For the first project select a small glass panel. The size of A4 or a little larger is good. Next, select a design. A simple abstract or floral one with large blocks. There are templates available on the internet that we can download and print on a home printer. Then we place the design underneath the glass and trace it on the front or top side with an erasable marker.
After that using the outliner tube we create a steady outline in black for the design. It looks like a 3D piping. We then have to wait for the outline to dry. It would be a good idea to do this on the previous day and colour it the next day. If the line is thick at some places and thin at others or if it is very light at some points, the colour will make its way through like water. It flows out. Erase the marker lines after the outline dries.
The ready kits have this step already done. The kids only have to pour the colours. Next we use a dropper and drop the colour in the closed portion. By ‘closed’, here I mean the black outline is sealed correctly. Units that we want in the same colour, try and drop the same quantity of colour. For example the leaves of the flowers in the picture below are all of the same colour.
The colour automatically spreads to the edges and sets like a block of jelly. There will be darker or lighter shade within the same colour, if we do not drop the same amount of colour. That’s correct, this is the tricky part. It can be understood only after trying to paint. Hence we need to spread the colour evenly and equally, knowing how many drops of colour to add in each of them. Once we get this right, we have aced it!

And there is another unique idea of putting a crushed silver foil as the backing for the the stained glass painting. We then mount the dried finished glass panel in a frame. It also looks good as wall art and not just the usual ceiling or windows panels.
Oops! Don’t be in a hurry. The paint may seem dry but it takes at least 24hrs to set completely. Only after that we can pick it up or change the level to tilt or hang it. Yes! The painting has to be done laying it flat on a levelled floor. Nah! We don’t paint the walls. Only after the pieces have dried completely it can be lifted and fitted.
An interesting similarity of this art is with acrylic pieces that they weld together as sun catchers for outdoor decorations. Have you seen them? If you have and know what they are called, please share the details in the comments section below. Have an Arty Week!
