Oops! I made a mistake .. Eraser Stories

‘Life is the Art of Drawing without an Eraser’ I am sure you have heard this one before. But the truth is most of us cannot draw that well. We all make mistakes at some point in time. Nobody is born knowing it all. What we do after that .. how we correct it .. what we learn from it .. is important. Think! What is it that we could do differently so that the mistake is not repeated? We learn by asking questions and making mistakes. We grow as we learn. It is a part of the process.

People can be a bit too hard on themselves. They discard things with the slightest flaw or even a single mistake. In Art, we can either incorporate the mistake into the design or erase it. Then it is about how big or small the mistake is. My Art teacher always said, “It is ok to make a mistake. What you should also know is how to correct it. You cannot keep throwing away everything or stop painting altogether because of them.”

Reflecting, I realised I had made mistakes on my art journey as well. Sharing them with you could help you avoid them, rectify them or at least feel that you are not the only one. Here’s a list of the ones I could recollect.

  1. If one uses a very sharp pencil or a hard graphite pencil on paper, it creates a dent. The pencil graphite can be erased but the dent or mark will stay.
  2. Excessive erasing can peel off the paper. Hence it is important to select a good eraser as per our use.
  3. Erasing when the paper is slightly wet will erode the paper. Literally!! There will be a hole. This happens if we use pencils along with watercolours. It is best not to draw with a pencil before using watercolours. If at all we do use them, make sure it is very light and will get covered in paint. We won’t have a problem if we use gouache colours because they are thick and opaque.
  4. Drawing with a pencil on a canvas and erasing it is a big no-no. The graphite will mix with the paint and the colour will change to dull and dark. It is a good idea to draw with a paintbrush on a canvas. We can use a very light shade (almost white but visible to the naked eye) for drawing or making the markings. This will get covered up when we paint on it thereafter.
  5. We do get ink erasers. Pencil erasers can be used for colour pencils too. I tried erasing a little pencil mark when the paper was almost dry but not completely dry and the paper peeled. This was because of the moisture in the marker. The idea is that once we paint or colour on the paper, the pencil mark goes under it. Hence it cannot be erased even after drying. Whether we use pencils, markers or paints it is best to erase all the extra markings before painting. We can always keep the outlines that will get covered with thicker outlines or enhanced after painting.
  6. This is one of my favourites – Give a light wash in the background and then detail and then more detail. Same way in pencil shading. Do the light tone, then darker and then darker as and where necessary. Work on the whole piece simultaneously, so that the colours of the artwork mix and match well. Also, there is a complete flow in the picture. By any chance, if we make any mistake or want to make changes after doing the other portion we will be able to correct it. Once the dark or final touch is done, it becomes a lot more difficult to correct it. That is why it is always better to work in layers.
  7. Spilled a colour and ruined the spot? Lighten the colour by removing the pigment by lightly dabbing on that portion. Let it dry completely and then paint over it. That is what I meant by it can be easily corrected in the beginning. That is why nobody paints one part of the art to the finish while the other part doesn’t even have a base wash. That’s 99% a digital edit.
  8. Want to remove dried paint? Acetone works well to remove Acrylic paint on surfaces like glass or plastic. I have used it on canvas too. The cotton in the canvas will have to be treated with gesso once again before painting.
  9. The paint water glass tipped and dripped water onto the paper. This happens a lot when we work in small spaces or a hurry. Especially during art exams. For many of us, it can even be a horrifying experience. Don’t worry this can also be corrected. Take a dry cloth and lightly dab on the paper to soak up the excess water. Some paint will come onto this cloth. It will be back to the light wash stage. Let it dry and repaint only that portion.
  10. Last and very important – In the process of correcting the mistake, don’t try too hard. Sometimes people focus so much on the mistake that it ends up becoming the highlight instead of blending or fading away in the picture.

One thing I clearly understood is most of the times we are the only ones to know what the mistake is and where. The onlooker doesn’t know it unless we specifically point it out or highlight it or in any way make it very obvious. If we manage to blend it and make it flow along with the rest of the painting it can add to the beauty. Yes! Some mistakes can be beautiful. A little here or there adds to the beauty of handmade. It makes it different and unique. It makes it special.

What if none of these methods works and we have to do a re-do? Then think of what Thomas Edison said ‘I haven’t failed, I just found 10,000 ways that won’t work.’ We are all human. To err is human. I like to wear my bruises as my badges of honour. So if at all we make a mistake, there is nothing to worry about. It is ok to make mistakes.

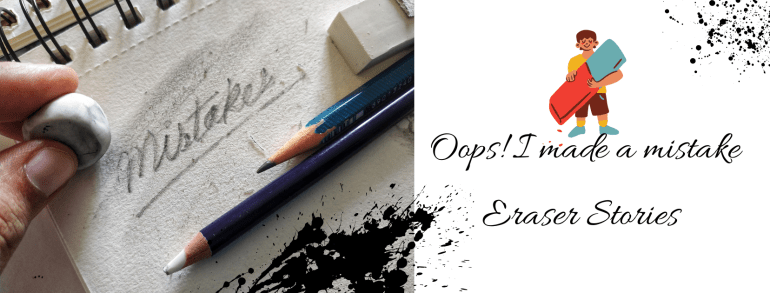
Fortunately, we have erasers for art. And there are different types of erasers too. Hehe.. Yes! There are different types of erasers. And no please don’t call it rubber. It is called an eraser. We all have this one vinyl eraser or a regular soft eraser (with a brush to clean the dust) for regular use. This can be used for Art as well. A pencil eraser for erasing precise lines (this is an eraser pencil, see the picture) and a kneaded eraser (magic eraser as I call it) that absorbs graphite and charcoal is something every artist should include in their toolbox.

Erasers
Different types of erasers that I use for my Art Projects

Having a good eraser and more so the right ones can be very helpful in drawing and painting. I don’t use erasers that are hard on the surface such as the sand eraser and the pink eraser. An eraser mounted on the pencil is a big no for me. It is not for drawing or sketching. One can use it for regular writing work. We also get changeable erasers and electric erasers in the market. These erasers are more pricey and better suited for specialists or professionals.

Do you also have eraser stories? Feel free to share them. We could all learn from them. Have an Arty Weekend!

A Trip Down Memory Lane : Sketching With Charcoal And Soft Pastels

Hey! Look! I managed Pencil Shading. I am confident that I can handle it well. May I try Charcoal now? Hehe…If that is your question “Sure! Why not!”. Charcoal sketching is very similar to pencil shading but in ways, it is also different. We use charcoal pencils or charcoal powder instead of graphite. In pictures, graphite looks a little greyish while charcoal gives a distinct black colour.

Would you like to join me down memory lane? In this post I am sharing my artworks I did years ago. Some while learning at the class and some afterwards. Soft Pastels (chalk) is also a similar medium. It has colours and is easier to handle. I couldn’t take formal training for Soft Pastels but I can decently manage with it. In fact, I really loved the medium once I started working with it. One can do much with it. Paintings with Pastels are quick and can look very realistic.

Charcoal Sketch Flowers
I started with Flowers
Charcoal Sketch Cheetah
Then tried Animals
Charcoal Horses
These are done with Stumps and Charcoal Powder
Charcoal  Sketches
Sketching Human Faces – Basic
More detailed Sketches – Portraits

Those are charcoal sticks in the picture above. They very are useful for filling darker tones in large spaces. All the pictures here above are of my artworks that I learnt and did in the class. Charcoal Sketching wasn’t exactly my strength but I enjoyed it and I think I did pretty well. Finding a good teacher is a blessing. So many can draw and paint but not all of them can teach.

Many people think pencil shading or charcoal sketching means making something exactly like that in a photograph. Please understand we are not competing against computers. Earlier when we did not have cameras people liked to have portraits and landscapes for memory. That is why artists tried to paint those pictures. That is replaced with photography. The cameras we now use are so amazing with details and precision that we need not paint the same.

Charcoal  Sketching
I think this one turned out really well

Some people edit photos and add effects to make them look like sketches or paintings. For me, if the computer can do it better, I feel it is better to let them do it. Personally, I like sketches that have a hand-drawn touch or twist to them. For my exams at the classes, we had to draw a sketch of a student sitting around: first in a pencil and then a charcoal sketch. That was my attempt at ‘live study’. I was happy I cleared the exam with pretty a good score.

Storing Charcoal Artworks can be a little tricky. The powder continues to dust off. It can spoil the other artworks stored with it. Store it in a cello envelope or sleeve. Once it is final, spray it with a fixative to fix the powder. Not only will the Artwork stay well, it won’t dust off and spoil the other papers it is kept with.

Charcoal Pencils
In the making with Charcoal Pencils
Charcoal  Sketch Girl Horse
One of my more recent works

Soft Pastels are more like chalk. They work very well for shading large surfaces. We can use the broader side as well as the pointed side. We also get Pastel Pencils for more precise finishing. More the shades in the colour box, the better for shading. Blending done with the finger works best.

Pastels on Paper
Pastels on Paper
Pastels and Charcoal Sketch
This is a mix of Pastels and Charcoal Powder

Nostalgia! I am all ready to paint with charcoals and pastels all over again. I would like to make a new artwork and see how it turns out. Would you like to give Charcoal Sketching and Soft Pastels a try? Have an Arty Weekend!

Related Posts that you may want to read :-

A Beginners Guide To Pencil Shading

Pencil shading is creating artworks using pencil strokes. I did my first artwork in pencil shading during my school days, probably in the 5th or 6th grade while preparing for my art exams. Later, after the 10th grade I took up a course in Charcoal Sketching. It was a vacation batch and as a preliminary step to Charcoal Painting my teacher took a few classes in Pencil Shading first. I learnt a lot both about Pencils and Charcoals in that class.

A pencil is the most easily available drawing tool. Learning pencil shading can teach a lot about shade and light in a drawing. Pencil Shading as a subject will be a part of every curriculum – at every Art School or University or College or a Masters level study. Traditionally ‘live study’ meaning the subject to be drawn or sketched is actually in front of you and you have to draw it was the way to sketching in Art.

It would be a good idea to invest and buy a few books on Pencil Shading and Sketching. It will be helpful to observe works by different artists and study their styles. We can practice and draw from the drawings in books. One can draw from photographs or online drawings at a later stage. Beginning from a book or with a tutor guides us stepwise and covers all the subtopics. Artists who wish to take up Pencils as their main medium of Art require training of an advanced level.

Begin with simple ‘Landscapes’ to more complex ones, followed by ‘Object Drawing’ and ‘Nature Drawing’ and finally to ‘Human sketches’ and ‘Portraits’. That is how I did them. Drawing and sketching always helps and is important even if you take up any other medium. I really think everyone can draw and everyone’s drawing will look different.

Here’s how I learnt it or what I learnt about Pencil Shading:-

  • To start with, select a simple single subject like a flower or leaf or a pot or a pan. (Picture 5)
  • For the first one, try to shade using only the 2B pencil. Observe the strokes, texture and blending (Pictures 1 and 2)
  • Add darker tones with 4B and 6B pencils (Picture 3)
  • Can blend using the finger, stumps or cotton buds (Picture 4)
  • Use a kneaded eraser. It helps erase a clean line when pointed and used. If you just tap it on the shaded area it will absorb the graphite like a magnet making the shaded area lighter but keeping the strokes. That is why I call it a magic eraser. (See pictures 6 to 8)
Learning Pencil Shading
Pencil Shading Explained

A beginner can start by looking at artworks and reference images in drawing books. I wouldn’t advise looking at images on the Internet because sometimes they are a bit too much for a novice. One can barely differentiate between a hand-drawn and digital artwork. Some of these are genuinely handmade artworks by professional artists, while some are computer edits. Don’t be disheartened looking at them or set the benchmark too high. That is why I suggest books or taking up formal training.

Learning  pencil shading  2
The strokes will improve with time. See bottom images and top images.

Pencil shading is the foundation to a lot of methods in drawing and painting. Once this is aced, the other methods become easier to learn. With time and practice the shading will improve. Like in this picture the leaves in the bottom images are my previous works and then with time it improved as the top two images. All the four are from my early days of learning pencil shading. Then as we feel more confident, we can take up advance levels.

I felt sharing my experience might help beginners taking up Pencil Shading. One can use Coloured Pencils for colouring as well. I have seen artists doing realistic colouring using coloured pencils. One small but important point that I would like to make here is ; with the advent of such amazing digital tools for drawing, even the best artists can get fooled as to whether the art is hand-drawn painted or digital. So please be honest with yourself and learn it without using the digital tools.

Pencil Shading Trees
Trees done in Pencil Shading

There are some additional things one needs to know about Pencil Shading. Knowing these can sort out some problems that may pop up while learning :-

1) Create strokes or lines to shade in the direction of the object surface. Rounded for the pot. The direction shows the rounded ness of the object. (Picture 9 and10) Some people create bold strokes in pencil shading like this but they should be in the flowing direction of the object. That is how they show movement also.

2) The Paper matters. The thickness, grains and texture of the paper influences the finish. I suggest Cartridge Paper of 160-200GSM if you don’t know which one to go with. After a few trials, you will surely be able to select the paper that works best for your style. (Picture 10)

3) The graphite powder can stick to the hand ruining your work. Keep a plain paper under your hand while shading to avoid this. (Picture 11)

4) All artworks in Black and White look best with contrast. There must be a distinctly dark tone, mid-tone and a light tone in the artwork. The whole artwork could be done using only one pencil. However, there should be areas you can distinctly call dark, mid and light.

Pencil shading tree
The light, mid and dark tones must be clear.

5) For a white, we either erase a portion or leave it as it is. Shade the area around that with a mid or dark tone to give a contrast. (Picture 12 and 13) The white looks whiter when there is a dark colour around.

Pencil shading techniques
Some additional points to note

So let us start! Make smaller objects first and then an entire picture. Think of Pencil Shading as learning the ABC to Art. We don’t need to be professionals at it but we definitely need to know it – Pencil Shading. Have an Arty Weekend!

Related Posts you may also want to take a look at :-

  1. Selecting Pencils for your Art
  2. Five ways to fine tune your Art
  3. Drawing without using a scale or ruler

Selecting Art Materials : Canvas and Paper, Paintbrushes

Most of the people I know buy brushes that are labelled as watercolour brushes and art paper that is mentioned as suitable for watercolour at the store and they are sorted. “Look! the company says I can use them for watercolour painting, so I bought them.”

They bought it either because someone told them, they saw someone using it or the brand company had written so on the product. Very few people bother to find out the product details and know if it is the right product for their use. Many a times we don’t want to stock different materials for different Art and so we use the same brush or paper for all. The selecting pattern is same for them and so I grouped canvas and paper with paintbrushes.

For beginners it really won’t matter; however artists and professionals will be equally choosy or selective about these materials. It makes a difference in their work and once we are used to a particular one, we only use that. Most artists start off with the trial and error method and once they like a particular brand or product, they stick to it.

Different kinds of brushes, what they are called and their suggested uses are printed on packs. As always a lot of information is available on the Internet. So I will not get into repeating that printed knowledge.

We have discussed ‘Selecting Art Materials’ in our previous posts. On the same lines I will share about selecting paintbrushes, art paper and canvas in this post. I do not endorse any brand and this is not an advertising or promoting post. I share about my understanding of these materials so that it helps others make an informed purchase decision.

Canvas
Selecting a Canvas

Canvas

Any surface we paint on is called the canvas. So if we are painting on fabric or wood or paper, all of them are actually our canvas. However when we go to an Art store and ask for a Canvas we usually get this fabric like drape wrapped on a board called BOARD Canvas, a stretched drape pinned to a wooden panel frame called STRETCHED Canvas and a ROLLED Canvas which is a roll of the drape. All three have the same material, only the mounting is different. Once the painting is complete we have to get it framed before hanging the painting on the wall.

The board canvas is a hard and flat painting surface, the stretched canvas is mounted on a frame and has a slightly bouncy feel while the roll canvas more floppy like a loose fabric. A stretched canvas can be directly hanged on the wall using the existing wooden frame. Hence it is also called wall mounting canvas. A canvas sheet that is cut from the roll will have to be stretched or mounted before painting.

Canvas was traditionally used more for oil painting. Earlier when I learnt mural painting we would have to apply oil and colour to prime the canvas. Now a days canvases are already coated and primed. Cotton is the main fibre of a canvas. Did you know? We also get paper sheets made from cotton linen pulp which are used as canvas for oil painting and acrylic painting. They are like a sheet cut from roll canvas: have the same texture and feel but are relatively sturdy and stiff like paper.

All of them will be acid free and primed and have some treatment or coating for protection against pests. It really won’t matter which one you buy, almost similar. Only the tension of your canvas will differ. That would be the basis of your selection. If you are using them for acrylic painting a canvas primed with gesso works well. You can use others too. If you are into oil painting you may be more selective while choosing the canvas.

Not all art supply stores stock all sizes of canvas. It is a good idea to buy the quantity together if your project uses multiple canvases. In case the size you need is not market ready, you can buy the roll canvas and get it custom made or mounted to your required size. Canvas is also used for Art prints. Digital prints of artwork is quite common. Flex banners are also a type of canvas.

Paper
Selecting Art Paper

Art Paper

We get sheets of art paper in bundles as well as bound in books. Books have perforated sheets which can be pulled out. Smaller sizes such as A4 and A5 sketchbooks are very popular and will be easily available everywhere. Art Paper is used for all mediums including pen drawing, pencil shading, acrylic painting, pastels painting, charcoal sketches, watercolour painting and oil painting.

In the info section they print the size in inches and cm. They print the thickness in ‘GSM’ or lbs. GSM stands for grams per square metre that is the weight of the paper or pulp for every square meter. It is how the thickness is measured. How does that make a difference? The thickness of the paper is an important attribute because for watercolour painting we need thicker sheets like 250-300GSM that will absorb water but will not tear while for ink art we can work with 120-180GSM.

Next we look for textured or plain. The grains on the surface. Depends on the artwork one is working on, whether they want a textured feel (a rough surface) or a plain background. For pastels and charcoals a little grain or texture is required. It helps hold the powder while for ink and watercolour art a smooth or plain surface can be selected. This gives a plain edge or a straight neat line finish while painting.

Artists usually use ‘acid free’ meaning paper that has been neutralised. In simple words if the paper is acid free it will not turn yellow with pitting and can be preserved longer. Paper made from cotton will have more absorbency for water based painting. It can be 100% cotton or mixed with other natural fibres like cellulose. I select the ones with 20-30% cotton for my artworks.

Paintbrush
Selecting Paint Brushes

Paintbrushes

Selecting paintbrushes is very simple. Each of them are built as such for a purpose or for a particular style of painting. It may sound weird but some artists manage to get fine lines with a thick brush of size 8 and a thick like with a brush of size 4. With years of practice we don’t change brushes for each size. So buying them in odd numbers like 0,2,6,8,10 is enough. For finer lines and intricate work I use finer brushes of size 0, double zero 00 and triple zero 000. These are smaller or finer than zero size brushes.

For painting on a canvas on the easel we require long handle brushes. Regular size handles are good when we are working on paper. Further we would need a mix of round and flat brushes in our art tool box. Flat brushes are used to paint backgrounds, round brushes for fills and riggers for fine lines. Filbert brushes are useful for one stroke painting or creating visible strokes and design. I even use the back of the brush handles as round stumps for dot painting.

Brushes can be made from natural animal hair or synthetic fibres. Use brushes with soft thin bristles when you want the colour to be applied evenly. It gives a smooth neat finish. Thick bristles cause an uneven finish with lumps of colour which can be left as it is or smoothened by using a roll over it. Bristles of brushes made from natural hair expand when soaked. They are best suited for oil painting. For painting using acrylic and watercolour paints we can use brushes made with natural or synthetic bristles. Watercolour and Acrylic, both being water based paints we can use a common set of brushes. No need to keep another set.

One special kind of brush is the water tank brush. This brush has a plastic body with a water tank attached to it and bristles of the brush are synthetic fibres. When we press the tank, the water drips to the brush tip and soaks the bristles. It works very well for quick sketches and on the go painting using watercolour cakes.

Paint Brushes
Just bought new Paint Brushes

I was surfing the Internet the other day when I came across a video titled ‘How it’s made – Paint Brushes?’ ‘How it’s made’ is a very popular show and I like watching it. They show how various products of our daily items are made. Helps us understand about the products, their usability and the thought process of the maker in creating it.

I understood which problem faced by artists are they trying to solve by offering a particular type of brush or why it is made the way it is. Every product is manufactured keeping in mind a certain use. Similarly they also have videos on ‘How it’s made’ for canvas, paper and many more products. If possible do take out some time and see them.

Painting
Selecting Art Materials

Links to posts related to this topic are listed below. Click on the title to open the post in a new tab. Have an Arty Weekend!

Pencil Mania – Part 1 ; Selecting the right pencils for your Art

Ever gone to an Art store and wondered ‘To buy or not to buy’ that is the question! And if you go with your kids, they will want to buy everything they can see on that shelf. Hehe..it happens with all of us. However it is not practical to stock so much. Also, it may end up being a waste of money or material. We all want to buy tons of Art Supplies especially when the display is so attractive. So then how to keep both your art appetite and your pocket happy at the same time? Knowing your Art Materials might help make an informed decision and select a product suitable for you.

This time I’m doing an article on the different Pencils you can use for your Art. I will cover all the type of Pencils available in the market and their use. I do not endorse any brand and hence will not mention any names, just how to make your selection based on your understanding of the product. This is not a product review but a know your Art Materials post. Based on my experience of using these, I will share a few special tips too!

Graphite Pencils: Graphite or Lead encased in a cover of plastic, paper or wood. The lead is used for drawing or writing. We all know that right! These are available in different grades depending on the hardness or softness of the lead. Here in India, we use an HB pencil most often for writing. The Pencils I use for drawing and shading or sketching are 2B, 4B and 6B. ‘B’ stands for blackness while ‘H’ stands for hardness. The pencil grades meter will show this. Higher the number, darker the pencil finish, softer the lead better for shading and smudging. You could go for the ready set or buy only selected ones as per your requirement. I prefer buying single pieces because I don’t use the other grades, so for me it is a waste to buy the entire set. Further if I use up a lead faster than the other, I keep more of those. I buy more of 2B pencils and maybe just one 6B pencil. You could do the math and in all probability it will even turn out more economical also. Just these three pencils is enough at the beginners level and even on a professional level. Once you take up pencil shading commercially or professionally you may want to invest in a complete set of any good brand suitable to your use.

Coloured Pencils: Coloured Pencils are made of a Pigment (colour) and a binding agent that binds this coloured powder. There are three types of coloured pencils based on the material they are made up of – wax based, oil-based and water-soluble. A pencil that has vibrant colour, a soft but strong lead that presses the colour well on to the paper but does not break easily while making bold strokes is considered as good quality coloured pencil. These are generally bought in a set. More the number of shades, more fun for an artist to colour the picture. 24 or 48 colours is considered a large variety but you even get up to 150 shades in a box for professionals. It is a one time investment because one box can last you for years unless you misplace a few shades. Rarely can one run out of a shade because they used it all up.

Waxed based coloured pencils have a soft lead and are slightly difficult to blend as compared to the others. I prefer oil-based coloured pencils – the lead is soft but sturdy, remains sharp, doesn’t dry out fast, pigments are nice, layering and blending can be done easily. Actually even for crayons I prefer Oil Pastels. So actually it is like the same family and works well if you use different mediums in the same Artwork. Wax based coloured pencils are less expensive than the others.

Water Soluble or Watercolour Pencils or Aquarelle Pencils : As the name suggests are water based. They can be used dry or wet. The dry version gives a lighter colour but once you use water over it, it gives an almost watercolour like finish. Once you paint something, you use a plain water brush over it and blend the strokes. Washable with water or removable, you can use these to shade or highlight in your watercolour paintings. We even get water soluble ink pens or watercolour brush pens. This combination works for those who do watercolour paintings.

We cannot use a water based colour on an oil based colour or a wax based colour. However we can use a wax based or oil based colour on a water based colour. Many people use wax based and oil based interchangeably. An important point to note here is that all three types are not manufactured by all brands. This is their point of differentiation. It means a difference in price, quality and finish. Reading up a little about the brand and which type of pencils they offer will surely help in making your selection.

Further like all Art materials even Coloured Pencils are available in two categories :-

1) Artist Quality 2) Student Quality

Most brands offer both. An Artist Quality will have better colour quality meaning more pigment less binder and will be more expensive than the student quality. So check the label and buy as per your usage. I generally prefer buying Artist Quality even if it lesser number of shades. For a school going child you may want to buy Student quality just in case the child misplaces or breaks them. The price difference can be substantial at times.

Many people feel coloured pencils are for children. That isn’t true. Adult Colouring is trending. It is a stress buster and many Adults are taking to colouring these days. Adult colouring means the colouring pages will have pictures with details or smaller colouring blocks as compared to colouring books for children which have pictures with a larger colouring blocks. There are ample colouring pages and books available in the market. Sometimes they are free. It is a good way to pass time while travelling too!

I will share about other Art Pencils – Charcoal, Pastels, Woodless Pencils in my next post. Have an Arty Weekend!