A Beginners Guide To Pencil Shading

Pencil shading is creating artworks using pencil strokes. I did my first artwork in pencil shading during my school days, probably in the 5th or 6th grade while preparing for my art exams. Later, after the 10th grade I took up a course in Charcoal Sketching. It was a vacation batch and as a preliminary step to Charcoal Painting my teacher took a few classes in Pencil Shading first. I learnt a lot both about Pencils and Charcoals in that class.

A pencil is the most easily available drawing tool. Learning pencil shading can teach a lot about shade and light in a drawing. Pencil Shading as a subject will be a part of every curriculum – at every Art School or University or College or a Masters level study. Traditionally ‘live study’ meaning the subject to be drawn or sketched is actually in front of you and you have to draw it was the way to sketching in Art.

It would be a good idea to invest and buy a few books on Pencil Shading and Sketching. It will be helpful to observe works by different artists and study their styles. We can practice and draw from the drawings in books. One can draw from photographs or online drawings at a later stage. Beginning from a book or with a tutor guides us stepwise and covers all the subtopics. Artists who wish to take up Pencils as their main medium of Art require training of an advanced level.

Begin with simple ‘Landscapes’ to more complex ones, followed by ‘Object Drawing’ and ‘Nature Drawing’ and finally to ‘Human sketches’ and ‘Portraits’. That is how I did them. Drawing and sketching always helps and is important even if you take up any other medium. I really think everyone can draw and everyone’s drawing will look different.

Here’s how I learnt it or what I learnt about Pencil Shading:-

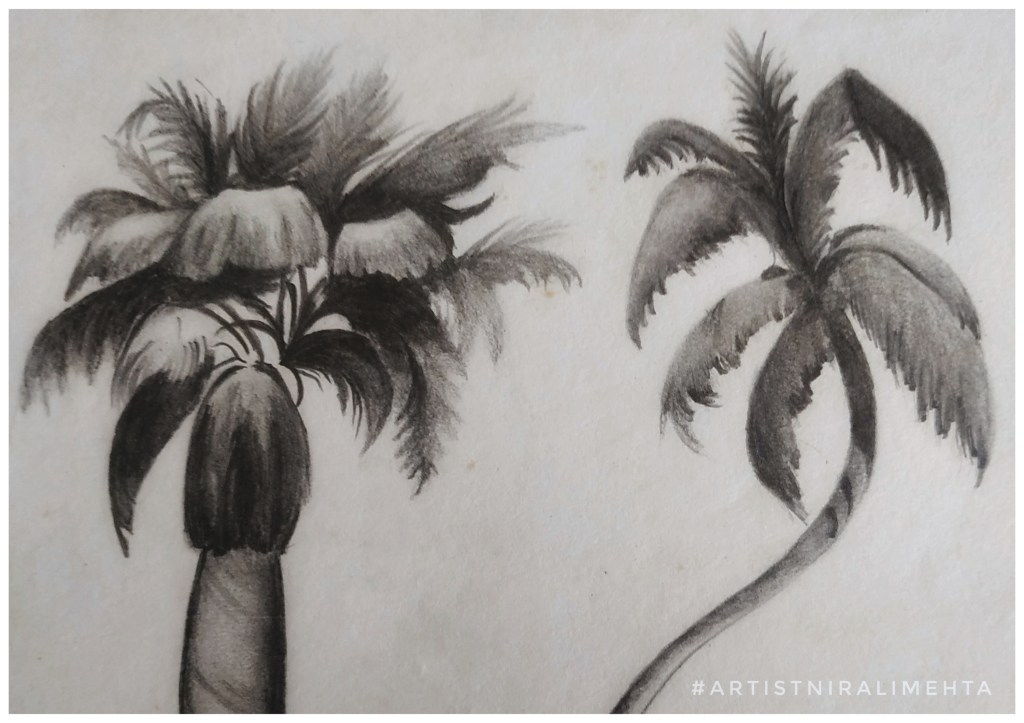
  • To start with, select a simple single subject like a flower or leaf or a pot or a pan. (Picture 5)
  • For the first one, try to shade using only the 2B pencil. Observe the strokes, texture and blending (Pictures 1 and 2)
  • Add darker tones with 4B and 6B pencils (Picture 3)
  • Can blend using the finger, stumps or cotton buds (Picture 4)
  • Use a kneaded eraser. It helps erase a clean line when pointed and used. If you just tap it on the shaded area it will absorb the graphite like a magnet making the shaded area lighter but keeping the strokes. That is why I call it a magic eraser. (See pictures 6 to 8)
Learning Pencil Shading
Pencil Shading Explained

A beginner can start by looking at artworks and reference images in drawing books. I wouldn’t advise looking at images on the Internet because sometimes they are a bit too much for a novice. One can barely differentiate between a hand-drawn and digital artwork. Some of these are genuinely handmade artworks by professional artists, while some are computer edits. Don’t be disheartened looking at them or set the benchmark too high. That is why I suggest books or taking up formal training.

Learning  pencil shading  2
The strokes will improve with time. See bottom images and top images.

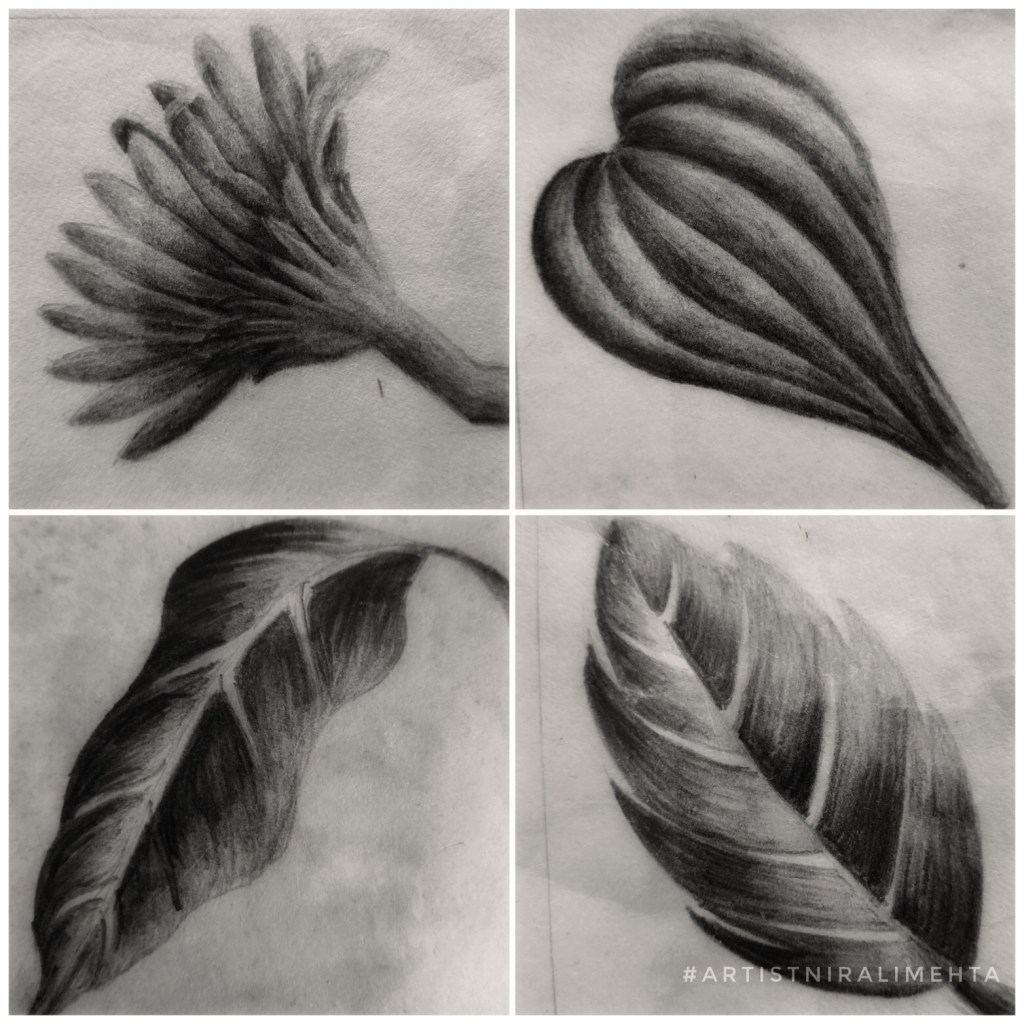
Pencil shading is the foundation to a lot of methods in drawing and painting. Once this is aced, the other methods become easier to learn. With time and practice the shading will improve. Like in this picture the leaves in the bottom images are my previous works and then with time it improved as the top two images. All the four are from my early days of learning pencil shading. Then as we feel more confident, we can take up advance levels.

I felt sharing my experience might help beginners taking up Pencil Shading. One can use Coloured Pencils for colouring as well. I have seen artists doing realistic colouring using coloured pencils. One small but important point that I would like to make here is ; with the advent of such amazing digital tools for drawing, even the best artists can get fooled as to whether the art is hand-drawn painted or digital. So please be honest with yourself and learn it without using the digital tools.

Pencil Shading Trees
Trees done in Pencil Shading

There are some additional things one needs to know about Pencil Shading. Knowing these can sort out some problems that may pop up while learning :-

1) Create strokes or lines to shade in the direction of the object surface. Rounded for the pot. The direction shows the rounded ness of the object. (Picture 9 and10) Some people create bold strokes in pencil shading like this but they should be in the flowing direction of the object. That is how they show movement also.

2) The Paper matters. The thickness, grains and texture of the paper influences the finish. I suggest Cartridge Paper of 160-200GSM if you don’t know which one to go with. After a few trials, you will surely be able to select the paper that works best for your style. (Picture 10)

3) The graphite powder can stick to the hand ruining your work. Keep a plain paper under your hand while shading to avoid this. (Picture 11)

4) All artworks in Black and White look best with contrast. There must be a distinctly dark tone, mid-tone and a light tone in the artwork. The whole artwork could be done using only one pencil. However, there should be areas you can distinctly call dark, mid and light.

Pencil shading tree
The light, mid and dark tones must be clear.

5) For a white, we either erase a portion or leave it as it is. Shade the area around that with a mid or dark tone to give a contrast. (Picture 12 and 13) The white looks whiter when there is a dark colour around.

Pencil shading techniques
Some additional points to note

So let us start! Make smaller objects first and then an entire picture. Think of Pencil Shading as learning the ABC to Art. We don’t need to be professionals at it but we definitely need to know it – Pencil Shading. Have an Arty Weekend!

Related Posts you may also want to take a look at :-

  1. Selecting Pencils for your Art
  2. Five ways to fine tune your Art
  3. Drawing without using a scale or ruler

Pencil Mania – Part 2; Charcoals, Pastels and Woodless Pencils

A friend jokingly said “That is why I shop online, the Art Store displays are too tempting to resist.” I smiled and replied “Then do you end up buying all the recommended best sellers” Both of us burst out laughing. At the end of this friendly discussion we agreed that knowing your Art Material can definitely help save up some money.

In my previous post, I shared about Graphite and Coloured Pencils. Do refer to that to associate a connection with this post. In this post I will share about Charcoal Pencils, Pastel Pencils and Woodless Pencils. Woodless Pencils are Graphite Pencils without a casing. They are covered in a coat of lacquer. They are helpful in shading large areas. It is a helpful tool that you would want to add to your Art Kit, once you are confident in Pencil Shading. Similar to them are ‘Sticks’.

‘Sticks’ are like a thick block of pigment. They just have a sheet of paper wrapped around it or sometimes none. When we say ‘Pastels’ we normally refer to the stick form. If you want it in the pencil form, you need to ask for ‘Pastel Pencils’. Similar to Coloured Pencils even Pastels are pigment combined using a binder such as; wax, oil, gum, clay or water soluble.

Pastels are of two types 1) Hard Pastels 2) Soft Pastels.

Pastels

A special tip here – if you ask for crayons, you will get Wax based Pastels. Oil Pastels are also referred to as Hard Pastels in some countries. Many people call Oil Pastels as Crayons which may cause undue confusion. Pastels made using Clay as a binder are commonly called ‘Chalk’. Pastels made using Gum as a binder are referred to as Soft Pastels. Water Soluble Crayons are similar to Watercolour Pencils but are used mostly by children. Pastels are also available in the form of compressed powder palettes called Pan Pastels.

Both Charcoals and Pastels are available as Pencils, Sticks and in Powder form. Charcoals and Pastels are preferred by many Artists for sketching Portraits and Landscapes. The investment is relatively less than what an artist would have to make for doing other kinds of Paintings.

Charcoal is a form of graphite or carbon. In simple words it is ‘Soot’ or a burnt material. The lead tip of a Charcoal Pencil is made up of compressed Charcoal Powder. Charcoals made without using any binders are best preferred. This means it is a nice dark lovely black pigment. Charcoal Pencils are available as Soft-Medium-Hard. Each of these leads will create a different texture when rubbed against the paper. The smoothness of the paper also affects this texture. Just like Graphite Pencils even Charcoal Pencils will have grades like 2B-4B-6B ; higher the number, darker the pencil.

We get combo packs consisting of 2-3 different Graphite Pencils, 2-3 different Charcoal Pencils, a Sharpener, 2-3 different size Stumps, 1-2 Charcoal Sticks and a Kneaded Eraser. ‘Stumps’ are tightly wound paper sticks used as a blending tool. If you are a beginner and don’t know much about the material, you may want to go for a combo pack like this. It is enough to begin learning Charcoal Painting.

Charcoal Painting

Charcoal is mostly black as associated with coal. Can we say Charcoals are black, while Pastels are colour? No, because we get coloured Charcoal Powder as well. Just as explained in the previous post both these are available in two variants 1) Artist Quality 2) Student Quality

I thought I would first share what is available in the market and explain a few jargons and then share about selecting from these. Making a choice should now be easy!

‘Pastels Painting’ mostly refers to Soft Pastels. One box of as many shades as you like from a good brand is enough. Yes! Like Crayons, Oil Pastels and Coloured Pencils ‘more the colours, more the fun’. Hard Pastels don’t need blending while you can use your fingers to blend Soft Pastels. You can use Charcoal Pencils or Pastel Pencils for finer details because the sticks are too thick to draw a fine line. Pastel Pencils are Soft Pastels in Pencil form.

Charcoal Pencil, Sticks or Powder entirely depends on the Artist whichever form of Charcoal they are comfortable using. Some Artists avoid powders while some use only powders. For a beginner a ready small pack with three black pencils, one white pencil, sharpener and eraser is good to go. Sometimes I use black and brown Pastels instead of Charcoal Sticks. Yes! We can mix the two in the same Artwork. They work well.

If it’s only Charcoals you wish to work with, your selection will be something like this:

Charcoal Pencils, Powder, Sticks, Sumps and Kneaded Eraser

1) Three Charcoal Pencils – 2B, 4B, 6B in Black

2) A White Charcoal Pencil

3) 2-3 Stumps (a ready pack of standard sizes) or you may use cotton buds or your own fingers to blend if you are comfortable. Any brand will do.

4) A Kneaded Eraser – I call it a magic eraser. It is specially for this purpose. It is often included in combo packs or can buy it individually.

5) Charcoal Sticks – This is usually a ready pack of only sticks.

6) Sharpener for your Pencils

7) Charcoal Powder – You would need stumps to apply this. Colours like blacks and browns are most commonly used. Other colours are available but it’s up to you.

If you already have Graphite Pencils it would be better to buy only the smallest combo pack of charcoal pencils and try it out first. Even if you make the other purchases later it will be less costlier than a otherwise all included big combo. So now you know all about your Pencils. Looking forward to doing some Art next. Have an Arty Weekend!

Pencil Mania – Part 1 ; Selecting the right pencils for your Art

Ever gone to an Art store and wondered ‘To buy or not to buy’ that is the question! And if you go with your kids, they will want to buy everything they can see on that shelf. Hehe..it happens with all of us. However it is not practical to stock so much. Also, it may end up being a waste of money or material. We all want to buy tons of Art Supplies especially when the display is so attractive. So then how to keep both your art appetite and your pocket happy at the same time? Knowing your Art Materials might help make an informed decision and select a product suitable for you.

This time I’m doing an article on the different Pencils you can use for your Art. I will cover all the type of Pencils available in the market and their use. I do not endorse any brand and hence will not mention any names, just how to make your selection based on your understanding of the product. This is not a product review but a know your Art Materials post. Based on my experience of using these, I will share a few special tips too!

Graphite Pencils: Graphite or Lead encased in a cover of plastic, paper or wood. The lead is used for drawing or writing. We all know that right! These are available in different grades depending on the hardness or softness of the lead. Here in India, we use an HB pencil most often for writing. The Pencils I use for drawing and shading or sketching are 2B, 4B and 6B. ‘B’ stands for blackness while ‘H’ stands for hardness. The pencil grades meter will show this. Higher the number, darker the pencil finish, softer the lead better for shading and smudging. You could go for the ready set or buy only selected ones as per your requirement. I prefer buying single pieces because I don’t use the other grades, so for me it is a waste to buy the entire set. Further if I use up a lead faster than the other, I keep more of those. I buy more of 2B pencils and maybe just one 6B pencil. You could do the math and in all probability it will even turn out more economical also. Just these three pencils is enough at the beginners level and even on a professional level. Once you take up pencil shading commercially or professionally you may want to invest in a complete set of any good brand suitable to your use.

Coloured Pencils: Coloured Pencils are made of a Pigment (colour) and a binding agent that binds this coloured powder. There are three types of coloured pencils based on the material they are made up of – wax based, oil-based and water-soluble. A pencil that has vibrant colour, a soft but strong lead that presses the colour well on to the paper but does not break easily while making bold strokes is considered as good quality coloured pencil. These are generally bought in a set. More the number of shades, more fun for an artist to colour the picture. 24 or 48 colours is considered a large variety but you even get up to 150 shades in a box for professionals. It is a one time investment because one box can last you for years unless you misplace a few shades. Rarely can one run out of a shade because they used it all up.

Waxed based coloured pencils have a soft lead and are slightly difficult to blend as compared to the others. I prefer oil-based coloured pencils – the lead is soft but sturdy, remains sharp, doesn’t dry out fast, pigments are nice, layering and blending can be done easily. Actually even for crayons I prefer Oil Pastels. So actually it is like the same family and works well if you use different mediums in the same Artwork. Wax based coloured pencils are less expensive than the others.

Water Soluble or Watercolour Pencils or Aquarelle Pencils : As the name suggests are water based. They can be used dry or wet. The dry version gives a lighter colour but once you use water over it, it gives an almost watercolour like finish. Once you paint something, you use a plain water brush over it and blend the strokes. Washable with water or removable, you can use these to shade or highlight in your watercolour paintings. We even get water soluble ink pens or watercolour brush pens. This combination works for those who do watercolour paintings.

We cannot use a water based colour on an oil based colour or a wax based colour. However we can use a wax based or oil based colour on a water based colour. Many people use wax based and oil based interchangeably. An important point to note here is that all three types are not manufactured by all brands. This is their point of differentiation. It means a difference in price, quality and finish. Reading up a little about the brand and which type of pencils they offer will surely help in making your selection.

Further like all Art materials even Coloured Pencils are available in two categories :-

1) Artist Quality 2) Student Quality

Most brands offer both. An Artist Quality will have better colour quality meaning more pigment less binder and will be more expensive than the student quality. So check the label and buy as per your usage. I generally prefer buying Artist Quality even if it lesser number of shades. For a school going child you may want to buy Student quality just in case the child misplaces or breaks them. The price difference can be substantial at times.

Many people feel coloured pencils are for children. That isn’t true. Adult Colouring is trending. It is a stress buster and many Adults are taking to colouring these days. Adult colouring means the colouring pages will have pictures with details or smaller colouring blocks as compared to colouring books for children which have pictures with a larger colouring blocks. There are ample colouring pages and books available in the market. Sometimes they are free. It is a good way to pass time while travelling too!

I will share about other Art Pencils – Charcoal, Pastels, Woodless Pencils in my next post. Have an Arty Weekend!