‘Embossing’ Using The ‘Gilding Method’

There are different ways to add the sparkle to your artwork. One of them is ‘Gilding’. It creates a nice embossed sparkling effect. It could be a simple outline or dots or stars or more in that shiny effect. Embossing with the gilding method is best suited for greeting cards as well as art and craft projects in school. In this post, I am going to share some tips to get this process right!

Materials Used
Materials used – Gilding Glue & Gilding Flakes

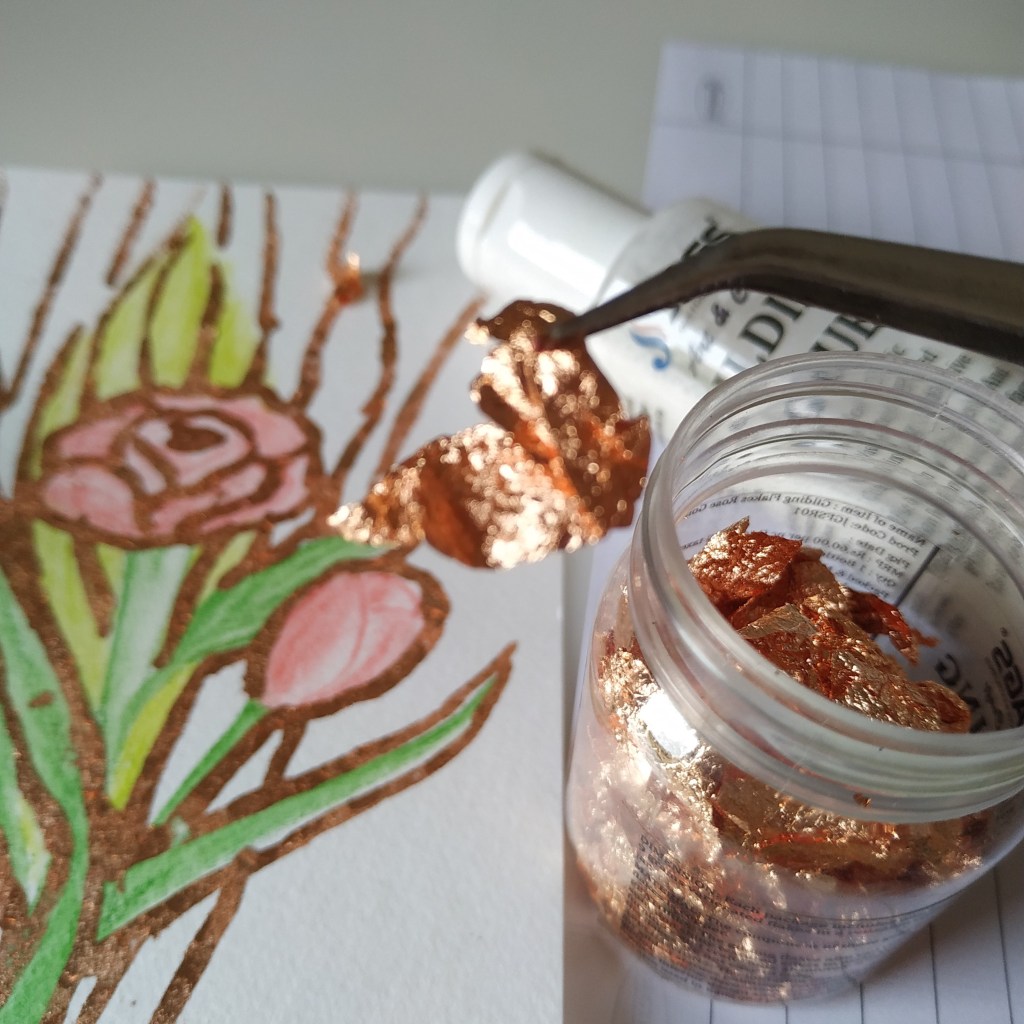
What is the material required? Gilding Glue and Foil Sheets are the main materials. Since I had Gilding Flakes at home, I used them. Gilding Foil Sheets are like cheese slices while Flakes are like crumbs or grated cheese. Hehe..I didn’t know how else to explain it without showing the product. The flakes give a crackled finish while a foil sheet gives a very smooth finish. Other than that we need a brush to apply the glue and dust off excess. Last but not least tissue paper or cloth. Gilding method is a highlight or add on to your existing artwork.

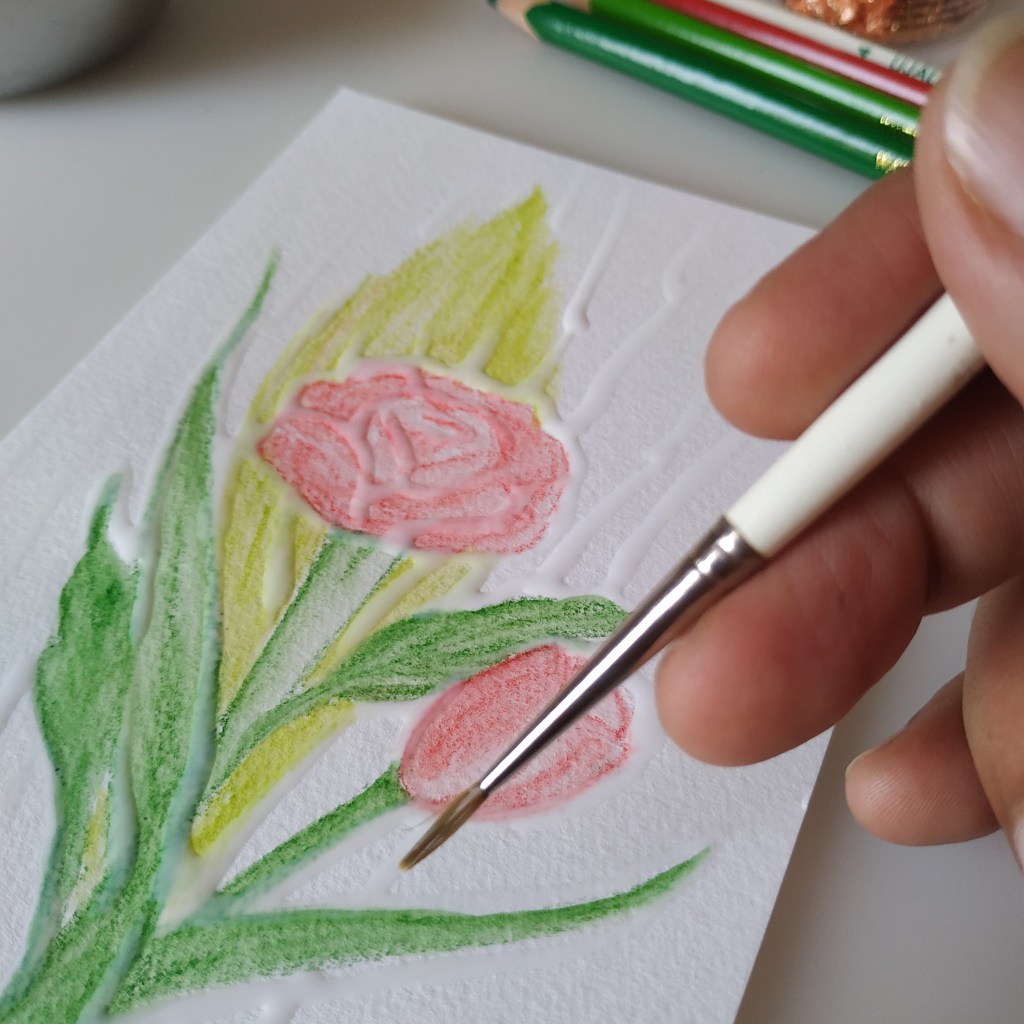
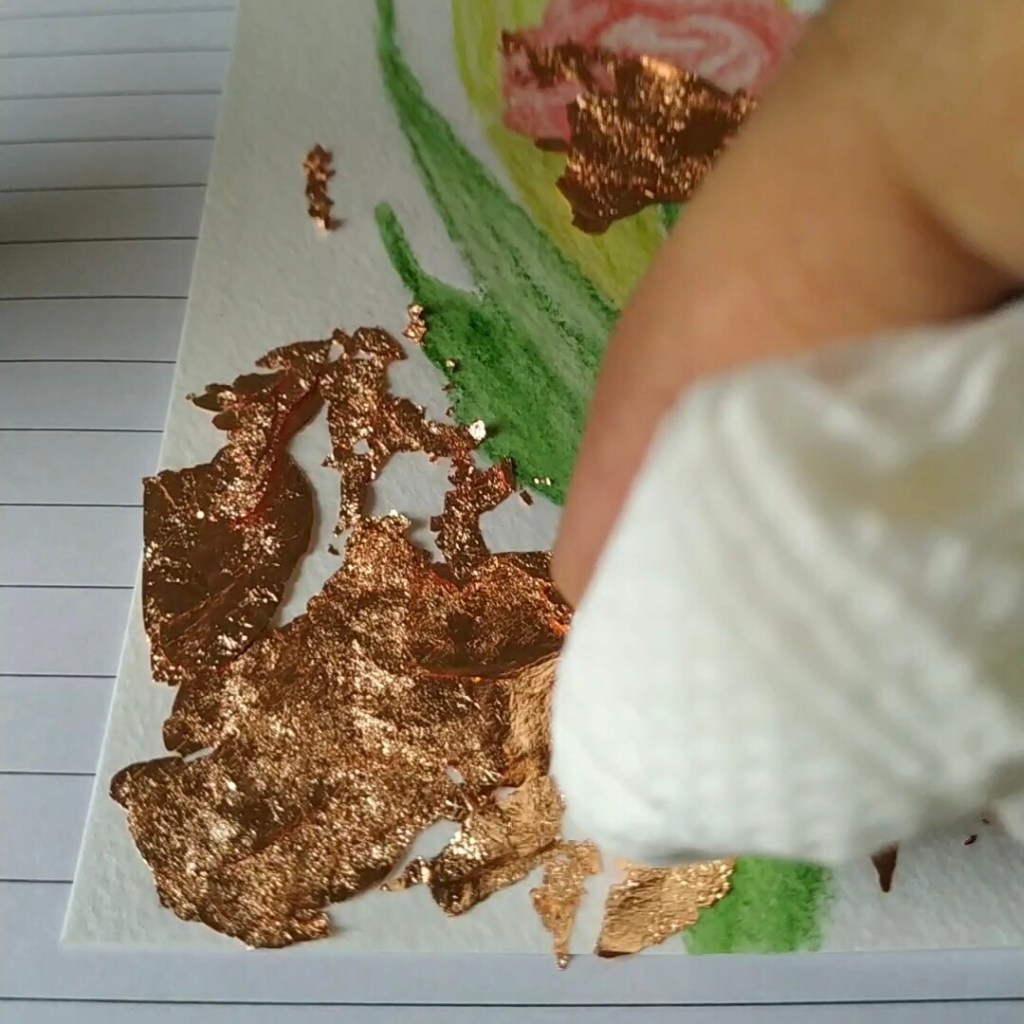
Next, let’s discuss the process. The process is simple. We apply the gilding glue using a brush. It becomes transparent as it dries. It is tacky or sticky for a few hours once it dries. Carefully transfer or lay the sheet on top of the artwork. The foil will automatically stick to this sticky base. Areas in excess where the glue was not applied but the foil fell can be dusted off later.

Gilding gives that metallic embossed look. Unlike ‘Embossing’ which requires a heat gun ‘Gilding’ is a natural drying technique. We use embossing glue and stick fine glitter powder in embossing method. Then we use a heat gun to fix the powder. The powder melts with the heat and sticks to the surface, giving the embossing effect. The look and finish may be similar for both methods. Best to choose the one you like. Depends on the purpose, material and your use.

Five tips for getting the gilding method right :-

  1. Apply a sufficient amount of glue neatly like a thick outline. Points where the glue was less, will not get sticky enough to stick the foil. This will result in breaks in the line or flow.
  2. The glue remains tacky for a good number of hours to work with. No need to hurry. Take your time.
  3. Open the flakes like a sheet or use sheets for a neater look. Rolled or crumbled flakes give a lumpy finish.
  4. Keep a paper or extra tissue below your artwork to collect the excess dusted off. It can be put back into the box for use next time.
  5. Switch off the fan while working on it. The dust flies off very easily. Even if you breathe, the foil or flakes fly off. They are so light in weight.
Finished Artwork
Artwork using Gilding Glue and Flakes from JAGS store

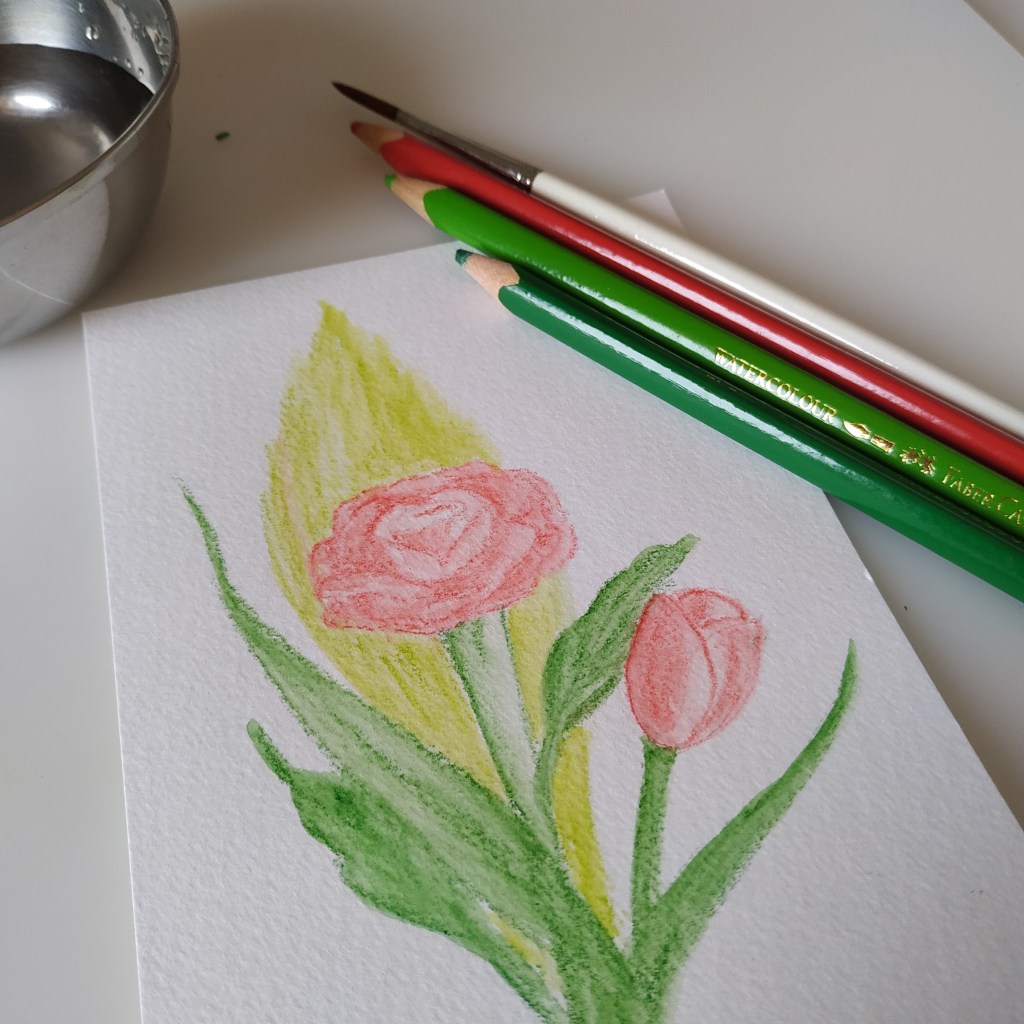
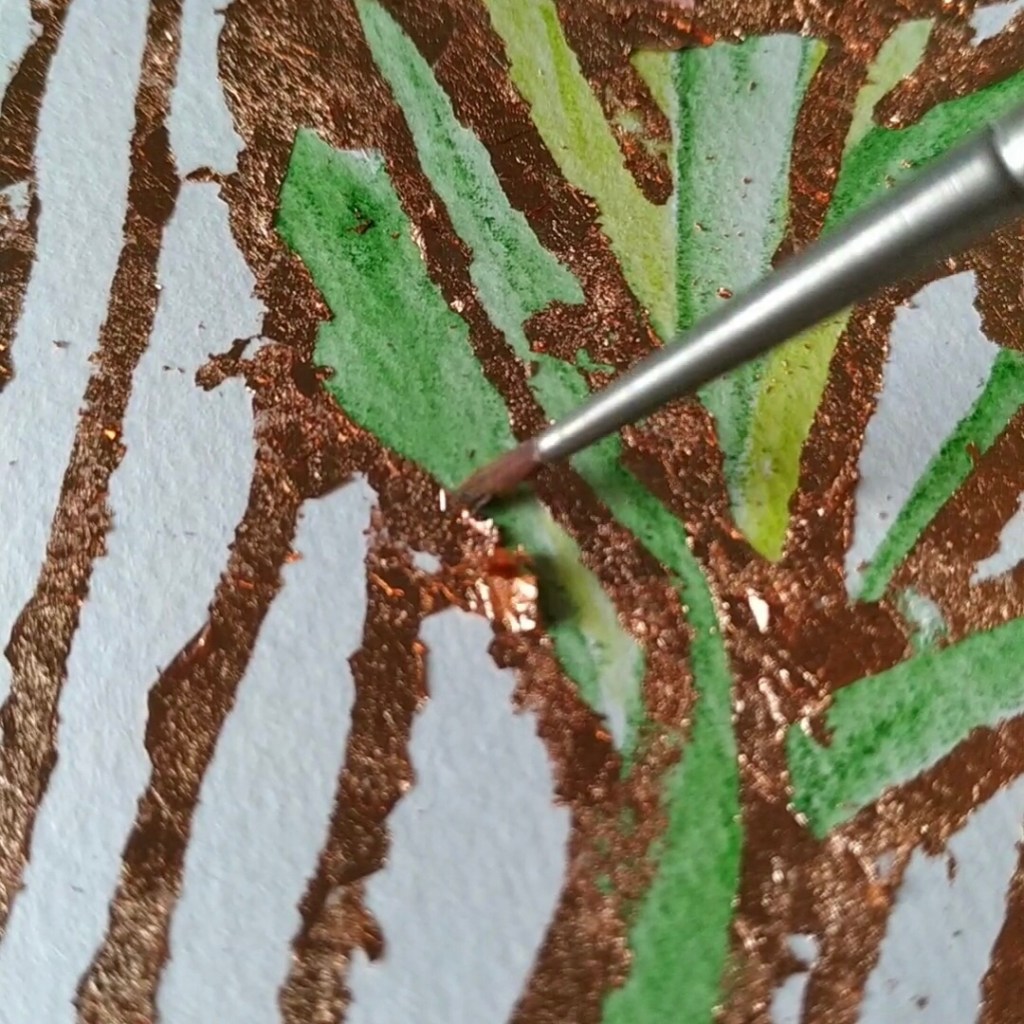
I tried it on a small postcard first to understand how to use the material. You could do that too. For the background, I drew flowers using watercolour pencils. I am aware that we do get a home-use heat press that works on this principle and gives a more professional finish. The print is like glue, we then insert the foil with the paper in the heat press which sticks the foil to it. I had that machine earlier as a kid. The finishing that I could manage with the heat press was similar to the one that I managed here when I did the process by hand.

Hence if your use is sparing, you need not invest in the heat press or the heat gun. The gilding method will work wonders. For lettering or calligraphy artists, ‘Gilding’ could add that zing to your next artwork. Let me know your views if you have tried this technique. Have an arty week ahead!

Say it with Flowers – Greeting Card

If there is something you want to say, say it! And as they say, say it with Flowers. A floral design card works for so many expressions. Please! Sorry! Thank You! and More! In this post, I am sharing an easy to do design you can try at home.

This simple, elegant and classy design will suit any occasion. We can make a gift tag, a greeting card, a postcard or have it as a letterhead on the letter to your pen pal.

You require some colours, pens, paper, basic drawing skills and your enthusiasm for making a handmade card. The same design can be made for a horizontal (landscape orientation) card as well as a vertical (portrait orientation) card.

Step-by-Step process to making this Floral Design Card

Drawing
Step 1

Step 1 – DRAW : Draw double borders to the page as shown above. We want one thick outer border and a thin inner border.

Step 2A  drawing
Step 2A

Step 2 – DRAW and OUTLINE : Draw the flowers and leaves. Tulips are the easiest to draw. They have long leaves and very few petals. A floral bunch looks better when it totals to an odd number. I have drawn two flowers and three leaves. We need not fill the entire space. Cover the area enough so that it looks well spaced out. Outline the final drawing with a waterproof black pen. If you don’t have a waterproof pen. You need not outline it at this stage.

Step 2B Drawing
Step 2B

Step 3 – COLOUR FILL : Fill the background with colours. Select any two colours – one for the thick border and one for background. Leave the flowers and thin border in natural white of the paper. For this card I have used markers. Even paint will look good.

Colouring
Step 3

Step 4 – FINAL OUTLINES : Outline the flowers, leaves and borders with a thick marker. Leave the thin border. Add little lines or fill patterns to the flowers and leaves in black. Give the thin border a thin outline. This thick and thin outlines makes it look better.

Tulip Greeting Card
Landscape or Horizontal Orientation
Yellow Gree Tulip Card
Portrait or Vertical Orientation

Colour combinations like Pink – Blue, Yellow – Blue, Red – Green also look good. Bright colours or Pastel shades both look great. A design like this is a ‘you possibly cannot go wrong kind of a design’. Here are both cards together :-

Tulip Design Greeting Cards

That was easy right? So try it out yourself and let me know if you have any questions. Have an Arty Weekend!

You may also want to see my other post on making Cards Let’s make Greeting Cards with ease

Colouring like a Pro with Pens and Markers

Two Artworks with the same sketch can look different only because of the colours, isn’t it? I have known people who cannot draw or paint that well but can colour amazingly well. In fact, their colouring is so good that they can turn it into a profession. Then how come nobody teaches us how to colour or why don’t we give much importance to it? “What is there to learn in that?” they say. I would say colouring is also an Art.

Everything from selecting the colours to the finished look has little things to understand. Once we know these, anyone can colour like a pro! Nowadays colouring is a popular hobby among both children and adults likewise. Art material brands offer free colouring pages. We can also download colouring apps or we can buy colouring pages online.

The drawing in colouring books have larger blocks to colour for younger kids and then as we progress to higher age groups, they have more intricate designs with small blocks to colour. Printed colouring books for children and adults are available at all book shops. It is a great activity for creative minds to do while waiting or travelling.

I have already done an elaborate post on selecting pens and markers before. In this post, I will share tips and tricks on colouring with them. Even today I try and learn new ways or designs to make my work better and faster.

I have worked with pens and markers by almost all popular brands. Professionals prefer using alcohol-based markers for their art and illustrations because of the finish. This includes 1) artists making greeting cards and stamping 2) illustrators making fashion illustrations 3) architects and interior designers making drawings 4) cartoonists, caricature artists, character designers and manga artists.

Watercolour artists use watercolour pens and markers for creating those effects in colouring. I like using oil-based markers for metallic colours. I also use permanent waterproof ink or archival ink pens for outlining, drawing patterns and for all my ink illustrations.

Beginners could buy a set of watercolour markers and waterproof ink pens to begin with. Then as the interest develops, it is a good idea to invest in alcohol-based markers and metallic markers. We also get acrylic markers or paint markers to draw on objects.

How to hold Marker Pens
Explaining how to hold different Markers and Pens

It is always a good idea to test the markers before buying. See the finish after drying and check if they come on to the other side of the page. If they do then we need to use a different paper for it. I have faced this problem with colouring books that don’t use good quality thick paper. Markers work differently on papers of different textures and thickness.

Colouring with markers
Look the alcohol marker ink came onto the other side.

Whenever we use alcohol-based markers we need to place a paper or protector below our paper to avoid colouring unwanted things. I mean the drawing board or the table or surface. Watercolour markers can be washed off from surfaces but not the others. Hence washable markers are best for kids.

Here are some methods or techniques for colouring. You could have a different style as long as it suits the kind of finish you wish to achieve.

Solid Colour – Colour in a single direction and use the pointed tip to fill the corners that may have been left out. Do not keep colouring the same place over and over. There will be colour blocking when the ink is wet. However once it dries, the colour automatically evens out in the case of most markers. When colouring larger blocks use the accented tip or the brush tip. If we use the round tip it will create a self texture in the fill; meaning we won’t get an even colour in the fill. Once again please note the direction is important or colour in tiny circles.

Highlights – Leave out the portion of the highlights. Do not colour it. The part where the light falls maximum is called highlight. It is a good idea to leave out a larger portion if you are not sure. The area can be coloured later. The white ink doesn’t work well to give highlights because the colour somehow shows through it. It isn’t even.

Blending Two Colours – Can we do shading with markers? Yes of course. Doesn’t matter which marker it is, watercolour and alcohol-based markers both can be used for shading. I recommend applying the light colour first and then the dark colour, so that just in case some of the colour comes on to the tip of the marker then a light colour marker may get spoilt. Many artists colour dark to light also but that is mostly with alcohol-based markers.

Single Colour Shading – The pressure applied is important here. We get colourless blenders for blending the colour. It is also a marker but the ink is colourless. Apply pressure and then lift the pen to create strokes for shading in single colour.

Darkening a Colour – If you apply another coat of the colour when the colour is wet, it will blend. So to create a dark line or make the same shade darker apply another coat after a few minutes. It will blend with the previous colour but will be darker. This works only for alcohol-based markers. For watercolour markers once dry the colour doesn’t blend. The green dot above has the dark colour done like that.

Creating Textures and Patterns – When we apply a stroke of two different colours next to each other, they blend. We can use these alternately and create fill textures. When we want the lines to stand out or want to create patterns without the colour blending. We can use a permanent ink marker before or after using the watercolour or alcohol-based marker. I use permanent ink pens for outlines during finish as well as my base sketch.

Colour Palettes – It is always better to think about the colour combinations beforehand. We get a lot of shades in the markers. Colour mixing isn’t possible. The paper can tear with excessive scribbling. This art has the yellow, orange, brown colour combination. Buying large boxes of markers is expensive, especially the professional or artist pens.

Selecting the right colour combination can make a huge difference to your artwork. If possible do a little research on the most popular colour palettes or international colour palettes frequently used before buying the markers. I recently bought a box of markers with the basic colours and then bought individual pens for the extra shades that I needed. It worked out to be cheaper than buying the larger box with colour shades that I didn’t need or wouldn’t use.

The colour combination in the artwork by artists of a particular region is influenced by the colours of their local surroundings. Further every colour conveys a meaning and emotion. For example, the colour red is considered auspicious in some cultures and it conveys love or anger as an emotion. I have done a post on understanding colours before this. You may want to take a look at it.

Watercolour Brush Pens
A close up of the artwork I recently did with watercolour brush pens

I normally draw my own sketches but you could print the colouring pages at home or with a printing service. Most of the large stores have a printing service. Do share your colouring experience with us. Have an Arty Week!


To see related previous posts please click on them here 1) Selecting Pens and Markers 2) Understanding Colours

Paper Quilling – A World Of Infinite Possibilities

Another simple, easy, colourful and attractive Paper Craft – Paper Quilling, also known as Paper Filigree. Heard about this one? I hadn’t. It wasn’t until my niece asked me if I knew about it. She told me, she got to know about it at school. Her friend had tried it. She was so excited sharing all about it, I thought I had to look it up. I like gifting my nephews and nieces Art Materials for Christmas. Ya! I like playing the Santa. When I went to the store this time I saw Quilling Kits at all shops that keep Art and Craft supplies.

Now I definitely had to try this one! So I bought the kit, read the instructions and did the projects. It was easy to pick up and do. All that it required was creativity and patience. There was one more person I learnt some special tips from – the Aunty at the store. She made loads of Wall Art pieces of Quilling Art and kept them on display at the Art and Craft Supplies store. I told her I would buy it, if she taught me how to use it. That was my first live demo.

Paper Quilling
Paper Quilling Envelopes that I made
Paper Quilling
Another set of Paper Quilling Envelopes that I made

Strips of Paper rolled, shaped and glued to create Artworks is The Art of Paper Quilling. In a more advanced level they make 3D miniatures too. I find it similar to sewing. The paper strips are like threads and the quilling tool my needle. There are so many things we can make. Let’s understand our tools and materials first. All materials are available as a set or individually. We can buy as we like.

Quilling is a fun interesting activity. If you enjoy it, you will not realise how time flies. The kit costs less than a dollar. This is the smallest one – it has colourful quilling strips, the main quilling tool (the needle) and instructions to follow. Other than that you would need regular Craft materials like Glue, Scissors and Card Paper or Art Paper and any embellishments or extra decorations for your own inputs. Optional items would include tweezers and other quilling or measuring tools.

Materials for Paper Quilling
Materials you need

Paper Strips – Cut strips of card paper 3mm or 5mm or 7mm in width and 54cm in length are readily available in the market. They are called Paper Quilling strips. They are available as mixed colours or single colour packs. We can make these at home with a Paper Shredder. I wouldn’t recommend cutting them by hand. The finishing of a precise machine cut paper does make a difference.

Quilling Tool – A ‘U shaped’ needle tip encased in a wooden or plastic casing. Just like we get different sewing needles, we do get a variety of quilling needles too. Yes! It is referred to as quilling needle as well. The main needle – just one is enough to do many designs. Then as you progress, you may invest in more.

Glue – We need glue that is fast drying and assists precise application, otherwise things can get messy. My glue bottle has a tapered tip for spot application. This helps me apply only a dot to lock the edges. Fast drying so that you don’t have to hold the strips for too long.

Additional Tools – Regular Scissors to cut them, tweezers to pick / place / hold them, pins to hold twists and turns in place. I use a pro circle to measure sizes. Craft Mats, Holders, Stencils, Measuring Tools – a lot of things are available to assist the maker. When we need to make multiple pieces of the same thing, it can get tedious and so the additional tools are quite helpful during such times.

Paper Quilling Gift Tag
Gift Tags with Paper Quilling

I’m going to show you two designs and we will make a floral piece out of it. You may use it to decorate your Greeting Cards, make Gift Tags or even as your special Christmas Tree Ornament. The pieces that we make, I’m going to refer to them as beads. With just two types of beads you can make so many different artworks. Please Follow the Steps in the pictures below :-

Making Paper Quilling Beads
Making your first bead

1) Take a paper quilling strip 2) thread the needle with the paper strip such that paper passes between the two points of the needle 3) We need to insert just about 2-3mm through the ‘U shaped’ hole 4) Turn the needle clockwise and roll the paper 5) Make sure it is levelled and tight 6) Glue the loose end and lock the bead.

This is for the first kind of bead. The orange centre piece in the flower. For the green ones I follow the same process but use half of the 54cm length, so it makes smaller ones. To make larger ones we glue another strip at the loose end and continue rolling. Thus making an endless rope or paper strip. We can even glue different colours and create a shaded beads. For the petals the first five steps remain the same.

6) Hold the roll tight and place it in the gap of the pro circle 7) As you keep it, it begins to loosen up 8) Let it loosen up till it fills the size of the circle 9) If it goes beyond, please control it to the size 10) Pick it up and glue the loose end to lock it at this size 11) Pinch one top end after the glue dries and you will get the shape of the petal.

Paper Quilling Christmas Tree Ornament
Christmas Tree Ornament

Variations in this will create different beads. Using a pro circle or any other measuring tool will enable us to make beads of the same size. Also it makes the beads look neat. Manually trying to roll each bead with a gap between turns and then measuring or not using a measuring circle will not give a neat look. With this method there isn’t much room for error. Arrange the beads as shown in the picture and glue them. Add a string to make it an ornament or stick it on card paper to make Cards.

This was the most basic roll method. Then there is the twist method and winding method and the 3D creations as well. Further to enhance our creations we can combine Paper Quilling with other Arts and Crafts and make more unique Artworks. Unfold your imagination and creativity! Have an Arty Weekend!

Let’s make Greeting Cards with ease

My Niece gave me a handmade Greeting Card recently. It felt so nice to know that someone thought of me and made me something special. I feel giving someone a handmade Greeting Card adds a personal touch. With the festive season approaching I thought it would be nice to share a simple and easy method to make a handmade Greeting Card using Ink Pens and Watercolours. I have shared two designs but you can always be creative and add your special touch to it. You can do traditional designs or even contemporary illustrations with the same technique.

First let us collect the Art Material that we will need :

1) Pencil and Eraser – I usually use a 2B pencil and a regular eraser

2) Ink Pens of any good brand with Waterproof Inks or Archival Inks – Waterproof will be written on the pens. These are available in different tips ; sizes, colours and brushes. A notable feature of these pens is that once the ink dries, you can easily use watercolour over them. It won’t smudge.

3) Drawing Paper or Card Paper with a minimum thickness of 180 – 200GSM. Basically a paper suitable for Watercolour Paintings. A notable feature here is that the paper absorbs the water and doesn’t peel off with use of water. Ideally 300 GSM is very good for Watercolour but it is too thick to fold for a Greeting Card.

4) Watercolours (Any colour; Tubes or Cakes) and Brushes

5) Compass, Ruler, Protractor and/or other Measuring Tools (Optional)

The process:-

1) Draw your design using the measuring tools in Pencil.

2) Use a pen with a thin tip like ‘005’ or ‘01’ and outline the Art. Do only the main outline. Don’t fill in the details yet. The idea is to block the main markings which will assist when you paint after doing the background. If you are very confident you can directly paint after the background but for most people these markings make it neat and easy.

3) Erase the extra pencil markings.

4) Use watercolours and shade the background with colours of your choice. Kindly avoid gouache paint or thick paint, it will make the steps listed below difficult.

5) Let it Dry completely. I list this as an important step. This is so that your pen tips do not get spoilt with moisture or excess colour that isn’t dried yet. It is the same reason I asked to avoid thick paint.

6) Now paint the details to your Design using the waterproof ink pens. This will be the final look.

Step by Step DIY Greeting Cards

You may use colour pencils, coloured pens and embellishments to add some aesthetic touches to your work. There you go! Last but not the least write your personal message and our beautiful handmade Greeting Card is ready! Wishing everyone a very Arty Weekend!

Pro Tip – You may also combine this with Paper Quilling and Stamping.