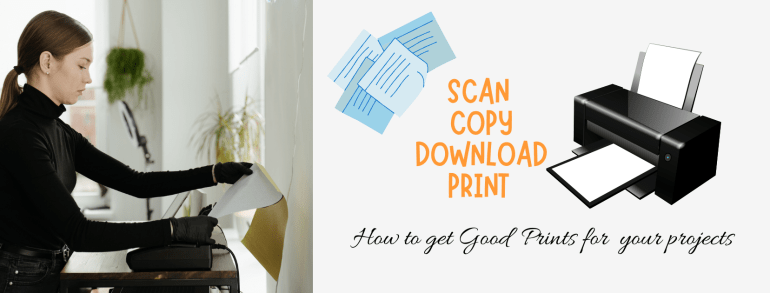
Did a hand drawn artwork and now want to make copies OR drew it digitally and now want to print it? Photographs, Graphics, Vector Art, Backgrounds, Designs, Drawings and Paintings – All of us might have tried to print these at some point of time or another. It could be for a School Project, a University Submission or a Personal Art Craft Project or for Commercial use.
I see many people struggle to get good prints of their work. What went wrong? They don’t know. I often get to hear “I gave the print command and the printing device printed it.” “I took it to a professional printer and he said the art work is not done correctly. The printing service owner said the device (printer) has done it correctly.”
It’s our loss as the money is wasted and we are not happy with the output. Today’s post is about ‘Getting a good print out’. I am going try and translate the language of a printer. In other words explain it in simple terms that everyone can understand.

Initially I sold ‘Digital Downloads’ at my Etsy Shop. It was one of my best selling products. One can ‘buy >> download >> print >> use.’ I also included a file with printing instructions and ideas for assistance. So the buyer can confidently print the art work they bought at home on a home printer or with a professional printing service of their choice.
Yes! Now a days most of the projects are only online submission and we don’t print files. I am aware of that. However there are times we want them printed. For example – A photo book or a journal or diary. A card for celebration or the final university project.
There are some basic terms one must know to be able to give the device the right commands for printing. After all it is a computer, it will do as commanded. Here’s a list of jargons we come across for this task. These are not definitions but rather explanations in a simplified form. The regular definitions are already up there on the internet.
Pixel – Think of a paper made up of small particles – numerous dots. This is a Pixel. It is square in shape. A computer screen is made up of numerous pixels. Just as we measure paper in a unit such as cms or inches, we measure a computer screen in pixels. Right click , go to ‘properties’ of the computer file to know the measurements of the image. It will be shown as length x breadth.
Some common standard monitor screen sizes
- 1366 x 768 pixels High Definition (HD)
- 1600 x 900 pixels High Definition Plus (HD+)
- 1920 x 1080 pixels Full High Definition (FHD)
- 3840 x 2160 pixels 4K or Ultra High Definition (UHD)
Image Size – The length and breath of the image, just like the length and breadth of the canvas or paper. For ease we can convert this from pixels to cms and vice versa with help of converters online. Helps know the best size it will print in. The size an art work is created in is always the maximum size it will print best.

Pixelate – Fine dots give a good image. The size of the pixel is called the pixel size. When we drag the file way larger than the size it was created in, each pixel size also gets amplified and we can see the distinct square blocks making up the image. The image is said to be pixelated. Always print the file only to a maximum of the size that it was created in, so that it doesn’t pixelate.
DPI – This is the resolution of the image. Consider the detailing done while copying or scanning the file. A higher resolution means more detailing and a larger file size. This value must be set while scanning the image or art work. Anything below 150dpi is blurred while above 300dpi may be excess. Images at 300dpi print well. It is a standard. For images that are used online on websites or blogs we generally keep the resolution as 150-200dpi. DPI stands for dots per inch.
File Size – Consider this as the weight of the package. The transport service in this case is electronic but allows a limited weight only. The weight is measured in kb, Mb, Gb (Kilo bytes, Mega bytes, Giga bytes). This information can be checked in the properties tab when we right click on the file. Higher the resolution, higher the file size. Means the package weight is high. A large size file takes longer to upload. We can lower the size of a file by compressing it. However it also compromises on the quality.
Compressing a file – Making the file size smaller. This could be by reducing the image size in terms of the length width as well as the file size in terms of the bytes. In some portals or software’s it can be a hidden command. In many email services, forms collecting data and social media platforms a default setting is made. The computer is asked to compresses the file to upload/ download faster. If we want to send across a high resolution file, we must make sure we turn off this setting and manually set it.
These are technical words that are used to describe or check if the file is suitable for printing. One important point we need to understand is that there will always be a minor difference in the colour on the screen and in print. I have explained ‘why’ this happens in my post about the Colour Wheel. For those of you who missed it – It happens because of the difference in the colours of light and the colours of pigment. A computer screen uses RGB (Red Green Blue) format while the Printing devices are based on the CMYK format (Cyan Magenta Yellow Black).
As professionals, designers must order prints with the exact colour shade and can specify the number assigned to the colour or shade. There is a standardised numbering system followed world over. This way the printer just cannot go wrong. It prints the exact colour selected.
Now there are some basic printer settings which all printers have. A Printer (device) comes with a set of default settings but we can always modify them if desired. Let’s understand these.


- Black and White – It will print only the extreme colours Black or White. No shades of grey. This setting is used to print all text files to save the toner and ink.
- Grayscale – The page will be printed in shades of black and white. The shades in between will be printed as tones of grey. Even a coloured image can be printed as black and white or grayscale. The output will differ.
- Colour – This is the setting we want to select for printing colourful images. A thing to note here is that a scanning device also has the same settings. We need to make sure we scan it and print it with the same settings for the desired output.

Print Margins – The white borders on the printed page are margins. We can change these when we give the print command. The image size and page size will not be exactly same, even if theoretically they are the same size. It means that the page and image edges will not coincide or overlap. An Image printed will always be smaller than the actual page.
This is a technical aspect of all printers. It differs with technology and brands. We do get borderless printers to print high quality photos and large format pictures. For home printers, at least even if we keep the margins to zero, it has a ‘gutter’ which will always be there.

Fit to page – This is a simple beginners setting. If the image is bigger then use the ‘fit to page’ setting to get the image to limit to the size of the page. For example the artwork is 12 inches by 18 inches which is bigger and we want to do a test print at home and the printer at home prints only A4 size, which is smaller than the art work. We can use the ‘fit to page’ setting and comfortably print it in A4. If this setting is not used the printer will use multiple pages to print the same image. It tries to print the artwork at the exact size it was created plus the white print margins. Leads to a lot of wastage in paper.
In another case, if the image is small and we use the ‘fit to page’ setting the image will be dragged to make it as large as the page. It will get pixelated.
Further we also need to ensure the aspect ratio is locked. Meaning when we change the size of the image, if the computer is decreasing the length by one inch it decreases the width also in the same proportion instead of keeping it constant. Otherwise it will change one of them and the image will not print correctly. This is the reason the white border is broad on one side and very thin on the other.
Of course we can cut and remove the white borders, join these sheets and all. However it is best to avoid such wastage by making sure the commands are in line with the output we want. Here is a simple chart explaining standard Paper Sizes used by all printing devices. They are denoted as ‘letter’ or ‘A3’ or ‘A5’. We select these from a drop down menu. The computer will edit the other settings to match it once we select from the drop down menu. The image is by Vector Stock and only for reference.

Let’s do a quick recap of the points to remember:-
1) Draw your artwork in the same size as the one you want to print. A larger art can be comfortably printed in a smaller size but not the other way around. If you are downloading and printing then check this info.
2) Scan it at 300dpi OR set the resolution of the computer drawing file at 300dpi. We can reduce this if we want to use the file only in the digital format. A printer will require it at 300dpi only. Changing this at a later stage spoils the file. It is to be done from the beginning itself.
3) Specify the colour or black and white print settings. A colour image can be printed in black white or grayscale also if that is the command selected.
4) Read the Printer Paper Sizes Chart and keep it handy. This enables us to know exactly the size we require the work in.
Last but not the least. Do this with the art that you create or art that you bought. Art work downloaded from the internet may be subjected to Copyrights. Printing or making copies of certain art work is considered illegal or a violation of the law. I did do a post on Copyrights earlier. Do take a look if it interests you. Making copies of things like currency or coloured copies of government papers is strictly illegal. Please do not engage in any such practices.
Use this information to make prints for your artwork, download files that are permitted for personal use or artwork that is officially yours and you have the rights in it. I hope this information was helpful. Now we can confidently get good prints at home as well as at professional printing services. Have an Arty Weekend!
Photo Credits : The WordPress Photo library for all the photos except one from vector stock and the other one that is mine.
Related posts to refer 1) Colour Wheel 2) Copyrights
