
Click! Click! Hehe! We don’t get to hear this clicking sound anymore. The cameras are silent but we still click as many pictures or probably more. Now that our phones have a very strong camera lens, we like to capture every memory.
It is a memory, it is special. Then why let it remain in the phone. Let’s print it and put it in a nice photo frame. That is my topic for today’s post – a very simple easy DIY Photo Frame. It also makes a great handmade gift to share with your loved ones.

Earlier if I had to make something like this I would have to buy mount board or ply and then cut and make the frame myself. Also cut such vintage design decorative pieces. I agree, it wasn’t everyone’s cup of tea to get a good finishing at these. Tedious too!
Now we easily get ready made stuff like plates in different shapes, pen stands, photo frames, coasters, alphabets and much more. The art and craft stores stock these. Further we get a large variety in primed chip board pieces. These designs are laser cut from plywood or board. They are primed ; meaning painted with a base paint. Won’t require gesso or primer to paint. We can directly use acrylic paints.
The material is plywood or fibreboard for all of them and hence for any craft or painting it is the same family. I did do a project earlier with the same materials – A Nameplate and Coasters. In case you wish to read those posts, the links are at the bottom. Yes! The material is mainly used for Mixed Media projects. Some stores are offering DIY kits with these.
I think one can always get more creative and use them differently, isn’t it! A big smile 😀 How is this project different? The method of painting is different. This method is super easy. Anyone just anyone can make it and it will still be a masterpiece.
Materials Required :
- Ready Plywood Base – Photo Frame – any design of your choice
- Decorative Primed Chipboard pieces – any design of your choice
- Acrylic Paints and Brushes
- Embellishments
- Varnish for Acrylic – Spray or Liquid – either will do
- Your enthusiasm to create something new
Minimum materials and most of it will be from your paintbox. No need to buy them. Make use of whatever you already have at home. Let’s get started! Put enough newspapers or plastic to protect your table or floor, wherever you are working. We do spill paint while doing this.

Special Tip : Cut out a rectangle from the plastic envelope of the frame or chipboard pieces. The size of the photo to be inserted. Insert it in the photo slot to avoid it getting blocked due to paint. This way we give a protective base and avoid colouring that portion.
Further we can use stencils to create textures on the base. We can use Tape to create designs as well. Pack the edges with Masking Tape or Washi Tape to avoid colouring the wrong side. We can even paint the edges in a different colour. Remove it once done. I will do a post on using tape soon.
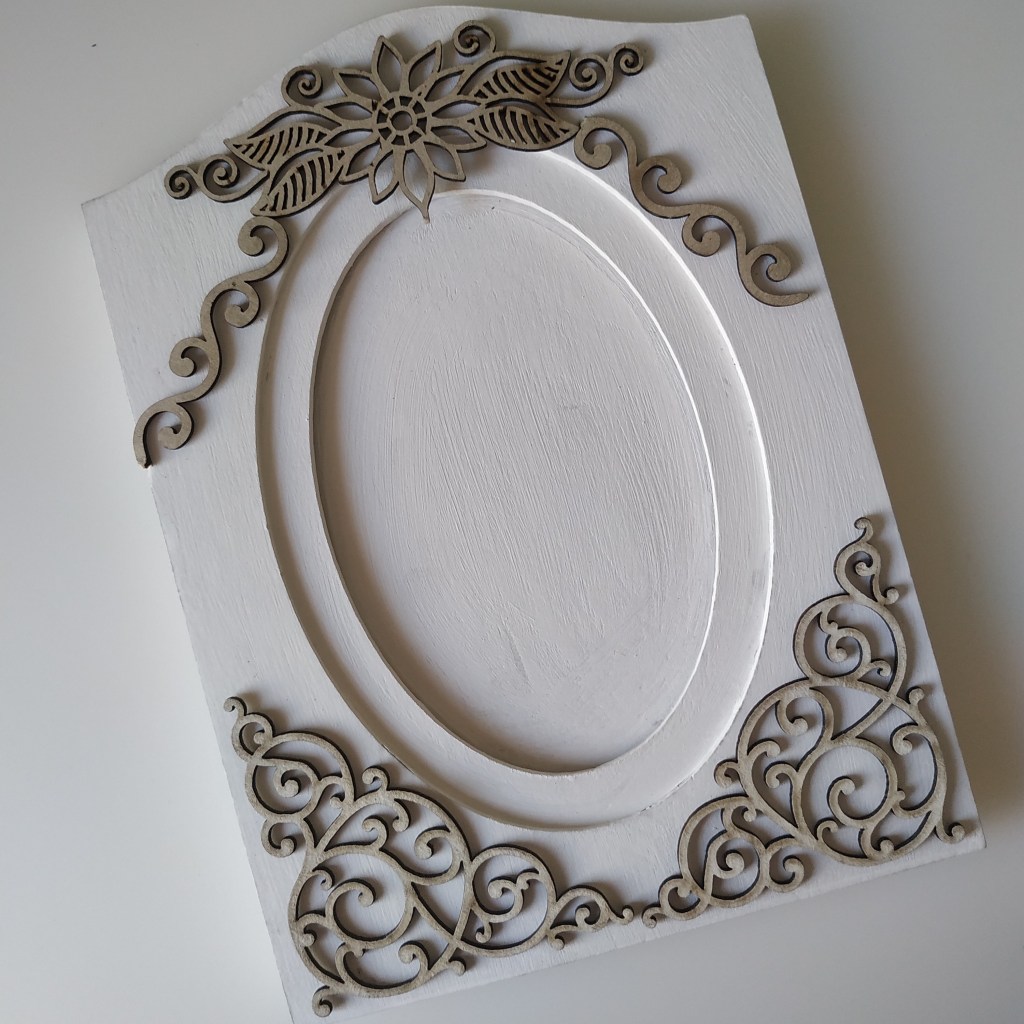
Arrange these pieces and roughly decide their placements. Next select the colours. Individually paint all the pieces in any single colour. Here, I have painted the chipboard pieces in Gold. Chipboard pieces are by the brand ‘Little Birdie’. We can shade them but they are already 3D and hence I feel a single colour looks better.

The frame base is painted in Titanium White. One edge I have painted in Pink – Medium Magenta. After that I have dusted the frame with the same Gold used for the pieces. Gold on White is blended to look like gold is dusted on it. Finish the edges and back side likewise. Acrylic colours are painted in layers and blend even after the base colour dries. Use a wet brush only if needed. We use water only to clean the brush.
Thereafter I added the Gold Border using acrylic pens or paint pens. I use ‘Posca’ and ‘sharpie’ brands. They work well. This one is a bronze by sharpie. Once the pieces dry we can assemble or stick them together. They dry very well in about half an hour maximum. Next, we assemble or stick them together with glue. I use ‘Fevicol’ – India’s most popular glue.

Next we add the embellishments. Any finishing touches if you require. Let this dry completely. Varnish it the next day and it is ready for use.

I like the colours in this one. Reminds me of my doll houses and princess fairy tales. I have mentioned the shades if you wish to use the exact same shades. Acrylic Paints are Artist Colours by the brand ‘Camel – Kokuyo Camlin’. I use spray varnish also by the same brand.
As you see, ones painting skills will not make much of a difference. It will still look as elegant and beautiful. Don’t forget to add your photo! Hope you enjoyed this post. Have an Arty Weekend!
View Post – Mixed Media Project ‘Name Plate’
View Post – Art Project Set of Coasters
