
Hot or Cold ? It is a good idea to use coasters when you want to avoid marks on the table that happen because of the condensate on drinks. I like customised or things made especially for me. Buying a ready coaster off the shelf was boring, making one myself sounded more fun.
That is why I decided to make my own coasters. And what is a project without a challenge? For this project, my challenge was to clear coat the coasters. The first thought for anyone when I say ‘handmade coasters’ is to think of them as school crafts made by children. This isn’t that. We want something professional looking and long lasting. Just because it is handmade does not mean it should be any less. Isn’t it?

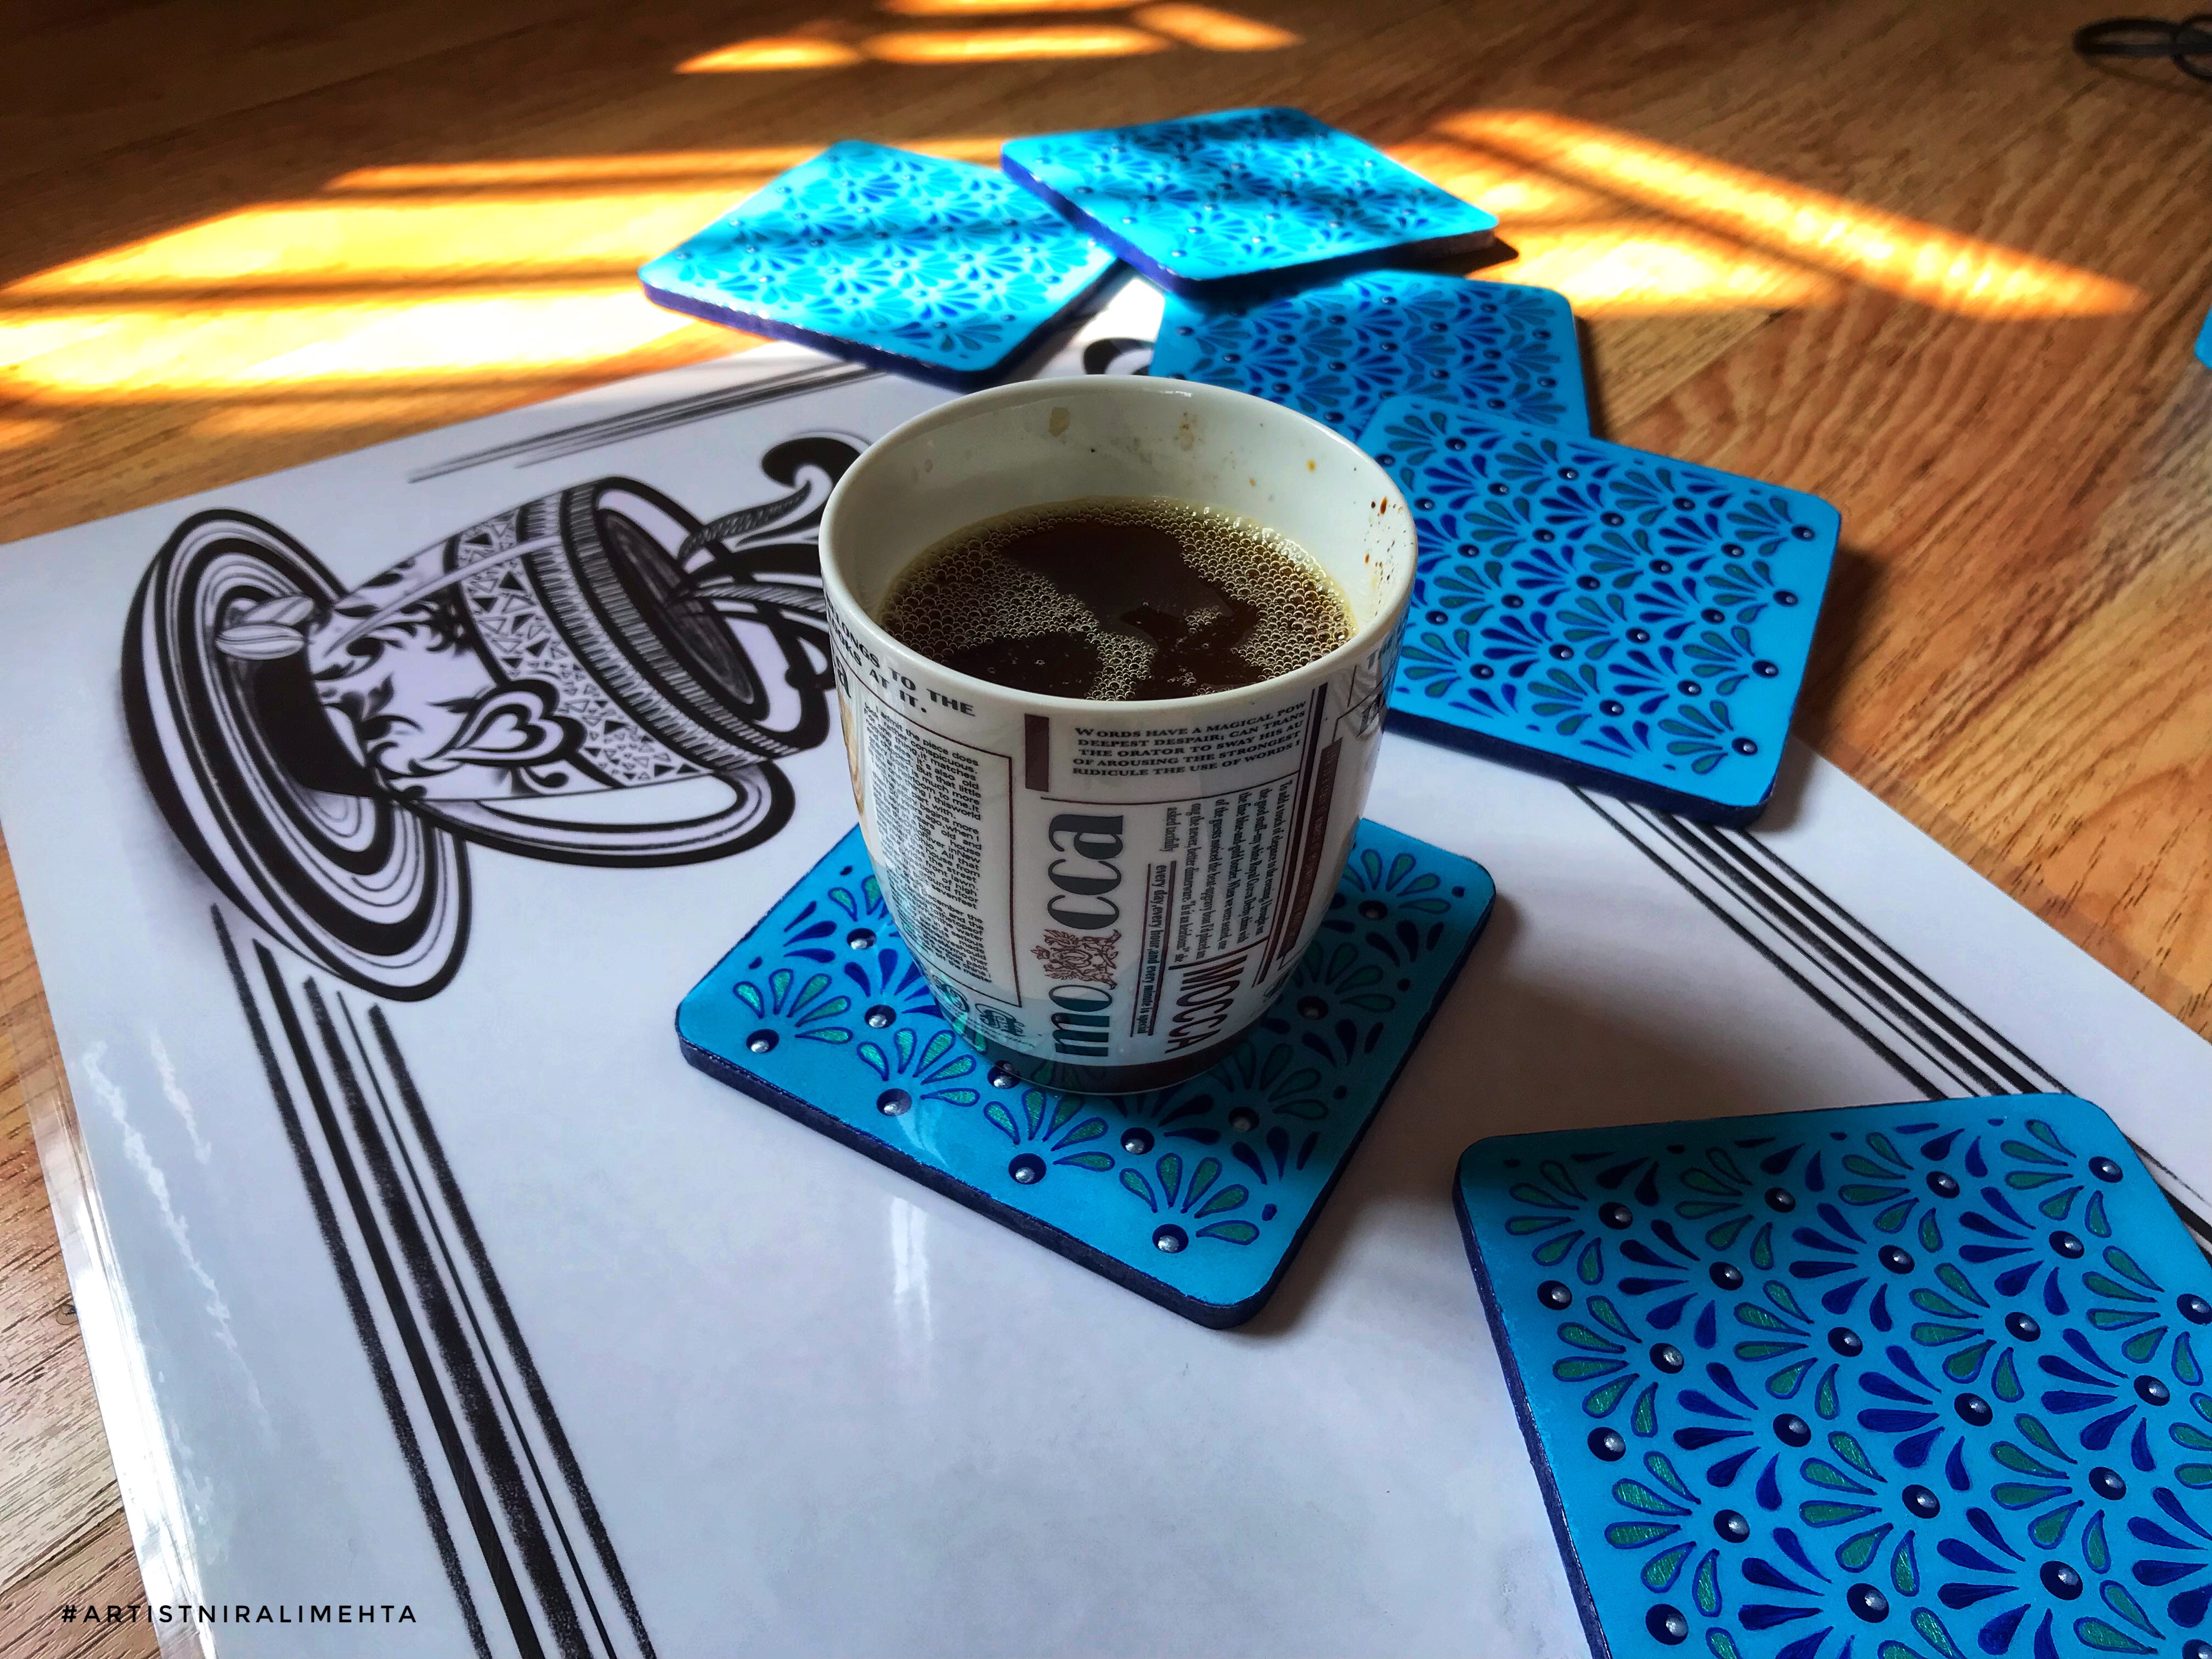
These are coated and exactly like those available in the market. They are durable and stand various temperatures. The coating protects the colour and design as well.
Materials Needed :
- Pieces from MDF Board – These could be any size and shape. We get ready ones at all art and craft stores. The quantity depends on your table. I picked six square shape boards of 3.5 x 3.5 inches
- Chalk Paint – I picked the frozen blue shade of chalk paint by a company called ‘Little Birdie’
- Acrylic Paints – I used acrylic paints in bottles. Pearl finish teal blue and regular finish persian blue colour. One has a glitter finish while the other has a plain finish. The brand for my acrylic paints is ‘Fevicryl’
- 3D liner White Pearl by ‘Fevicryl’ for highlights (optional)
- Permanent Markers to draw or outline the design
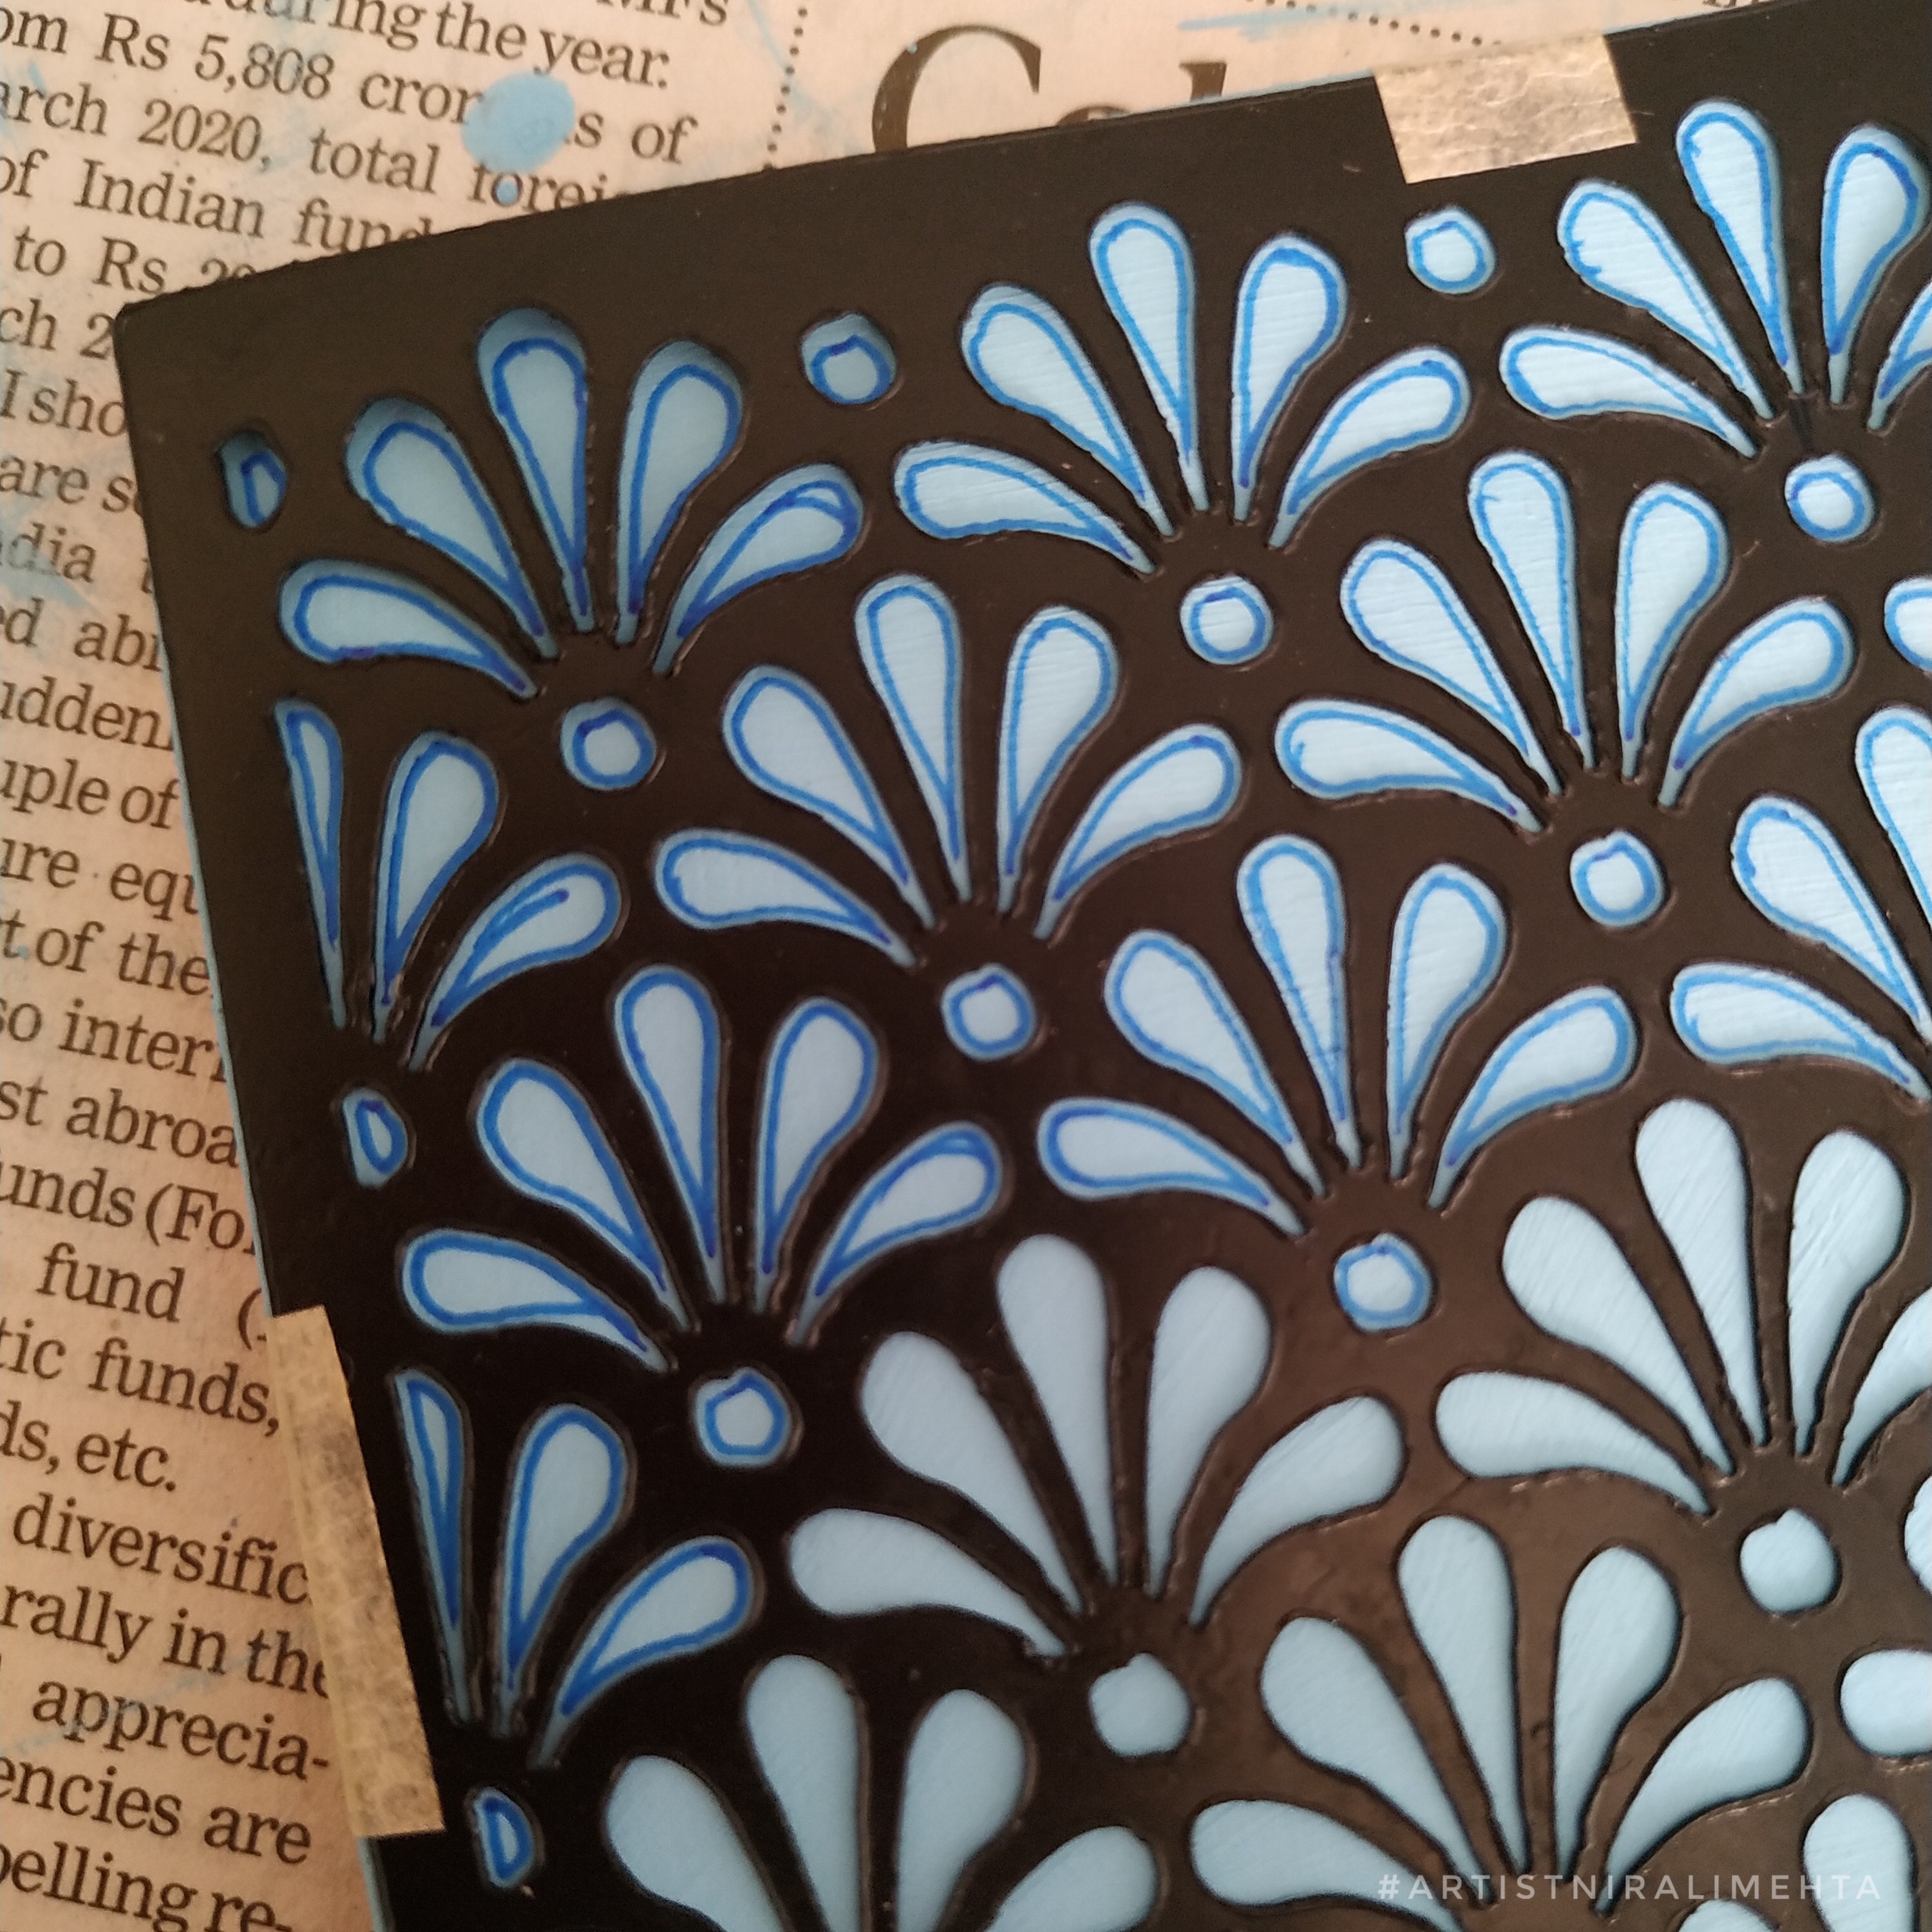
- Design Stencil – You can use a readily available one or make one with paper yourself for the design. To get the exact same design on all coasters it is important to have a stencil. It makes replicating the design easier.
- Acrylic Varnish – I used the spray from the brand ‘Camlin’
- Art Resin – comes in two bottles (resin + hardener) to be mixed and used. The resin to hardener proportion is different for different brands but will either be 1:1 or 2:1. This is for the coating. I used epoxy art resin by the company ‘Little Birdie’
Method :
MDF Board is thick board made from wood fiber. For art and craft the material is handled just like plywood or wood. Ready pieces of different shapes and sizes are available in the market for various arts and crafts. For coasters they are available as multiple packs or single pieces, with and without a stand to complement it. The choice is yours.
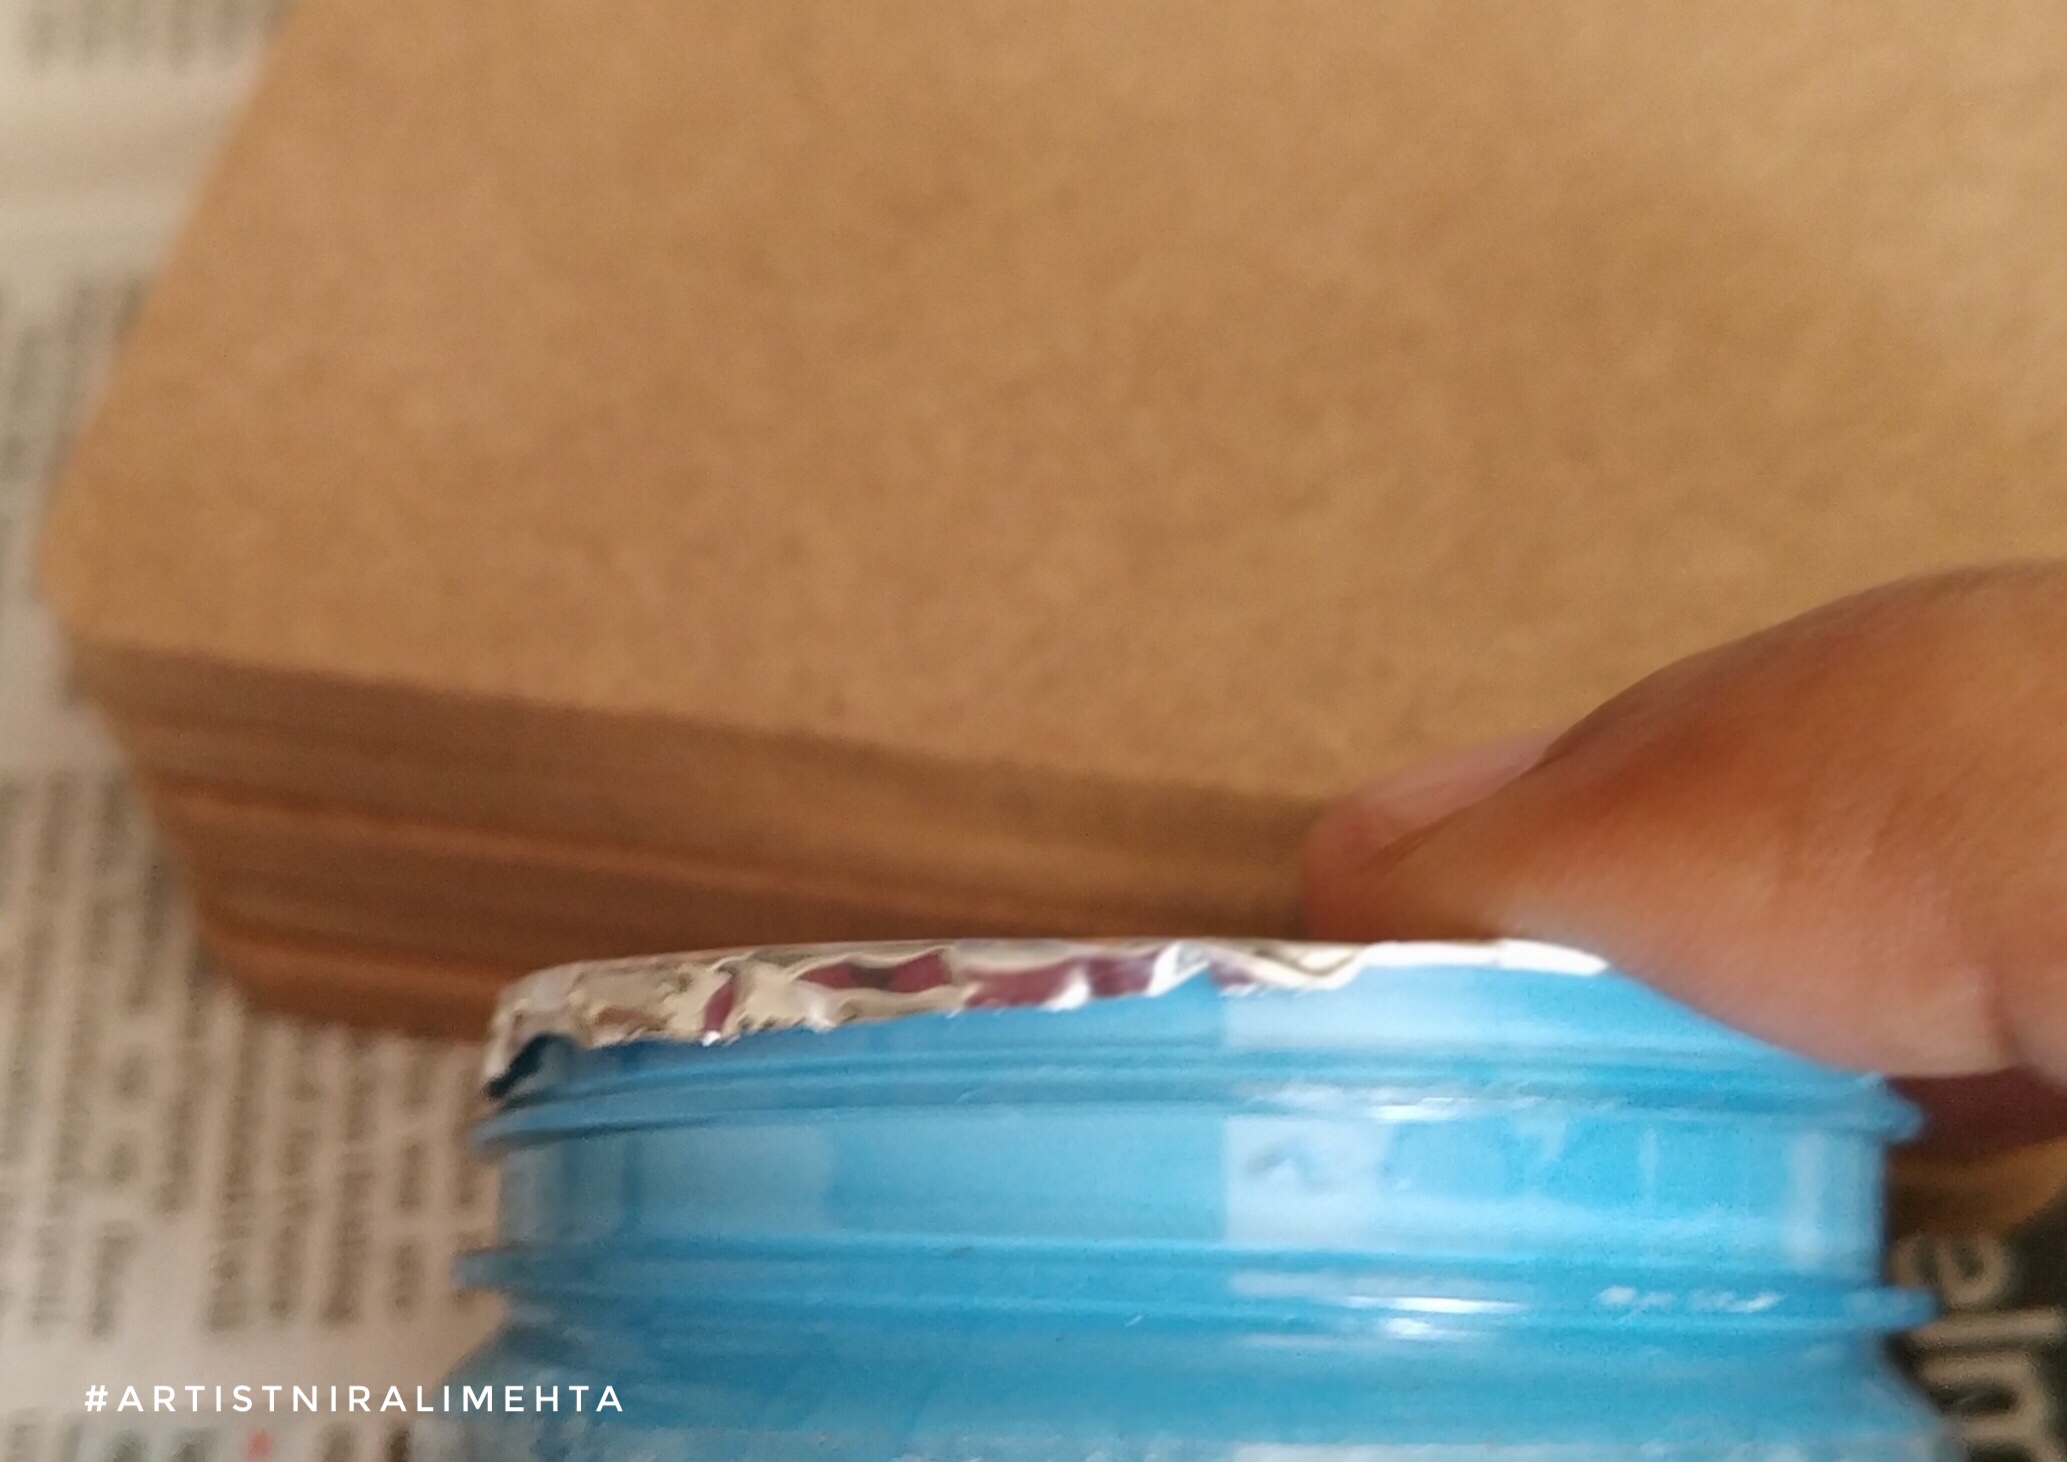
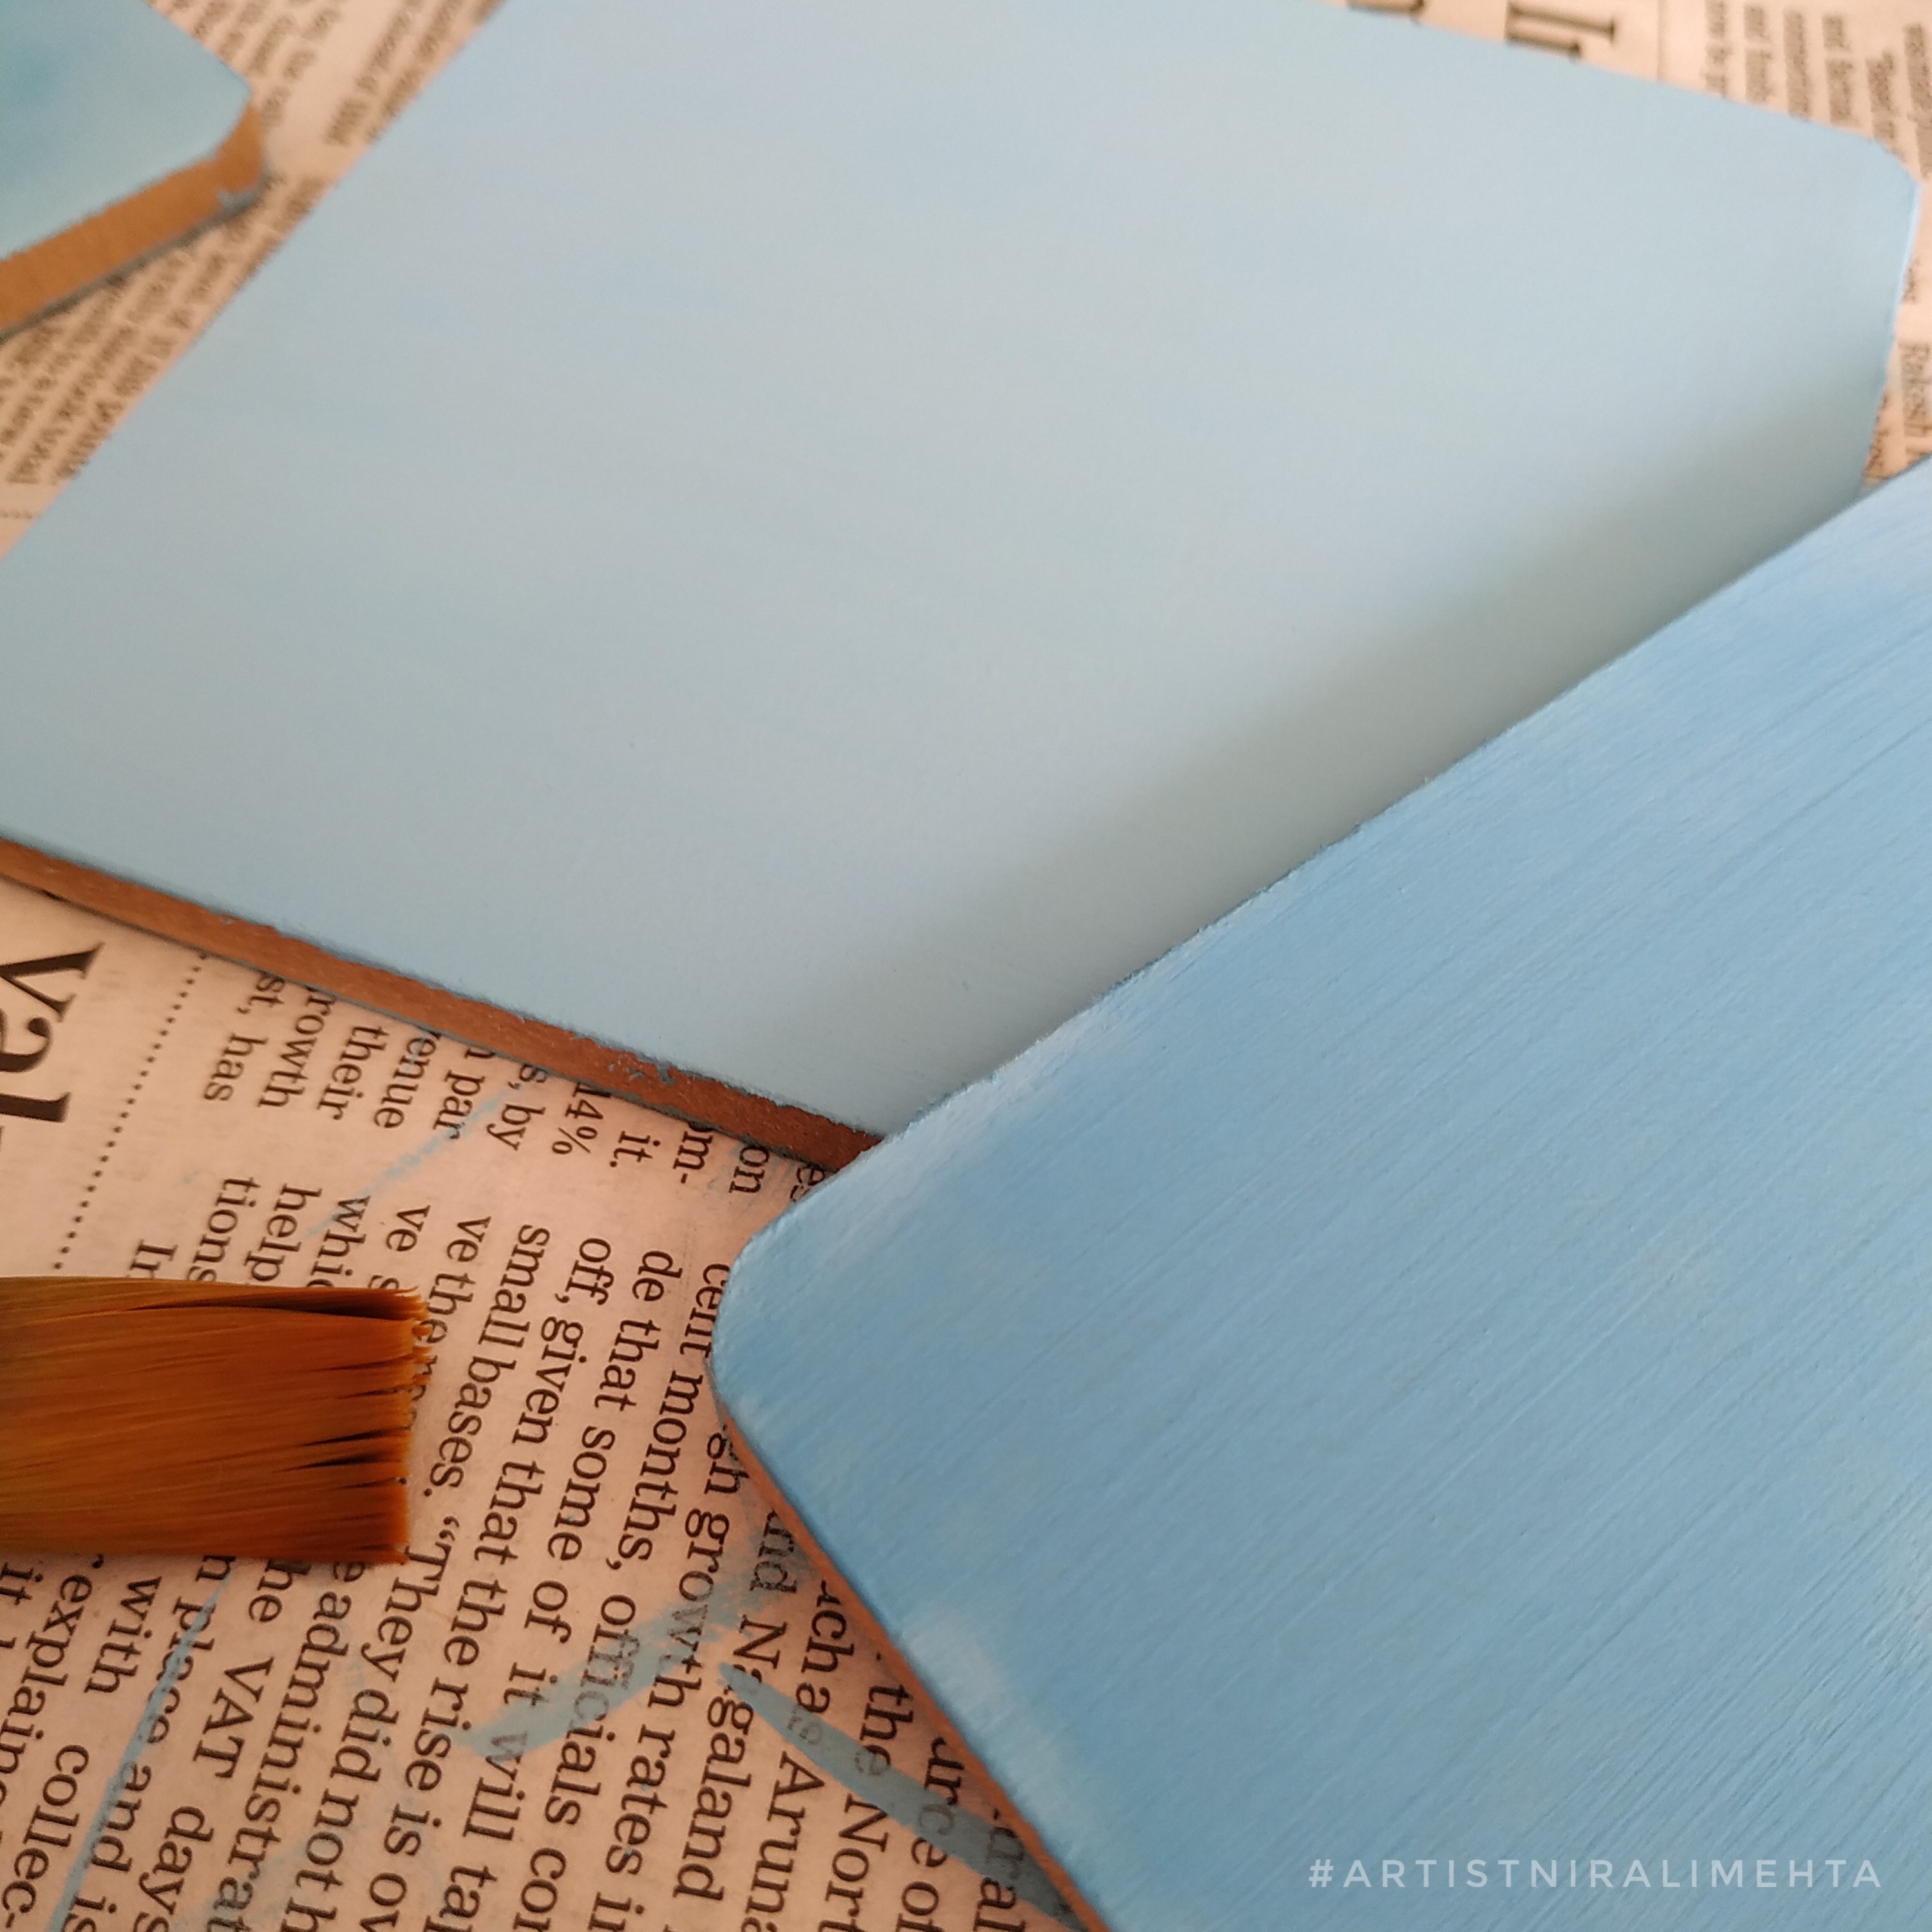
I had picked six square shaped board pieces with rounded corners. They don’t have a wrong side or right side. We can paint on either. Select the side you feel looks good and make that the top side. I painted them on both sides with chalk paint using a flat brush.

What is chalk paint? Most acrylic paints leave a self texture and gloss after drying. Further, we need to prime the base before using them. Chalk paint is also an acrylic paint but it gives a matt finish and better coverage. There is no need to prime the base. Can be applied directly to any wood or wood like surface. I have applied two coats of chalk paint on both the top and bottom of all coasters.
It is quick drying. An interval of 15-20mins between coats is sufficient for it to dry. On the side rim as a dark colour and just to have a contrast I applied Persian blue colour from the acrylic bottle paints. These are liquid and of pouring consistency. Work very well for Dot Painting as well.
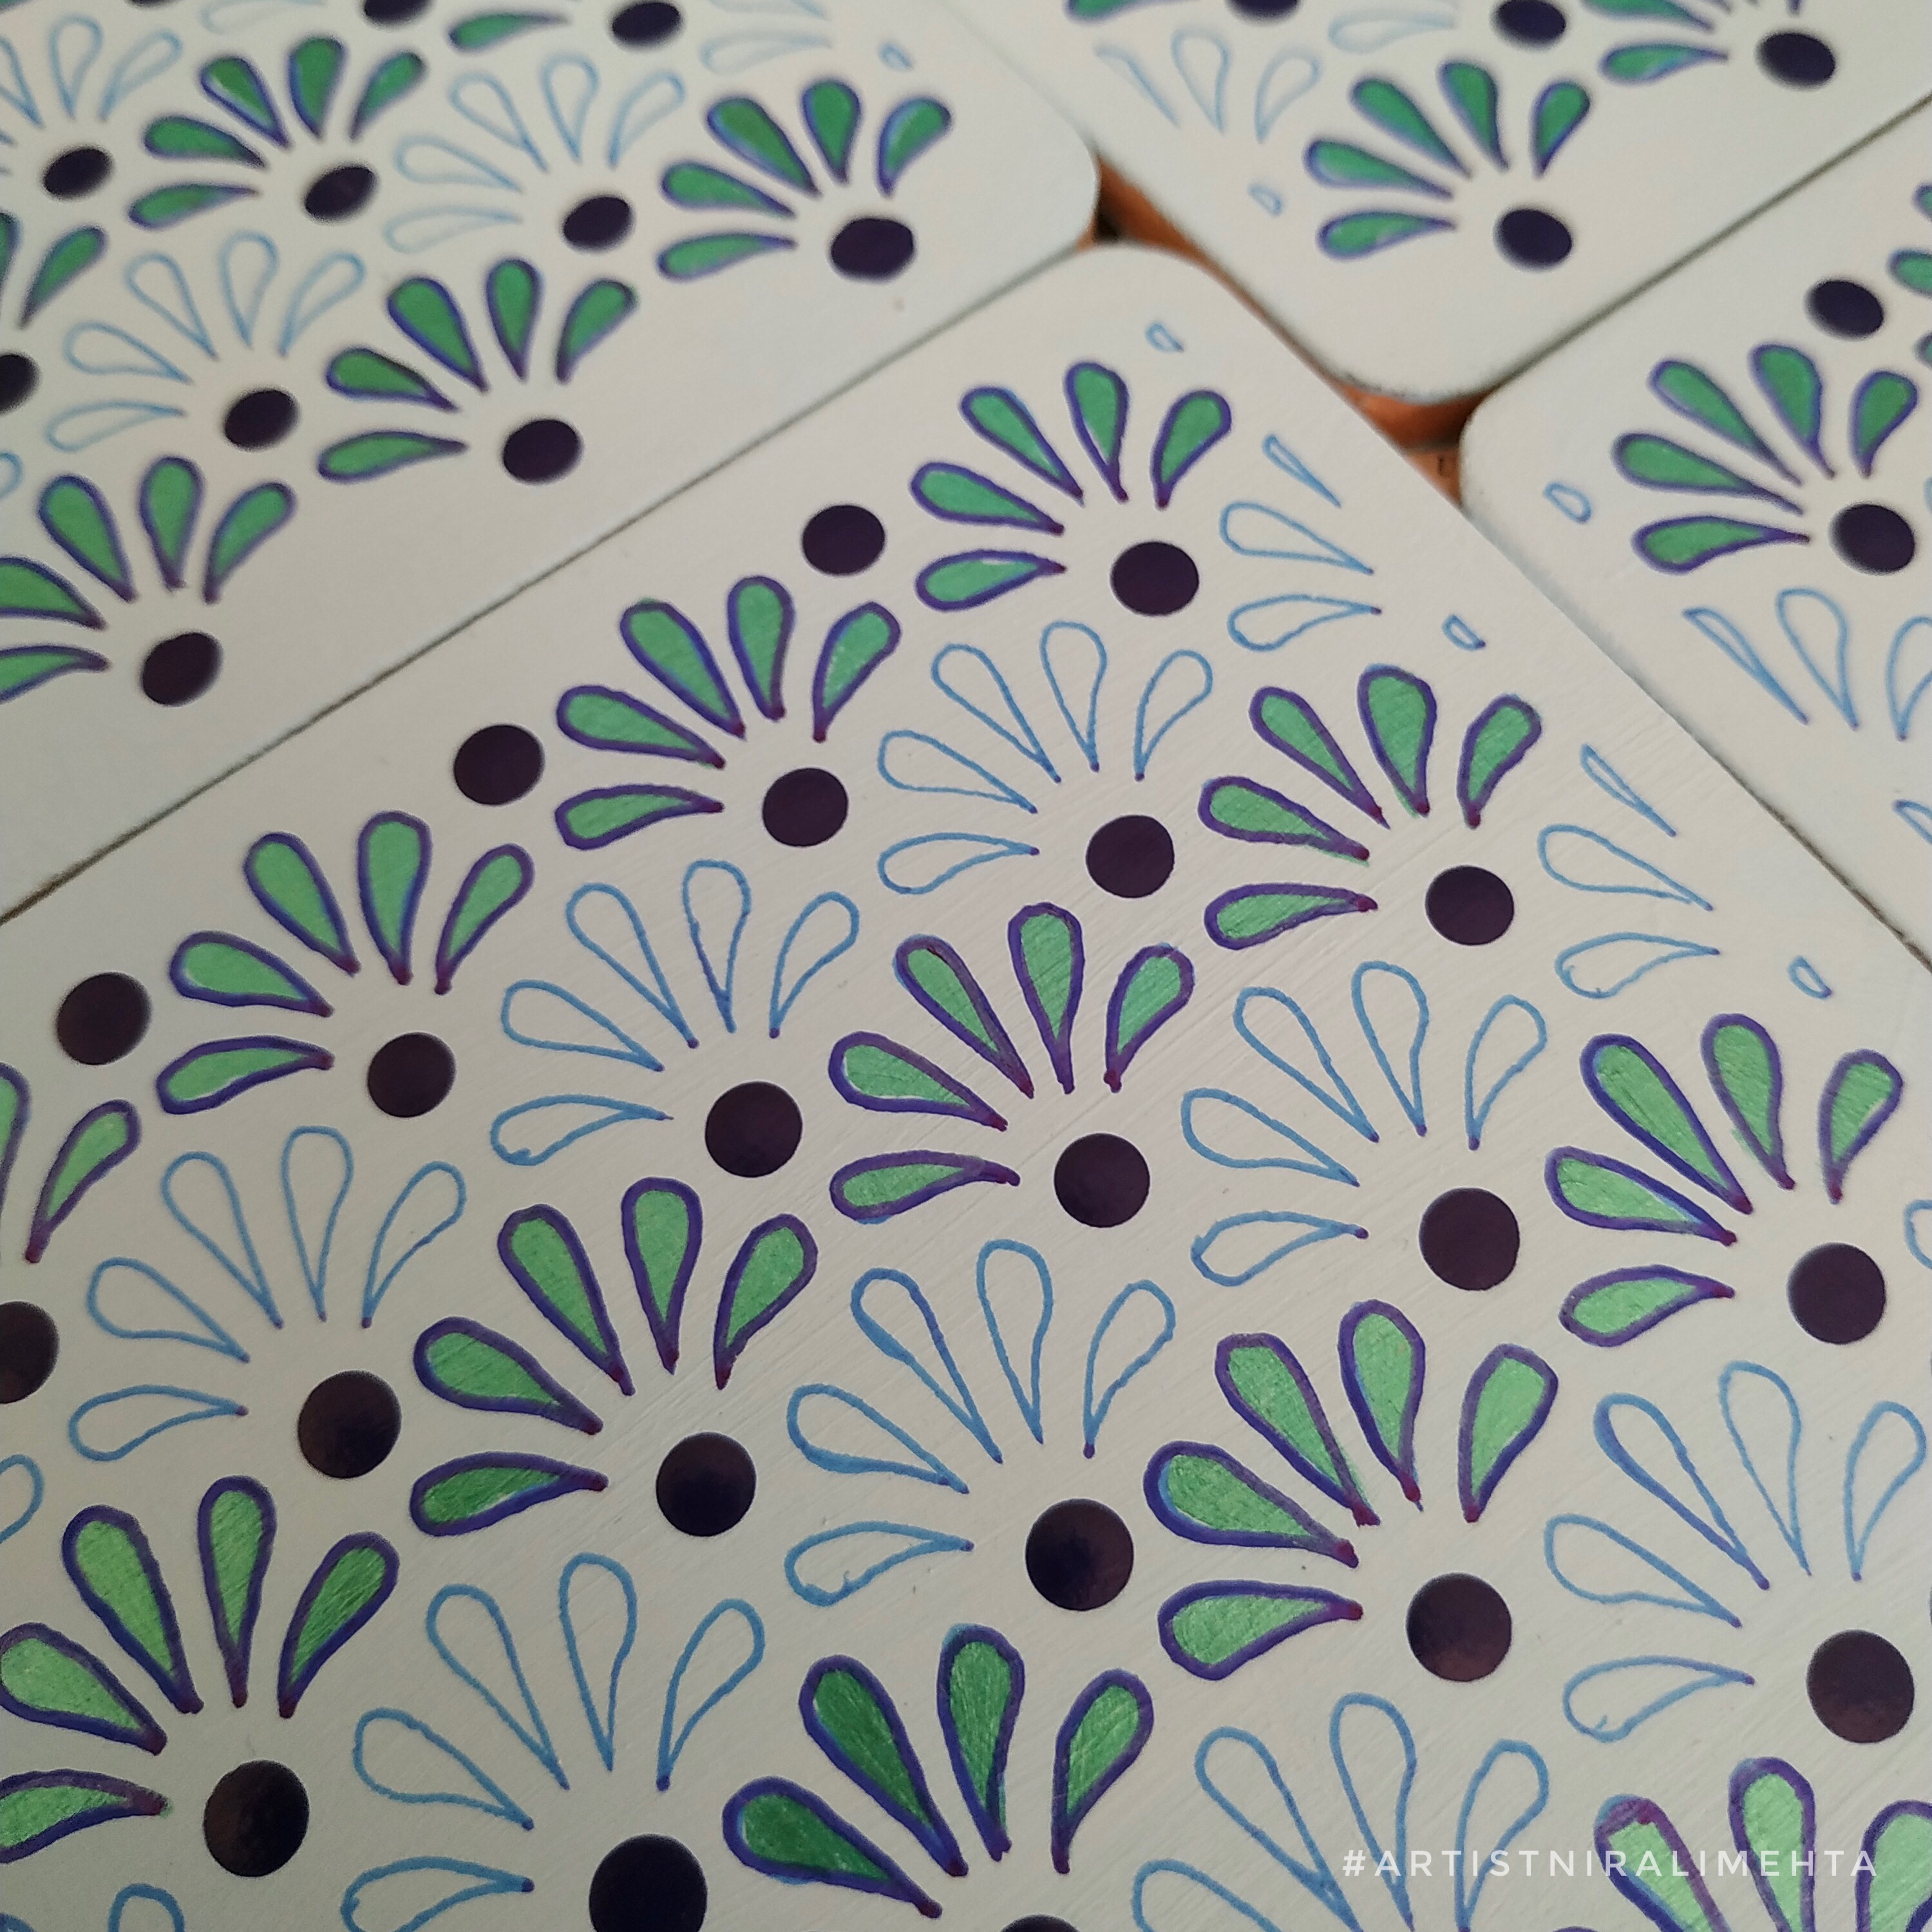
After drying I secured the stencil with a paper tape on the top side of the coaster. I traced the design using a blue permanent marker. Did this for all the coasters. Painted the design using acrylic paints in bottles. Highlighted using a 3D liner – white pearl colour. You can use the permanent marker on dried acrylic paint for touch up of the design.


Now we need to let this dry completely. Acrylic Paints are fast drying. We may feel it is dried after an hour but before the next process let it dry completely to the last particle for at least 24hours. Apply two coats of acrylic varnish after that and leave it for another day 24hours after that. I sprayed varnish on the backside as well. Makes an easy clean surface in case it gets dirty.

It is usable after this but I wanted to coat it with resin. Resin is a thick clear coat making it durable against extreme temperatures and gives a reflective glass like finish. Even a small piece of dust will sit and stick to it. The acrylic varnish makes it easy to clean the dust and locks the paint. That is why, the colours don’t smudge or bleed when we pour the resin.
Now for the challenging part – applying the coat of resin. Working with resin can be messy. The clean up is very difficult. Make sure you do this at a place well protected with paper or plastic for any unwanted spills.
Resin is like lacquer. Art resin is a slightly milder form and better to work with at home. Use masking tape or paper tape and pack the edges of the coasters. So in case the resin spills you can remove it with the tape after it dries. Put the coasters on a levelled lifted surface. I placed a paper cup upside down and put the coaster on it.
Wear silicon gloves or plastic bag as gloves. Resin sticks to the hand. It becomes sticky and is difficult to remove. In case you get some on your hand while working use an alcohol based solution or acetone or sanitiser to remove it. It does not go with soap water. I haven’t clicked pictures of the process as both my hands were occupied and I couldn’t touch the camera with dirty hands.
In another paper cup I mixed resin in the ratio 2:1 (resin to hardener) as mentioned in the description on their bottles by ‘Little Birdie’. The next process is same for all resins. We have to stir it continuously using a wooden stick for 3 mins till it becomes transparent and then pour on the surface to coat. 40ml + 20ml = 60ml was sufficient to nicely coat six coasters. The proportion has to be correct else it will not harden upon drying.
I poured the resin mixture at the centre and spread it to the edges using another wooden stick. The excess drips. I cleaned it using the stick. It is a self setting liquid and any craters will level out as it dries. Lightly pop the bubbles that come up using the pointed side of a toothpick. Also use a heat gun or a hair dryer or blower over it once. This pops the bubbles too.
Let it dry in a dust free environment. It gives out a mild smell or fumes as it dries. Hence best to leave it at a spot not frequented by anyone. It takes 12 hours to set and 24 to 48 hours for curing. The surface will be hardened, clear and reflective like a glass. Easy to clean and protective for coasters. We get food grade resin also. They use it for making trays and other kitchen items.
Think creatively and make your own design. Coasters made entirely from resin using silicon moulds and fluid art as also popular. They mix a paste called resin pigment to add an opaque colour, alcohol inks for transparent colours, decorative elements like glitter, stones and dried flowers to the resin and make many artistic home decor items.
Do try it out and share your experience. Have a creative weekend!
Note: This is not an advertisement or paid promotion. I bought the materials, made the coasters and clicked the pictures all myself. Kindly do not use without permission.

Nirali, these coasters are in some of my favorite colors…Lovely!
LikeLiked by 1 person
Really! I’m so happy you like them. Thank You!
LikeLiked by 1 person
Beautiful coasters! Well shared! 🙂💓👍
LikeLiked by 1 person
Thank You 😀
LikeLike
My pleasure 🙂💓God bless you.
LikeLiked by 1 person