
I find it very exciting and interesting to make and give handmade greetings with personalised messages. I think I have to tell you, all the cards that I have received till date, I have kept them very neatly stored in my drawer. They are all special and a beautiful memory. In fact whenever I conduct workshops, it is that special thank you card that is worth a billion to me. Is it just me?
Now a days most of the people use digital ways to send messages. Very few people call to wish or invite. I know! The personal touch has changed to digital. That is why, if even one person puts in the effort to send a handmade card, it makes the receiver feel loved. The time, effort and the thought is what counts. Paying or downloading and sending is what anyone can do. Isn’t it?
Making a greeting card all by yourself may seem difficult for some. No one wants to be judged or mocked for their artistic skills. Besides not everyone can be a master at it. I understand. But what if I were to tell you that even with minimal artistic skills and creativity one can make beautiful professional looking greeting cards.

Yes! In this post, we will be discussing a few tools and techniques for making professional looking greeting cards with ease. There are so many of them, so I have clubbed them as per the method of making. The materials are expensive and a mistake in selection means it was a waste or is just lying around. It is a costly affair. This makes it more important to know about them. I am going to try and explain the tools and the methods together, so that we know what all we will be adding to our shopping lists.
1. Stamps and Inks – Stamps with a variety of designs are available. Every few months all shops stock new designs. I buy them based on the theme like – Birthdays or Christmas. We get everything from alphabets to numbers to florals to the popular movies and more. I buy stamps in off season or bulk for discounts. They stay well for years and is usually a box collection we can share among creative friends too.


Along with stamps we need a stamping block or a stamping pad. What is that used for? The stamps are silicon and not firm. They have a glue side which helps attach them to the block, dip it in ink and press it on paper for an even finish. A neat finish is very important when selecting quality. Once complete we clean the stamp with a cleaner or dry cloth and put it back in the pack. The same block can now be used along with another stamp. A stamping pad works to stamp multiple ones quickly and neatly. It is a great tool if you make multiple greeting cards.

Next we select ink pads or pigments for the stamp. A good choice for selecting from the colour options is available. My pick – A black archival ink stamp pad is a must have. The ink is waterproof and instant drying. We can colour the stamped design with markers. We need not worry about any smudges. Other than that a few more standard colours can be selected according to the theme. We also get oxidised inks. They give a different finish and their colour shades are also different. The inks give a kind of the rustic finish rather than the bright regular shades.

For beginners, basic tools are great. Once you get a hang of it and use them more often, I am sure you will pick more. There are innumerable creative ways of using stamps. We can use them for journals and other tags too! Most stamp sellers share ideas for using stamps and their latest collection on social media. I am always amazed to see how much creativity one can have. Do check them for inspirations.
2. Embossing – The process of embossing is very simple. The material quality matters. Earlier embossing techniques and materials were not that great and they looked very messy, more like a beginner’ school project. We have now started getting good quality embossing glue and embossing powders. We apply glue using the stencil and then dust it with the embossing powder. The glue is either dabbed onto the surface or applied with a brush. The excess powder falls off once it dries. It is the same method of sticking glitter powders. The difference is in setting embossing powders. An embossing heat gun is used to set the powder. The powder melts due to the heat and binds to the paper.
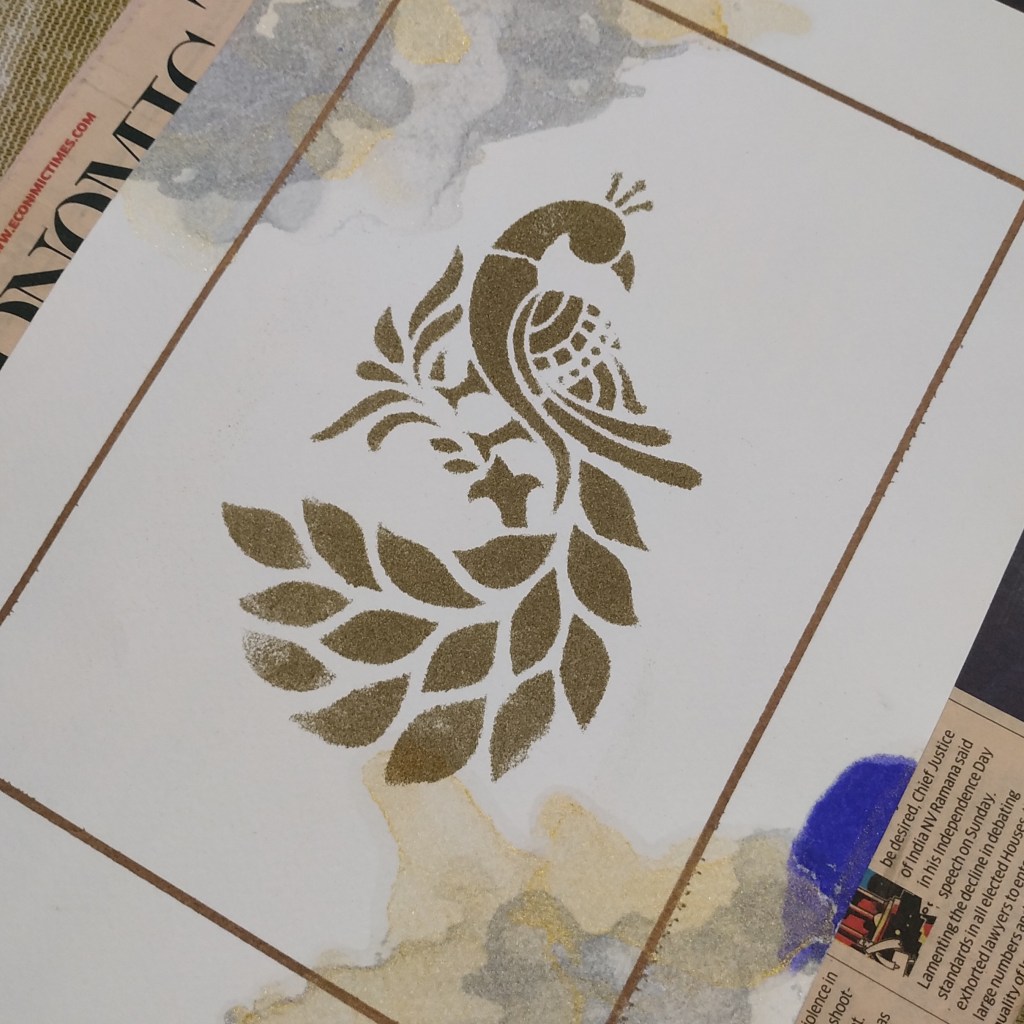

Different grain sizes and colours are available. They all give a different texture or finish. I select embossing powders in fine grains so that they melt and set evenly.
3. Stencils – As the name suggests these are cut outs of various designs on plastic or paper. They are either one use or multiple use stencils. We also get stencils with a sticky backside to stick them on the surface we are working on. This helps secure the stencil in place. We can do the same thing with tape. Stencils are helpful in tracing artwork and can be used for embossing and painting with most materials. It makes a great assistant for the creative folks.

4. Pigments – The name means colour which is present in Inks and paints. We get a concentrated version in a box just like the stamp pad. Pigments are powdery and the composition is different from inks. I find them similar to compressed powder in makeup. They are very useful in applying background colour to the card paper.
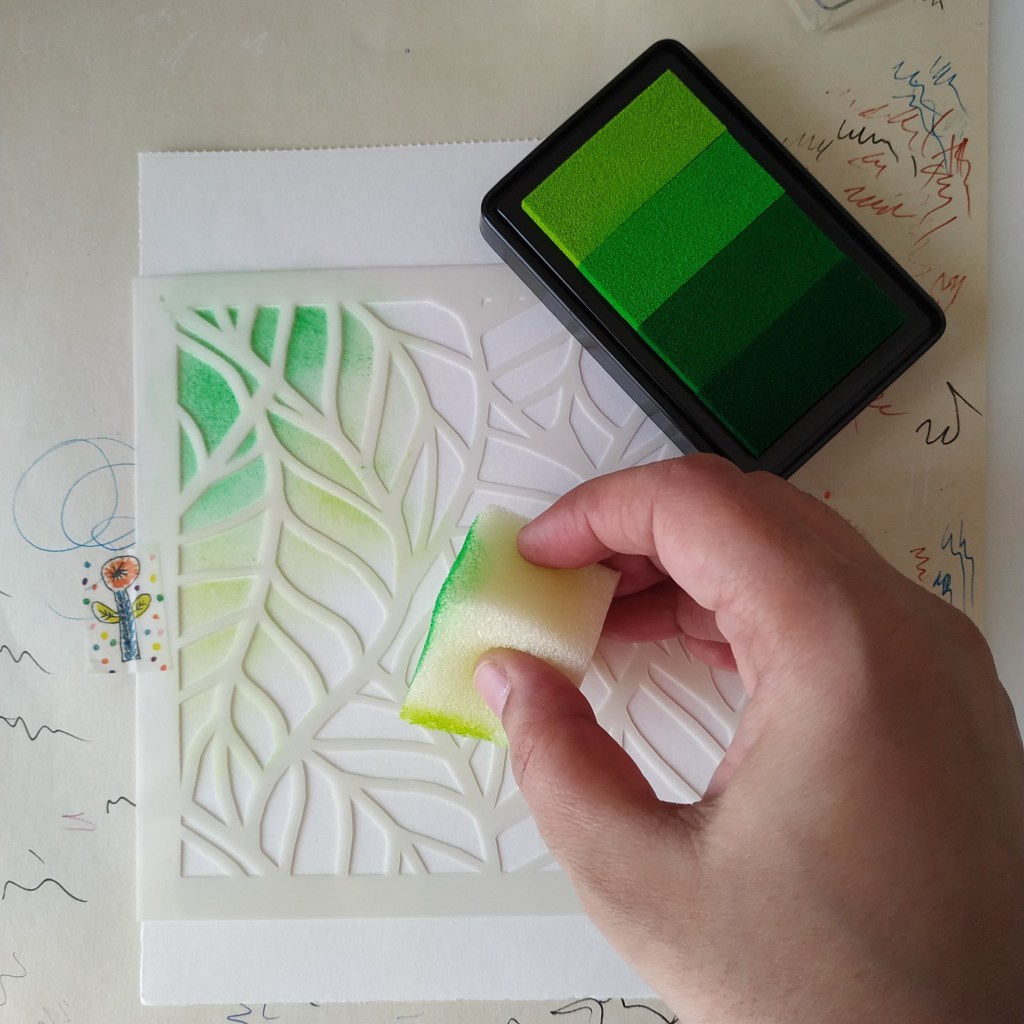
We need a sponge with or without holders to apply and blend it. They are available as single solid colours or as multiple shades in the same box for creating shading. They are very easy to use and create a nice perfect finish if applied correctly. I picked up boxes with basic shades that go on almost all designs. They can be used with stamps and stencils to create different effects. In fact I liked it so much that I bought the other colours too!
5. Punch – This is the cutting part. Specialised paper cutting knives are available. However if cutting is not exactly your main skill it is best to use a punch machine. Small individual punch machines with small designs like flowers, leaves and more are available. This punch is just like a regular punch machine, just that this one punches fancy shapes instead of the regular circles.

Further we get a small dye cutting machine that has metal stencils to cut multiple shapes from paper at the same time. And last but not the least we also get a larger complex machine that cuts various shapes from paper based on computerised designs that we provide. The prices are also likewise.

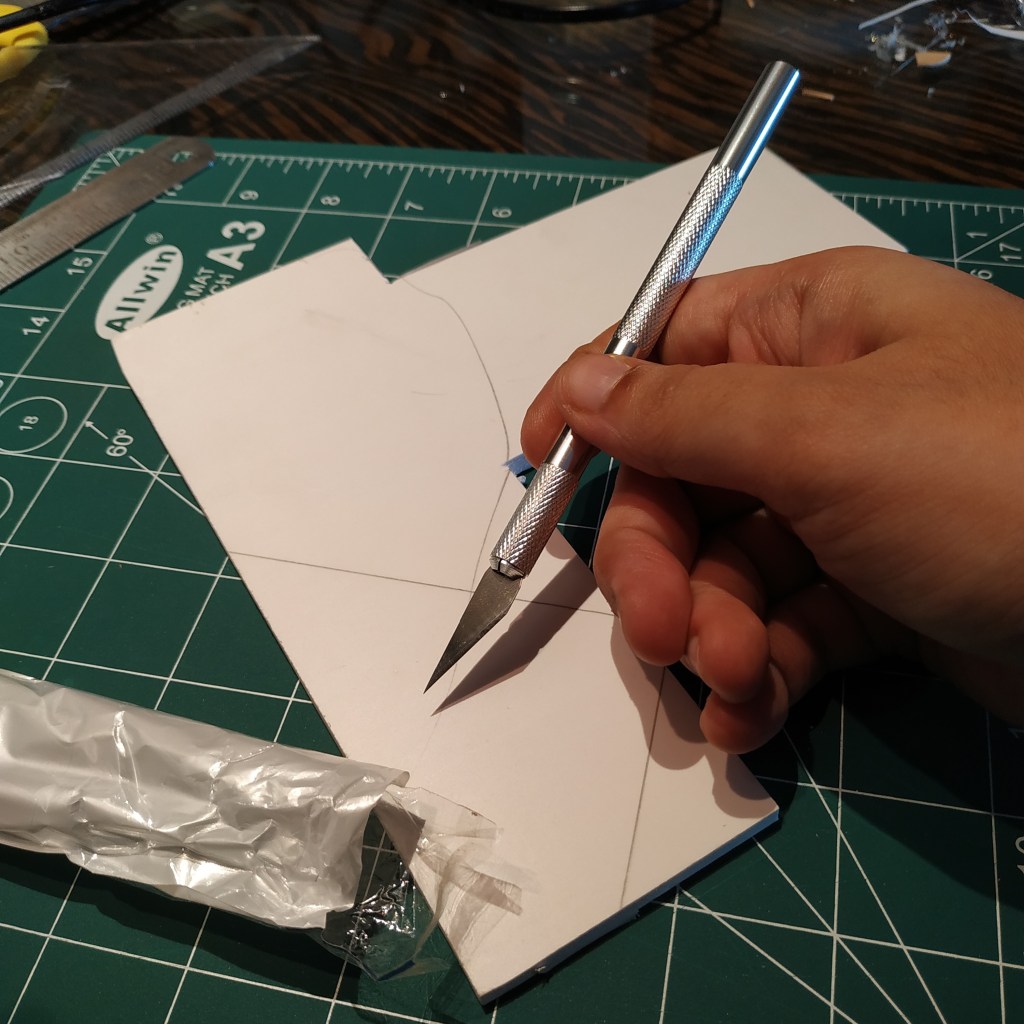
The small punch machines are easy to carry and work well for many basic crafts. Professionals might want to invest in the other cutting tools. I prefer the specialised cutting knives because that is my skill. There are many cutting blades that come along with it that are for precision cutting.
A few other helpful tools and materials are – 1) double sided tape and 2) washi tape for graphics or protecting a surface or marking (my detailed post on using Washi Tape is there on the blog page) 3) folding, rolling and shaping tools to make paper crafts. An interesting idea is 3D cards and Shaker Cards. Teachers can ask their students to make shaker cards with all the stars they collected during the month.
I just saw the meme that reads ‘buying crafting materials is a different hobby’. Hehe! That is true. We all stock materials we may not use but we can always try to stock only what we use. Including my previous posts on paper crafts I have now covered all the methods of making creative handmade greeting cards. If you have made a creative paper craft, do share them. I would be very happy to see them. Have a crafty week ahead!

Great art 💪
LikeLiked by 1 person