Wishing everyone a very Happy Diwali and a Prosperous New Year!
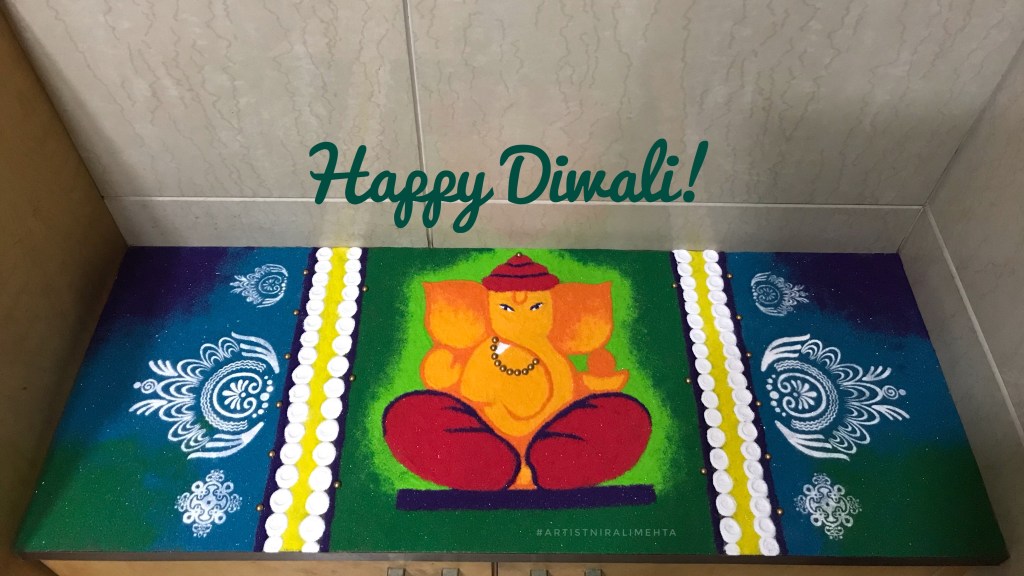
In the picture is the Rangoli Design that I made for Diwali this year 🪔
Wishing everyone a very Happy Diwali and a Prosperous New Year!
In the picture is the Rangoli Design that I made for Diwali this year 🪔

I find it very exciting and interesting to make and give handmade greetings with personalised messages. I think I have to tell you, all the cards that I have received till date, I have kept them very neatly stored in my drawer. They are all special and a beautiful memory. In fact whenever I conduct workshops, it is that special thank you card that is worth a billion to me. Is it just me?
Now a days most of the people use digital ways to send messages. Very few people call to wish or invite. I know! The personal touch has changed to digital. That is why, if even one person puts in the effort to send a handmade card, it makes the receiver feel loved. The time, effort and the thought is what counts. Paying or downloading and sending is what anyone can do. Isn’t it?
Making a greeting card all by yourself may seem difficult for some. No one wants to be judged or mocked for their artistic skills. Besides not everyone can be a master at it. I understand. But what if I were to tell you that even with minimal artistic skills and creativity one can make beautiful professional looking greeting cards.

Yes! In this post, we will be discussing a few tools and techniques for making professional looking greeting cards with ease. There are so many of them, so I have clubbed them as per the method of making. The materials are expensive and a mistake in selection means it was a waste or is just lying around. It is a costly affair. This makes it more important to know about them. I am going to try and explain the tools and the methods together, so that we know what all we will be adding to our shopping lists.
1. Stamps and Inks – Stamps with a variety of designs are available. Every few months all shops stock new designs. I buy them based on the theme like – Birthdays or Christmas. We get everything from alphabets to numbers to florals to the popular movies and more. I buy stamps in off season or bulk for discounts. They stay well for years and is usually a box collection we can share among creative friends too.


Along with stamps we need a stamping block or a stamping pad. What is that used for? The stamps are silicon and not firm. They have a glue side which helps attach them to the block, dip it in ink and press it on paper for an even finish. A neat finish is very important when selecting quality. Once complete we clean the stamp with a cleaner or dry cloth and put it back in the pack. The same block can now be used along with another stamp. A stamping pad works to stamp multiple ones quickly and neatly. It is a great tool if you make multiple greeting cards.

Next we select ink pads or pigments for the stamp. A good choice for selecting from the colour options is available. My pick – A black archival ink stamp pad is a must have. The ink is waterproof and instant drying. We can colour the stamped design with markers. We need not worry about any smudges. Other than that a few more standard colours can be selected according to the theme. We also get oxidised inks. They give a different finish and their colour shades are also different. The inks give a kind of the rustic finish rather than the bright regular shades.

For beginners, basic tools are great. Once you get a hang of it and use them more often, I am sure you will pick more. There are innumerable creative ways of using stamps. We can use them for journals and other tags too! Most stamp sellers share ideas for using stamps and their latest collection on social media. I am always amazed to see how much creativity one can have. Do check them for inspirations.
2. Embossing – The process of embossing is very simple. The material quality matters. Earlier embossing techniques and materials were not that great and they looked very messy, more like a beginner’ school project. We have now started getting good quality embossing glue and embossing powders. We apply glue using the stencil and then dust it with the embossing powder. The glue is either dabbed onto the surface or applied with a brush. The excess powder falls off once it dries. It is the same method of sticking glitter powders. The difference is in setting embossing powders. An embossing heat gun is used to set the powder. The powder melts due to the heat and binds to the paper.

Different grain sizes and colours are available. They all give a different texture or finish. I select embossing powders in fine grains so that they melt and set evenly.
3. Stencils – As the name suggests these are cut outs of various designs on plastic or paper. They are either one use or multiple use stencils. We also get stencils with a sticky backside to stick them on the surface we are working on. This helps secure the stencil in place. We can do the same thing with tape. Stencils are helpful in tracing artwork and can be used for embossing and painting with most materials. It makes a great assistant for the creative folks.

4. Pigments – The name means colour which is present in Inks and paints. We get a concentrated version in a box just like the stamp pad. Pigments are powdery and the composition is different from inks. I find them similar to compressed powder in makeup. They are very useful in applying background colour to the card paper.
We need a sponge with or without holders to apply and blend it. They are available as single solid colours or as multiple shades in the same box for creating shading. They are very easy to use and create a nice perfect finish if applied correctly. I picked up boxes with basic shades that go on almost all designs. They can be used with stamps and stencils to create different effects. In fact I liked it so much that I bought the other colours too!
5. Punch – This is the cutting part. Specialised paper cutting knives are available. However if cutting is not exactly your main skill it is best to use a punch machine. Small individual punch machines with small designs like flowers, leaves and more are available. This punch is just like a regular punch machine, just that this one punches fancy shapes instead of the regular circles.

Further we get a small dye cutting machine that has metal stencils to cut multiple shapes from paper at the same time. And last but not the least we also get a larger complex machine that cuts various shapes from paper based on computerised designs that we provide. The prices are also likewise.

The small punch machines are easy to carry and work well for many basic crafts. Professionals might want to invest in the other cutting tools. I prefer the specialised cutting knives because that is my skill. There are many cutting blades that come along with it that are for precision cutting.
A few other helpful tools and materials are – 1) double sided tape and 2) washi tape for graphics or protecting a surface or marking (my detailed post on using Washi Tape is there on the blog page) 3) folding, rolling and shaping tools to make paper crafts. An interesting idea is 3D cards and Shaker Cards. Teachers can ask their students to make shaker cards with all the stars they collected during the month.
I just saw the meme that reads ‘buying crafting materials is a different hobby’. Hehe! That is true. We all stock materials we may not use but we can always try to stock only what we use. Including my previous posts on paper crafts I have now covered all the methods of making creative handmade greeting cards. If you have made a creative paper craft, do share them. I would be very happy to see them. Have a crafty week ahead!

Yaaaaay!!! We have achieved a milestone! 50 posts! That is why I have listed links to all the 50 posts plus 3 review posts on the blog tab. Any post that you missed reading or wish to revisit you can by selecting it from the blog page. I hope you have subscribed to the blog by now, because if you haven’t done it yet, now is a good time!
A big thank you to all those who have been following and supporting the blog. I hope you are enjoying reading the posts. Any topics on Art and Craft that you want me to share about or if you wish to send us a feedback, please do so in the comments section below. I would be very happy to hear from you! Thank you! Have an Arty weekend!

Large panels of coloured glass at the Church, is where I probably saw stained glass paintings for the very first time. Most of them are florals or abstracts. Some of the best works I have seen share stories of the church. This art form is very ancient and people have been doing it for years. A striking point of the design is the blocks or parts of the painting and the translucent colours. Have you noticed it?


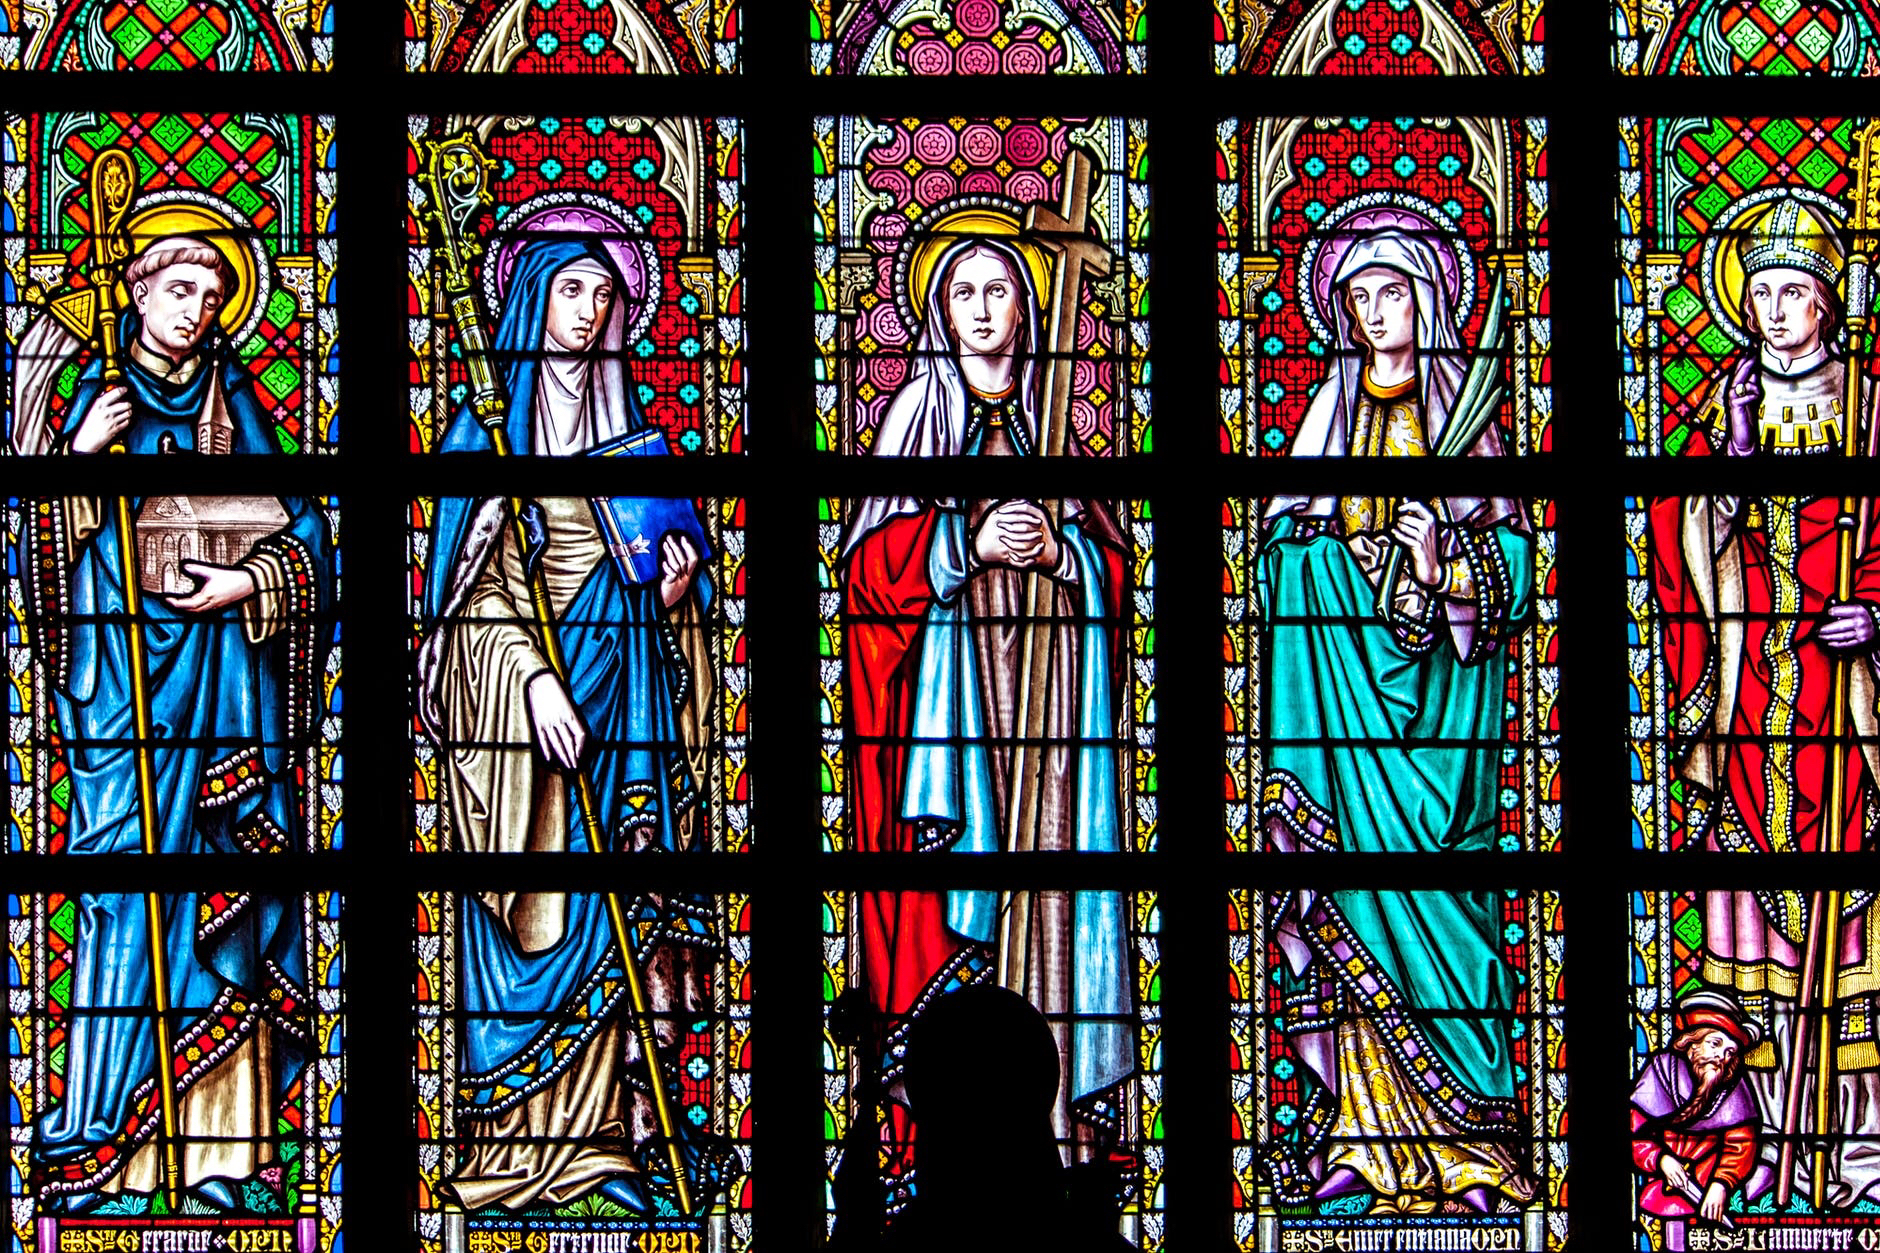


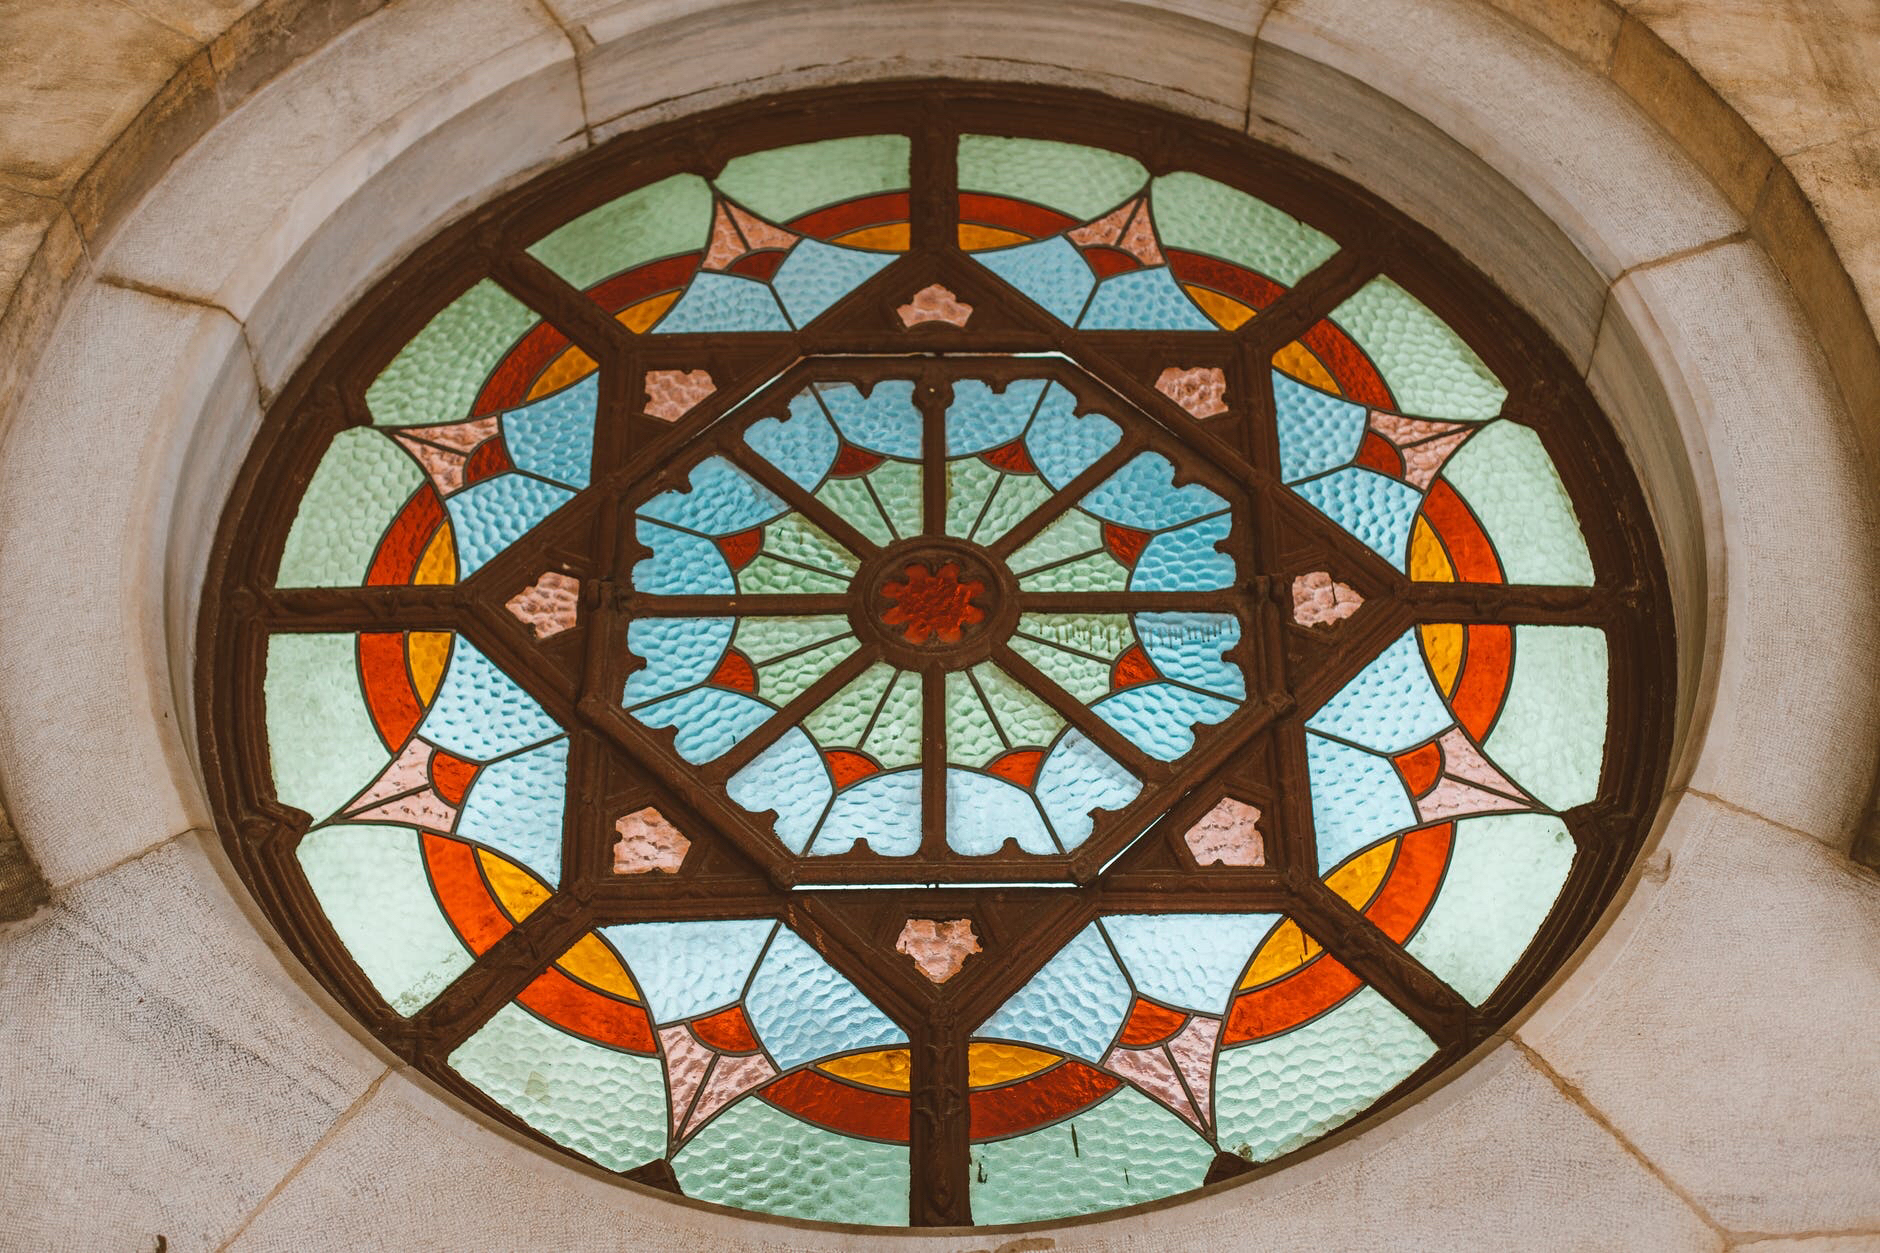
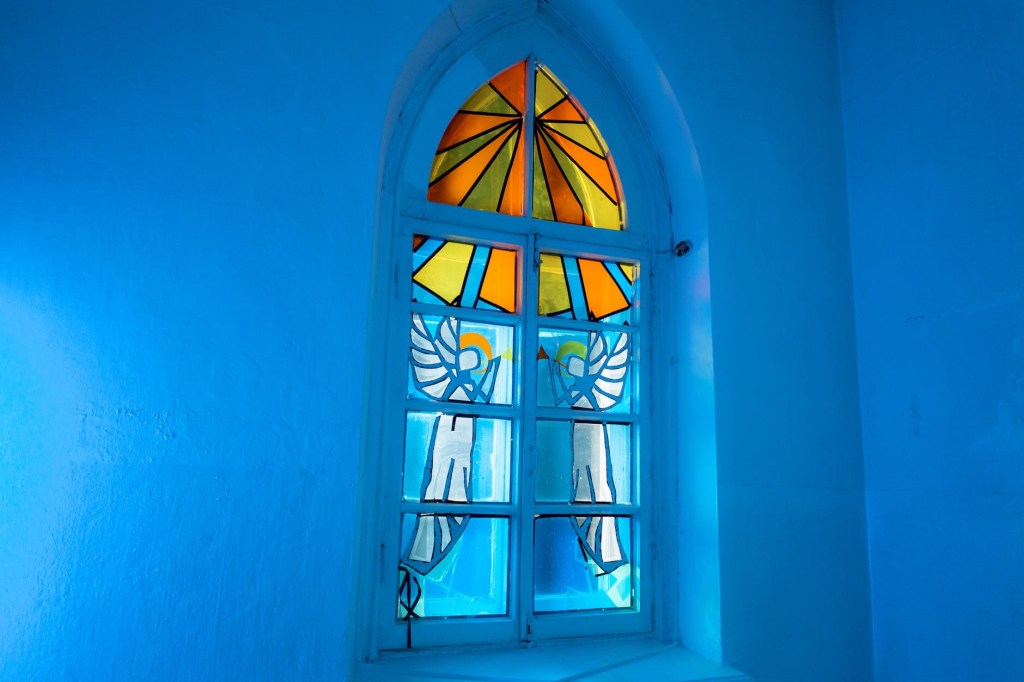

The motifs and panels are large, the larger the better. But they can be used in our homes too. I painted a mirror for my dressing room with this method. I also designed the acrylic ceiling for my bathroom using the same technique. Yes! We also get DIY kits with simple designs for kids to paint. I clearly remember, back during my school days stained glass painting had become a fad. There is a chance almost all of my creative friends would have tried it at least once.

Notice how the dresses of the human figures have been sketched as blocks? The drawing is never one single large piece in a stained glass painting. Even after so many lines it looks beautiful, isn’t it? Also, from what I understand this painting is five panels joined and set in a single window. The black horizontal lines are the frame.
The painting process is very simple. Two steps 1) Create the Outline and 2) Fill the colours. The skilled part is in doing it. And like they say, you have to do it to know it. The texture that you see is the original texture of the glass. We select the glass based on the type we want. The material except the glass isn’t very expensive. The colours in a set are enough to make two or three glass panels. So if you want to re-use or recycle a piece of glass from the renovation, consider stained glass painting. It will give a fresh and majestic look to your decor.
The Paint used for ‘Stained Glass Painting’ is very different from others. It is translucent and self-setting. It is available in small bottles with droppers or changeable caps. A box of glass paints by ‘Fevicryl’ has a black outliner tube and 5-6 basic colours. This is enough for a beginner. Red, Yellow, Orange, Brown, Green and Blue create pretty designs. It is amazing how we can create such beautiful artworks using barely a few minimum shades.
The Black outliner has a pointed nozzle with cap for precision or can be transferred to a cone. The bottles have a dropper. I don’t know if you understood what that means. It means we do not need a paintbrush. The colour is dropped into the blocks created. However just like most artists I also prefer to use a brush to spread the colour evenly or create shading. We need to be careful because if the paint is old and thicker than needed, it will not give a smooth finish.

I shall try to explain this with a detailed process of creating a stained glass panel. For the first project select a small glass panel. The size of A4 or a little larger is good. Next, select a design. A simple abstract or floral one with large blocks. There are templates available on the internet that we can download and print on a home printer. Then we place the design underneath the glass and trace it on the front or top side with an erasable marker.
After that using the outliner tube we create a steady outline in black for the design. It looks like a 3D piping. We then have to wait for the outline to dry. It would be a good idea to do this on the previous day and colour it the next day. If the line is thick at some places and thin at others or if it is very light at some points, the colour will make its way through like water. It flows out. Erase the marker lines after the outline dries.
The ready kits have this step already done. The kids only have to pour the colours. Next we use a dropper and drop the colour in the closed portion. By ‘closed’, here I mean the black outline is sealed correctly. Units that we want in the same colour, try and drop the same quantity of colour. For example the leaves of the flowers in the picture below are all of the same colour.
The colour automatically spreads to the edges and sets like a block of jelly. There will be darker or lighter shade within the same colour, if we do not drop the same amount of colour. That’s correct, this is the tricky part. It can be understood only after trying to paint. Hence we need to spread the colour evenly and equally, knowing how many drops of colour to add in each of them. Once we get this right, we have aced it!

And there is another unique idea of putting a crushed silver foil as the backing for the the stained glass painting. We then mount the dried finished glass panel in a frame. It also looks good as wall art and not just the usual ceiling or windows panels.
Oops! Don’t be in a hurry. The paint may seem dry but it takes at least 24hrs to set completely. Only after that we can pick it up or change the level to tilt or hang it. Yes! The painting has to be done laying it flat on a levelled floor. Nah! We don’t paint the walls. Only after the pieces have dried completely it can be lifted and fitted.
An interesting similarity of this art is with acrylic pieces that they weld together as sun catchers for outdoor decorations. Have you seen them? If you have and know what they are called, please share the details in the comments section below. Have an Arty Week!
Nature has it’s way of healing. Clay has been used for making arts and crafts since times immemorial. An easily available, natural material, used to make numerous household and decorative items ; mud and clay also have cooling properties. Playing in mud or working with clay can have therapeutic effects too.
Dr. Bhau Daji Lad Museum, Mumbai has a section dedicated to the evolution in this art. They take us through different types of clay that were used and the evolution in designs of the objects made from clay. Yes! Even though it is called ‘pottery’ world over, many artisans have unique methods in : mixing the clay, making the art and designs and drying the objects.
I got to work on the potter’s wheel thrice. We made pots of different designs each time. I don’t think I can do it all by myself though. Pottery is a very skilled art. We definitely need help from the artisan for the start and the finish. At summer camps they call a local artist and arrange for the potters wheel as an added attraction. One thing that I clearly noticed is, that all the potters had a different mix of clay. They used the local soil or mud and mixed it with other ingredients such as minerals to prepare their clay.
Once the pot was dry, I would decorate and paint it. ‘Pot Decorating and Painting’ as they call it, is an art anyone would enjoy. Those who work in the kitchen might find it similar to working with a dough. We also make toys or models from clay. India is a country of festivals where we make idols of gods and goddesses from clay. Clay sculpting is a very well known and age old art form here. The ‘Diyas’ we make during the festival ‘Diwali’ are an example of painting clay pots and lamps.
Then there is another art, where we use mud or clay to decorate the walls. It is called ‘Lippan Art’. ‘Lippan Art’ is a traditional art in India where mud mouldings are used to make decorative designs on walls or panels. Thereafter the entire panel or wall is painted in white. Once dry they embellish it with mirrors. It is definitely worth a try if you get a chance. Essentially in white, we also get them in coloured designs. Workshops in Lippan Art are held during the summer holidays.
These crafts are best done in their studio settings or at the artisans place. In India as tourists when we visit the countryside or village, we may get a chance to try them. Whenever I visit the interiors I make it a point to learn, try a local art or interact with the local artisans. It is very insightful and is my idea of a fun and interesting holiday. These clay arts are difficult to do in a home setup. At home, we can make other items that have a simpler process.
For arts and crafts at home, we use Clay that is available at art and craft stores. Basically for hobby crafts and crafts at home there are two types of clay : one is the air drying and the other one that needs to be baked. We can use them to make many artistic objects from the comforts of our home. I have made wall murals, decorated wooden and glass panels, mirrors, jewellery and toy models with both types of clay. Yes! I know friends who have made saleable products from these. They are now successful small businesses.
‘Lamasa’ is a clay craft where the clay is coloured using natural ingredients from the kitchen. The clay is a type of a dough made from corn flour. The process includes mixing and heating the clay dough. Varnish is applied to the dried clay models for lustre. Statues and sculptures made using this technique are expensive and famous world over. Have you heard of it?
Plaster of Paris (POP) is also a kind of clay used for craft projects. POP Sheets are used to make decorative ceilings. We also mix ceramic powder with glue to form a paste. Fill it in cones (like mehendi) and make designs. I have used this method in making traditional Indian folk style wall murals.
Unfortunately I made these artworks more than a decade ago and I don’t have pictures to share. If in future I make these again, I will be happy to share them. There are loads of images, designs and videos on all these crafts online, if they interest you.
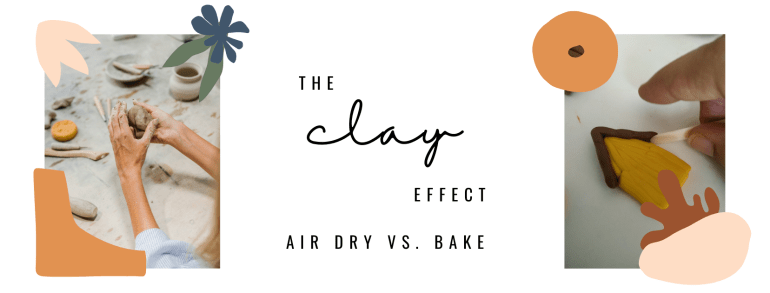
There isn’t a recommended type of clay here. It is to understand one’s crafting process and decide which clay will be suitable. There are some differences in properties and methods on processing both types of clay. We need to understand these differences to choose the clay best suited for our project.
Air Drying Clay – As the name suggests, this clay hardens naturally if left open in air. It is available as two separate materials to be mixed well for a chemical reaction. The clay made from mixing hardens over time in natural air. In the meantime we have to shape it. The time we get is barely a few hours. This clay is a bit messy and sticky to use. So, we dust it with talcum powder while working. This clay is either black or white. We can paint it with acrylic paints after it dries completely.
Bake Clay – This clay is available in a variety of colours. It is oil based and needs heat treatment to produce a chemical reaction for bonding. The clay hardens only if it is baked in the oven for the correct time at the right temperature. It is quite advantageous for an artisan to work with it, if the design or product is time consuming.
For my artworks I have used the white clay of the brand ‘M-Seal’. White so that it is a good base to paint any colour shade. Moulding Clay by ‘Fevicryl’ is also good. For the bake clay, I used the pack from the art store by the brand ‘JAGS’. There are other brands and types, but I am happy using these. If you wish to try, you may use the same ones for your crafts.
Here is a short intro to clay crafts. Have you tried any of these? Do share your experiences in the comments below. Have an arty week ahead!

What is Coffee got to do with Art? 😀 My young followers have exams coming up at schools, colleges and universities. Coffee will be their best friend keeping them up studying late nights. Just like a good coffee is all about the blend. Art is also all about blending and having the right combinations. All set? Prepared?

I will do posts on ‘Latte Art’ and ‘Coffee Painting’ later after exams. This post is to wish them ‘All the Best’. No last minute advice or instructions before the exams. Just go out there and do your best. A sweet follower wrote to me saying she has her art exams coming up and my posts were helpful in preparing for them.
I am so glad the posts were helpful. I am sharing links to some of them once again as they have been pushed off the main blog page due to the space limitations. The posts might be of interest to the new readers or followers who just joined and missed the previous posts. I will put a search the website option once I do a few more posts.

I made them using Coffee theme stamps, Black Ink archival ink stamp pad, Watercolour Markers and Brush Calligraphy Pens. Here’s a very extra special tip that one must always remember :- You can paint with Coffee but you can’t drink Paint Water. Hehe..Just to lighten the mood. Have an Arty Weekend!

We are done with half of 2021. Here is a recap of all the posts on the blog from January 2021 to June 2021 just in case you missed out reading any of them. I will be back in July with more posts on arts and crafts.
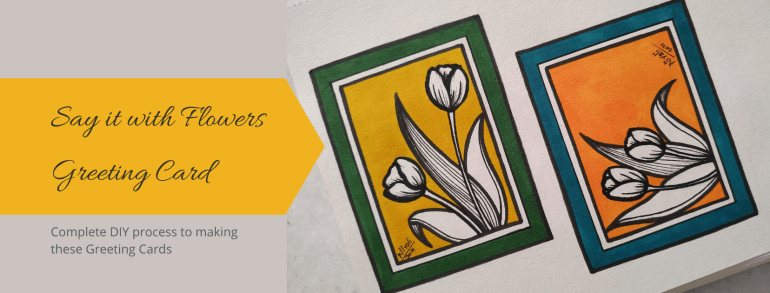
If there is something you want to say, say it! And as they say, say it with Flowers. A floral design card works for so many expressions. Please! Sorry! Thank You! and More! In this post, I am sharing an easy to do design you can try at home.
This simple, elegant and classy design will suit any occasion. We can make a gift tag, a greeting card, a postcard or have it as a letterhead on the letter to your pen pal.
You require some colours, pens, paper, basic drawing skills and your enthusiasm for making a handmade card. The same design can be made for a horizontal (landscape orientation) card as well as a vertical (portrait orientation) card.
Step-by-Step process to making this Floral Design Card

Step 1 – DRAW : Draw double borders to the page as shown above. We want one thick outer border and a thin inner border.

Step 2 – DRAW and OUTLINE : Draw the flowers and leaves. Tulips are the easiest to draw. They have long leaves and very few petals. A floral bunch looks better when it totals to an odd number. I have drawn two flowers and three leaves. We need not fill the entire space. Cover the area enough so that it looks well spaced out. Outline the final drawing with a waterproof black pen. If you don’t have a waterproof pen. You need not outline it at this stage.

Step 3 – COLOUR FILL : Fill the background with colours. Select any two colours – one for the thick border and one for background. Leave the flowers and thin border in natural white of the paper. For this card I have used markers. Even paint will look good.
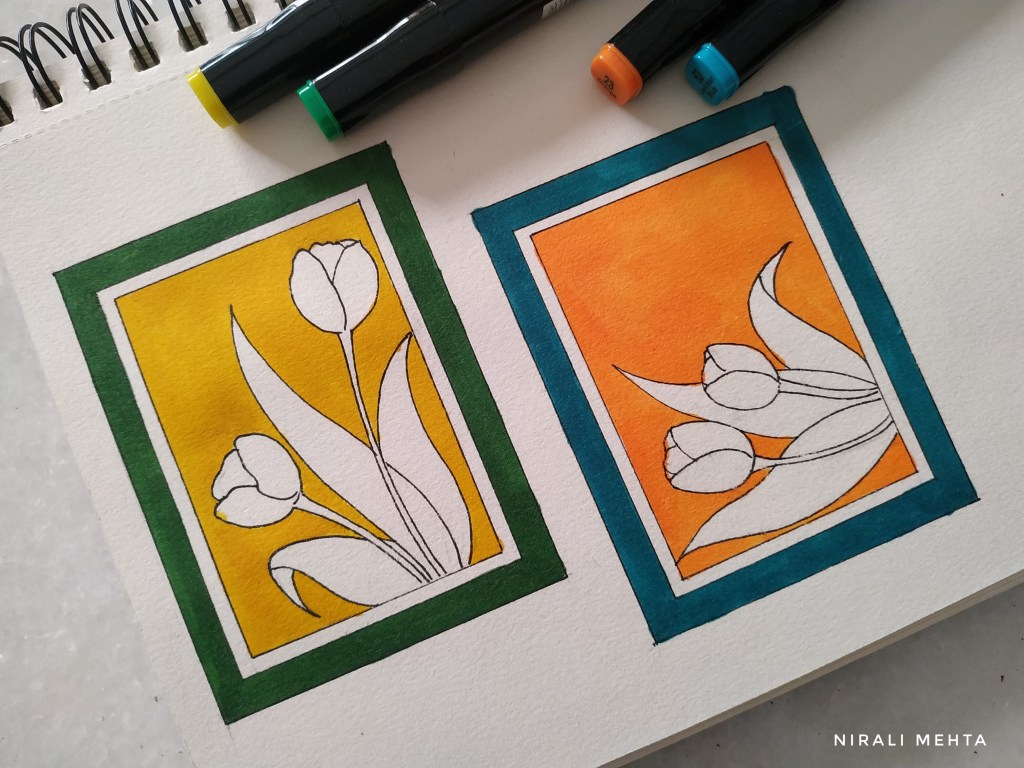
Step 4 – FINAL OUTLINES : Outline the flowers, leaves and borders with a thick marker. Leave the thin border. Add little lines or fill patterns to the flowers and leaves in black. Give the thin border a thin outline. This thick and thin outlines makes it look better.


Colour combinations like Pink – Blue, Yellow – Blue, Red – Green also look good. Bright colours or Pastel shades both look great. A design like this is a ‘you possibly cannot go wrong kind of a design’. Here are both cards together :-

That was easy right? So try it out yourself and let me know if you have any questions. Have an Arty Weekend!
You may also want to see my other post on making Cards Let’s make Greeting Cards with ease
My city is almost in a complete state of lockdown. The thing with these people is that they think this is the new normal. They aren’t opening the lockdowns. Stepping out is a complete ‘No-No’. To draw and paint, I need to calm my mind. During such prolonged lockdowns, keeping your mental health good becomes challenging.
We aren’t getting any materials either except groceries. The city never really opened the lockdowns since last year. As the wait becomes longer, hopes get dimmer. Reading all this news only makes it worse.
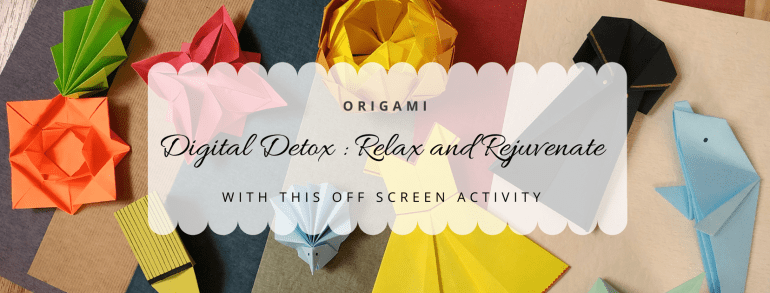
That is when I came across this Sunday Column in India’s largest selling newspaper. It is called ‘timespapershaper’ by ‘The Times of India’. They share ‘How To Make’ Origami Models. A new one every Sunday! Origami is the Japanese Art of Paper Folding. All you need is a sheet of paper.
I collected the posts and sat down to make the ones I liked. Origami can be a very relaxing activity for a person of any age. I thoroughly enjoyed my time off-screen. Almost felt like I should do this digital detox regularly.
I am sharing pictures of the Origami Models. I made all these by myself reading these posts. For the last few difficult ones, I did turn to their videos on FB and Insta. These are listed in the order of their difficulty level. The difficulty level meter is based on what I felt.
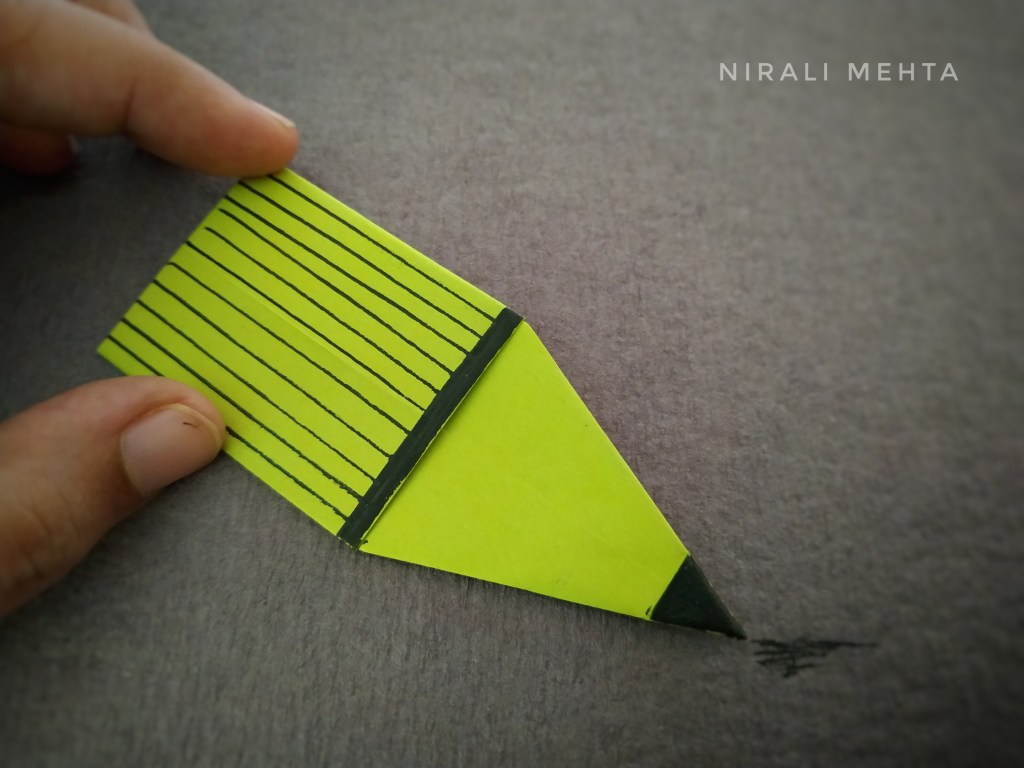
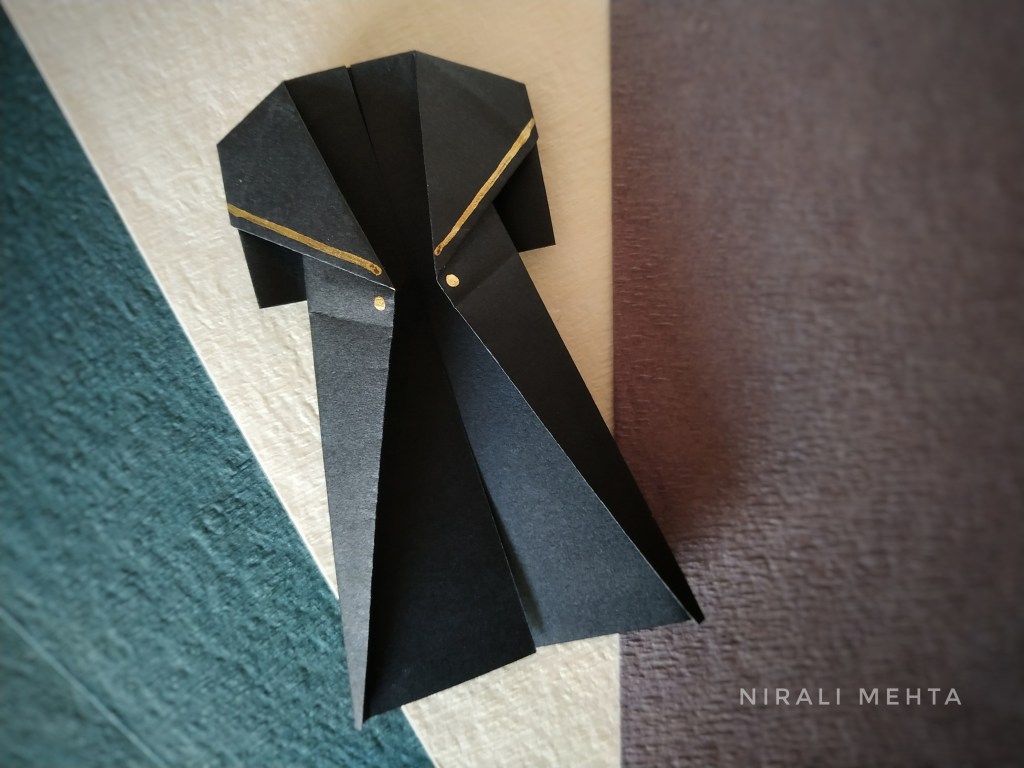


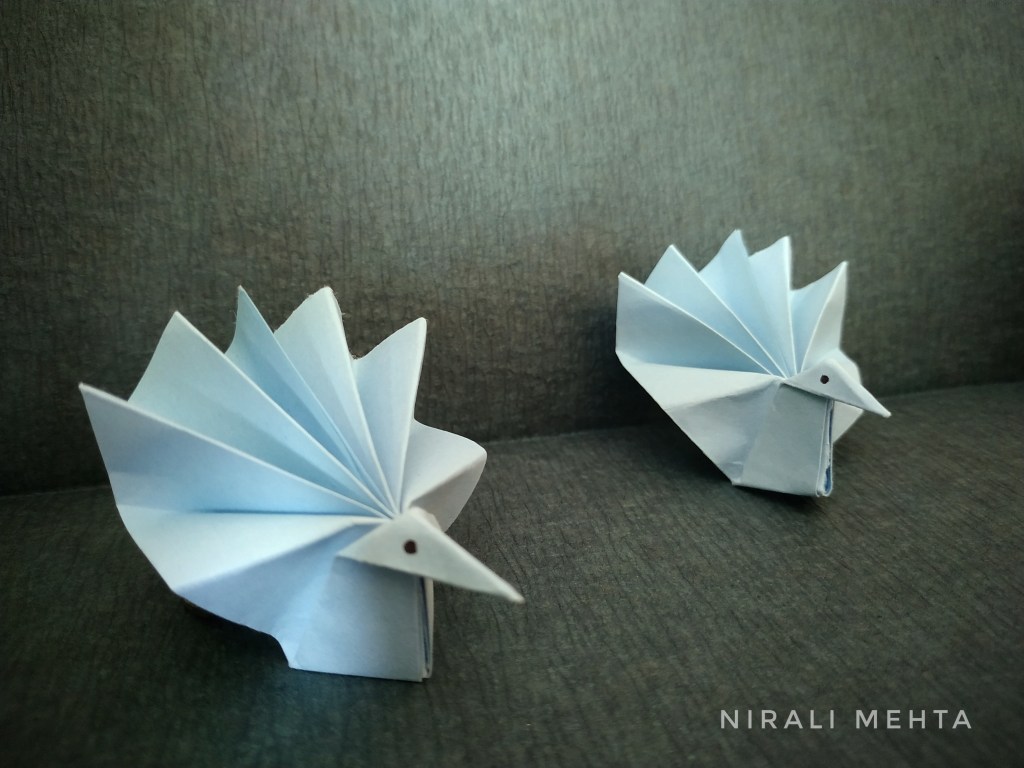


A big Thank you to ‘timespapershaper’ for teaching us these beautiful Origami Models.
It is a simple creative activity that can be done with things we have at home. However it helps relax and rejuvenate. I feel everyone should try them. It doesn’t require any prior training and the benefits are totally worth the time and effort. Have an Arty Week!
Other Posts that you may like :

In the Holiday mood, I am also going to take a break next week. Most people have already signed off till New Years. As a shop owners, we are busy making products, posting on social media, settling accounts, packing, shipping and making new and the cycle continues year round. That makes us use our phones for long hours at work. A little digital detox to spend time with yourself, family and nature can rejuvenate us.
And we can come back in the New Year refreshed and charged up for another year ahead. Many people also use this time to upgrade their skills, read up on books they always wanted to. I started my Blog this year in September 2020. I have 17 Posts by now. The response to the Blog has been overwhelming. It’s been a good journey with your love, support and encouragement.
So I thought I would do this year in a review post. Helps me connect with the new followers too! Here is a list of the posts I have done on Arts and Crafts so far. You may click on the title to go to the post. All these are listed on my Blog page – ‘The Art Life’
So just in case you missed out on reading any of them, you still can. Please note the Blog page shows only the last 10posts and so to see the previous ones you may use the links above or scroll to previous posts.
If you like reading my posts and wish to continue our association, you may click follow or subscribe to the Blog. This will make the posts come to your Email Inbox and you may read them at your convenience.
Wishing everyone a Merry Christmas and a Happy New Year!

This is an Instant Digital Download (JPEG) File that can be purchased at my Etsy Shop NMARTWORKS Picture Format opens with any Photo Editing Software. Once you pay, you can instantly download and use.

‘For it is in giving, that we receive’ – St.Francis of Assisi
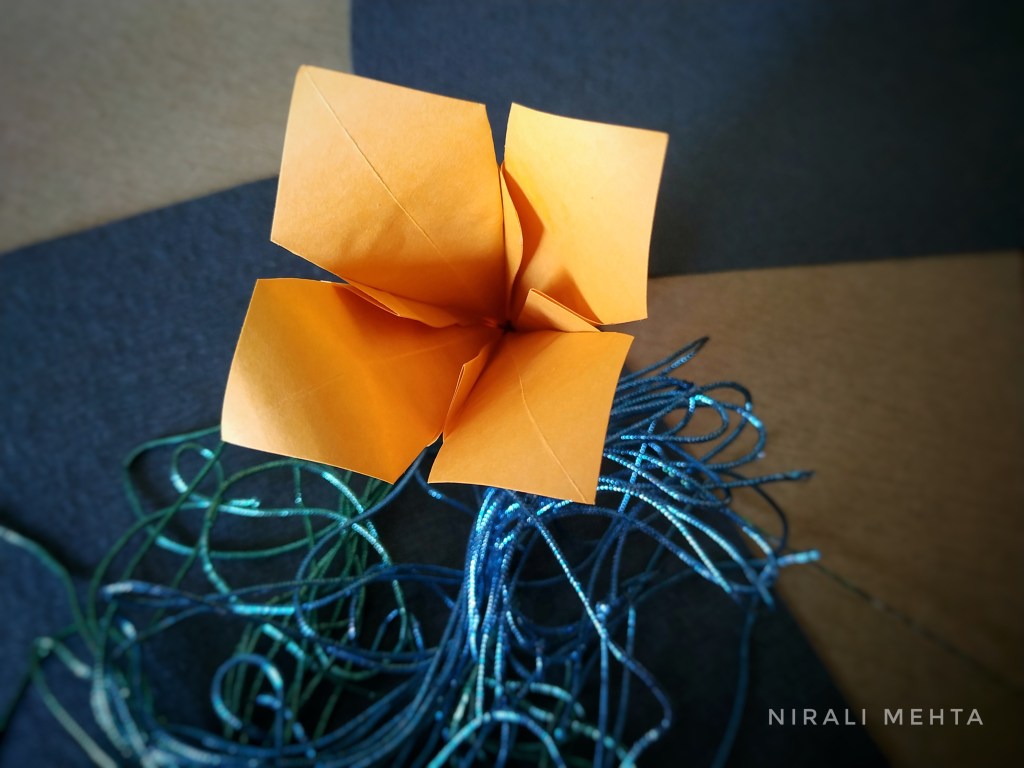
The Festive Season is coming soon. I love to select Gifts, wrap them up with fancy wrapping, add a small hand written note; thus making it special. Everyone likes to feel loved. Sometimes a thoughtful gesture and a little extra touch can bring so much joy. Today I’m sharing a very easy method to craft simple ‘Paper Flowers’. These flowers look pretty on Greeting Cards, Gift Tags or as Fancy Gift Wraps. Alternatively I have even used these to decorate Paper Bags, Pen Stands and even my School Projects. It takes just about 10mins to make these and the material required is usually available at home or can be easily purchased. You may creatively use materials from whatever is available to you, no need to buy anything.

Materials Required:
1) Sheets of Coloured Paper – Ready Packs of Coloured Paper for Crafting OR Printed Paper from discarded magazines OR Used Wrapping Paper ; As long as the Paper is foldable. Laminated thick sheets won’t work. Ready Packets are available as A4 or Square Paper Sheets in various colours.
2) Glue, Scissors and a Pencil
Optional Decorations
3) Paper Strips ( from a shredding machine) or Ready Paper Quilling Strips [Optional]
4) Embellishments [Optional]
5) Markers and Colours for any additional creativity [Optional]
Making the Flowers :-
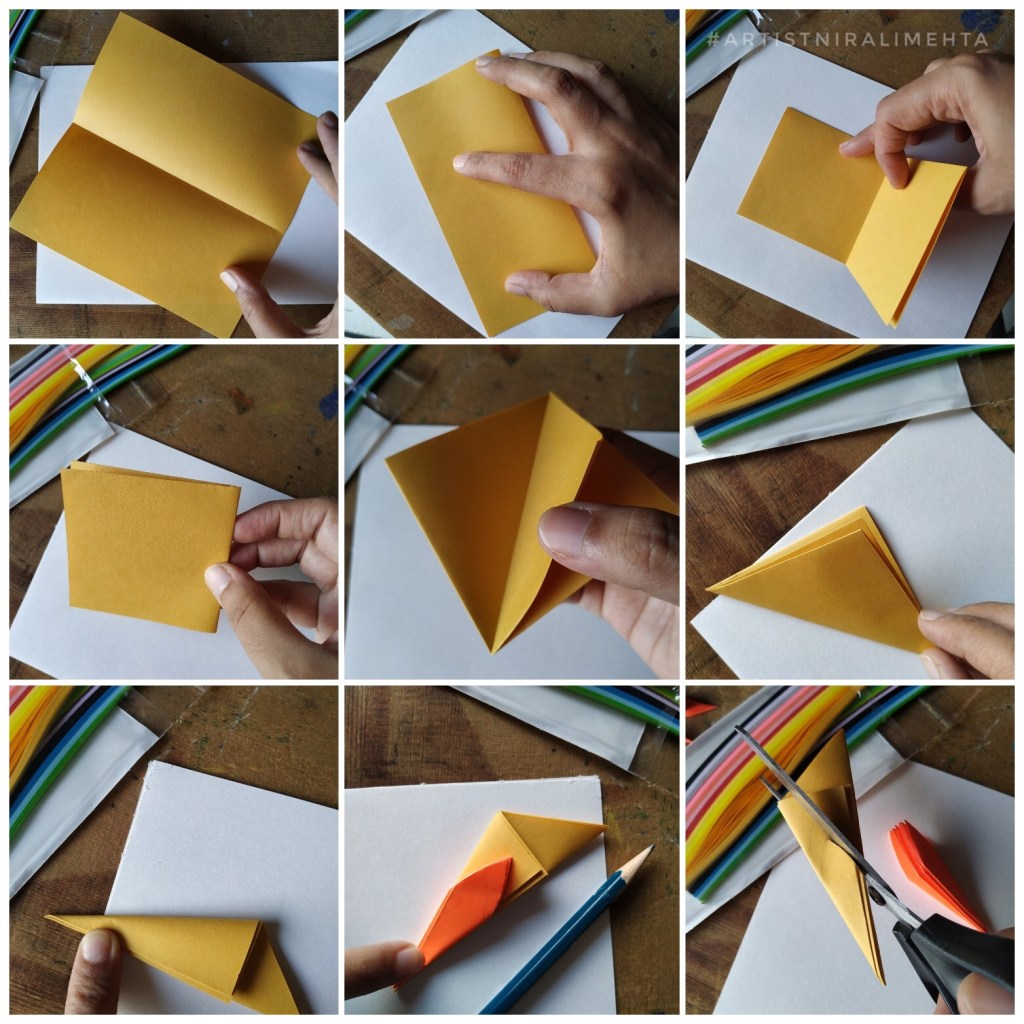
Take a square sheet of Paper. Fold at mid length along the dotted lines as shown in the picture. Once again fold along the dotted line to get a folded square. Next fold matching opposite corners to get a triangle. Last fold, fold the triangle into half at the dotted line as shown. Draw and mark the shape of the Petal and cut along the blue dotted line.
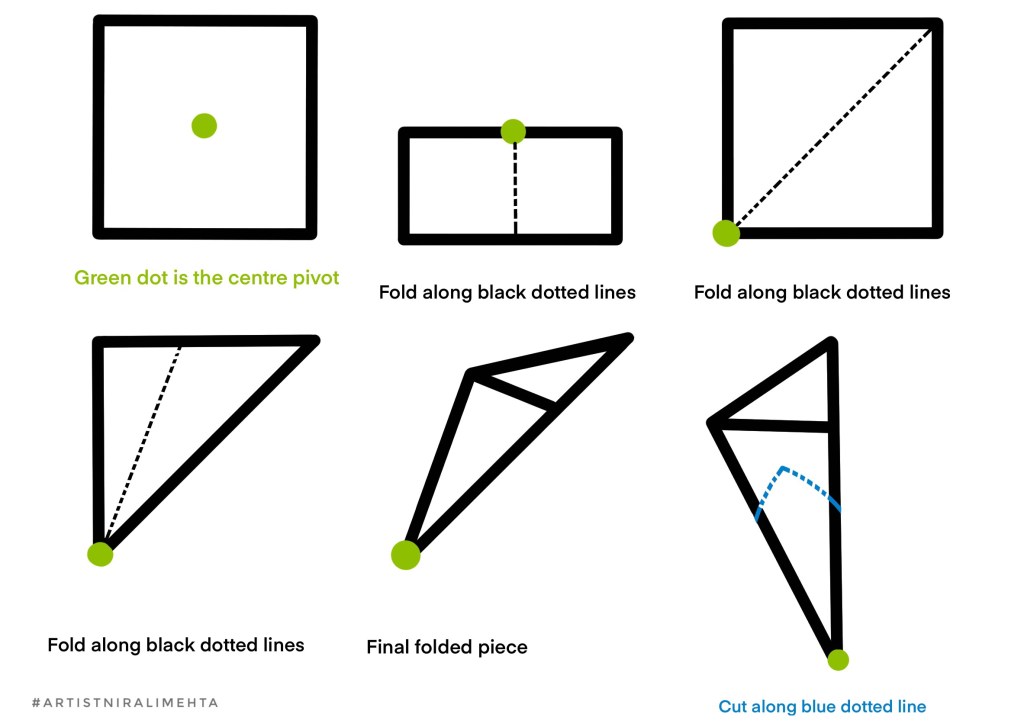
Please note the centre of the paper being folded becomes the pivot and centre of the flower. So all folds are made accordingly. Look at the reference picture below for help. It is shown as a green dot reference. Open up the Flower once it is cut. Make more flowers smaller and smaller each time. Layer them by placing one inside another.
Apply glue as a dot only at the centre to stick the flowers. Add a paper dot in the centre of the flower using a quilled circle or a punch hole from paper or an embellishment. Cut Leaves. I have shown two-three different leaves. Choose the ones you feel are easy. Arrange all this with optional decorations on your base Paper.
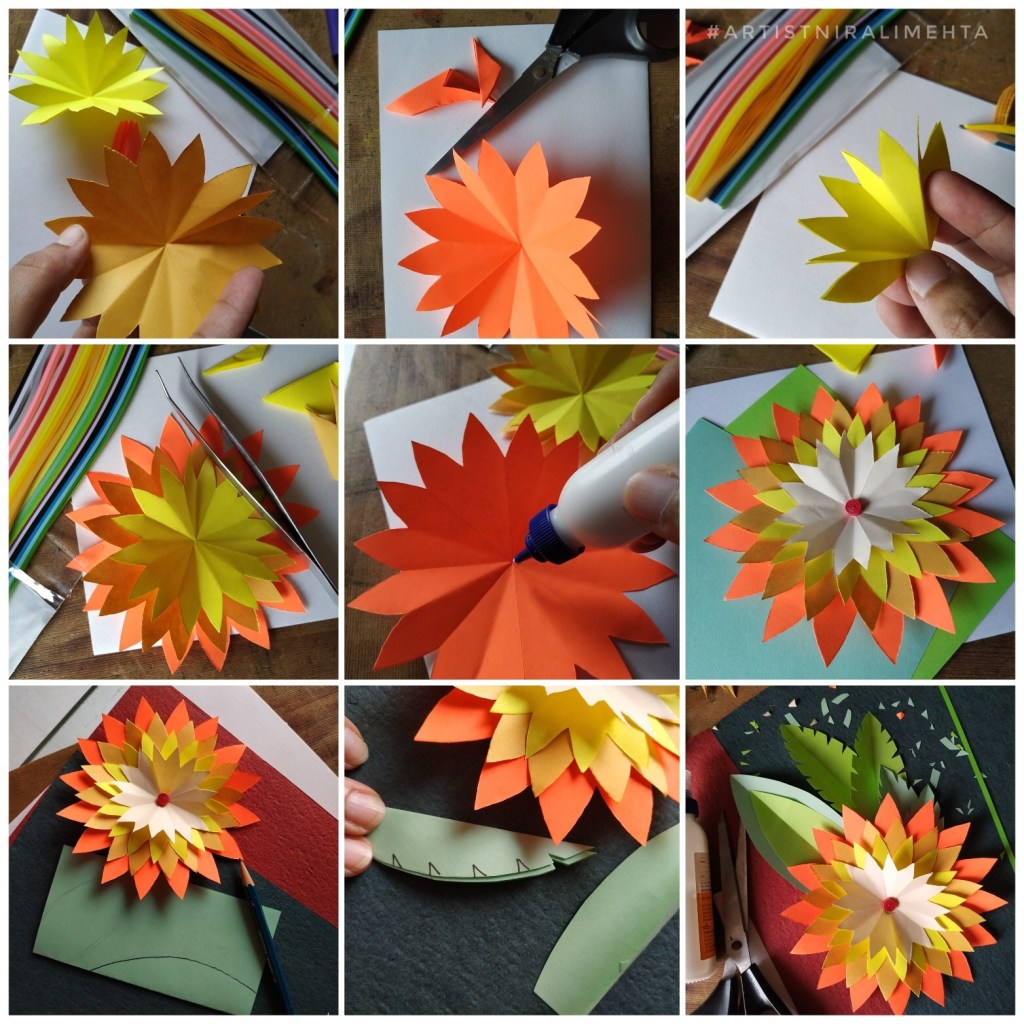
Special Tip: It is always a good idea to make a bunch of flowers and leaves in odd numbers. Example 3 Flowers -5 leaves. It looks more natural.
Making it colourful and neat is more important. One does not require too much precision in this. Someone without much practice will also be able to make a flower as pretty as another. Anything natural is not perfectly in a line. The beauty lies in the imperfections. Creatively I used the extra crumbs from discarded cutouts of this paper as confetti in the background. It looks better when the background is complete. Go ahead try these and let me know if you enjoyed. Have a Crafty Weekend!

A friend jokingly said “That is why I shop online, the Art Store displays are too tempting to resist.” I smiled and replied “Then do you end up buying all the recommended best sellers” Both of us burst out laughing. At the end of this friendly discussion we agreed that knowing your Art Material can definitely help save up some money.
In my previous post, I shared about Graphite and Coloured Pencils. Do refer to that to associate a connection with this post. In this post I will share about Charcoal Pencils, Pastel Pencils and Woodless Pencils. Woodless Pencils are Graphite Pencils without a casing. They are covered in a coat of lacquer. They are helpful in shading large areas. It is a helpful tool that you would want to add to your Art Kit, once you are confident in Pencil Shading. Similar to them are ‘Sticks’.
‘Sticks’ are like a thick block of pigment. They just have a sheet of paper wrapped around it or sometimes none. When we say ‘Pastels’ we normally refer to the stick form. If you want it in the pencil form, you need to ask for ‘Pastel Pencils’. Similar to Coloured Pencils even Pastels are pigment combined using a binder such as; wax, oil, gum, clay or water soluble.
Pastels are of two types 1) Hard Pastels 2) Soft Pastels.

A special tip here – if you ask for crayons, you will get Wax based Pastels. Oil Pastels are also referred to as Hard Pastels in some countries. Many people call Oil Pastels as Crayons which may cause undue confusion. Pastels made using Clay as a binder are commonly called ‘Chalk’. Pastels made using Gum as a binder are referred to as Soft Pastels. Water Soluble Crayons are similar to Watercolour Pencils but are used mostly by children. Pastels are also available in the form of compressed powder palettes called Pan Pastels.
Both Charcoals and Pastels are available as Pencils, Sticks and in Powder form. Charcoals and Pastels are preferred by many Artists for sketching Portraits and Landscapes. The investment is relatively less than what an artist would have to make for doing other kinds of Paintings.
Charcoal is a form of graphite or carbon. In simple words it is ‘Soot’ or a burnt material. The lead tip of a Charcoal Pencil is made up of compressed Charcoal Powder. Charcoals made without using any binders are best preferred. This means it is a nice dark lovely black pigment. Charcoal Pencils are available as Soft-Medium-Hard. Each of these leads will create a different texture when rubbed against the paper. The smoothness of the paper also affects this texture. Just like Graphite Pencils even Charcoal Pencils will have grades like 2B-4B-6B ; higher the number, darker the pencil.
We get combo packs consisting of 2-3 different Graphite Pencils, 2-3 different Charcoal Pencils, a Sharpener, 2-3 different size Stumps, 1-2 Charcoal Sticks and a Kneaded Eraser. ‘Stumps’ are tightly wound paper sticks used as a blending tool. If you are a beginner and don’t know much about the material, you may want to go for a combo pack like this. It is enough to begin learning Charcoal Painting.

Charcoal is mostly black as associated with coal. Can we say Charcoals are black, while Pastels are colour? No, because we get coloured Charcoal Powder as well. Just as explained in the previous post both these are available in two variants 1) Artist Quality 2) Student Quality
I thought I would first share what is available in the market and explain a few jargons and then share about selecting from these. Making a choice should now be easy!
‘Pastels Painting’ mostly refers to Soft Pastels. One box of as many shades as you like from a good brand is enough. Yes! Like Crayons, Oil Pastels and Coloured Pencils ‘more the colours, more the fun’. Hard Pastels don’t need blending while you can use your fingers to blend Soft Pastels. You can use Charcoal Pencils or Pastel Pencils for finer details because the sticks are too thick to draw a fine line. Pastel Pencils are Soft Pastels in Pencil form.
Charcoal Pencil, Sticks or Powder entirely depends on the Artist whichever form of Charcoal they are comfortable using. Some Artists avoid powders while some use only powders. For a beginner a ready small pack with three black pencils, one white pencil, sharpener and eraser is good to go. Sometimes I use black and brown Pastels instead of Charcoal Sticks. Yes! We can mix the two in the same Artwork. They work well.
If it’s only Charcoals you wish to work with, your selection will be something like this:

1) Three Charcoal Pencils – 2B, 4B, 6B in Black
2) A White Charcoal Pencil
3) 2-3 Stumps (a ready pack of standard sizes) or you may use cotton buds or your own fingers to blend if you are comfortable. Any brand will do.
4) A Kneaded Eraser – I call it a magic eraser. It is specially for this purpose. It is often included in combo packs or can buy it individually.
5) Charcoal Sticks – This is usually a ready pack of only sticks.
6) Sharpener for your Pencils
7) Charcoal Powder – You would need stumps to apply this. Colours like blacks and browns are most commonly used. Other colours are available but it’s up to you.
If you already have Graphite Pencils it would be better to buy only the smallest combo pack of charcoal pencils and try it out first. Even if you make the other purchases later it will be less costlier than a otherwise all included big combo. So now you know all about your Pencils. Looking forward to doing some Art next. Have an Arty Weekend!

Ever gone to an Art store and wondered ‘To buy or not to buy’ that is the question! And if you go with your kids, they will want to buy everything they can see on that shelf. Hehe..it happens with all of us. However it is not practical to stock so much. Also, it may end up being a waste of money or material. We all want to buy tons of Art Supplies especially when the display is so attractive. So then how to keep both your art appetite and your pocket happy at the same time? Knowing your Art Materials might help make an informed decision and select a product suitable for you.
This time I’m doing an article on the different Pencils you can use for your Art. I will cover all the type of Pencils available in the market and their use. I do not endorse any brand and hence will not mention any names, just how to make your selection based on your understanding of the product. This is not a product review but a know your Art Materials post. Based on my experience of using these, I will share a few special tips too!
Graphite Pencils: Graphite or Lead encased in a cover of plastic, paper or wood. The lead is used for drawing or writing. We all know that right! These are available in different grades depending on the hardness or softness of the lead. Here in India, we use an HB pencil most often for writing. The Pencils I use for drawing and shading or sketching are 2B, 4B and 6B. ‘B’ stands for blackness while ‘H’ stands for hardness. The pencil grades meter will show this. Higher the number, darker the pencil finish, softer the lead better for shading and smudging. You could go for the ready set or buy only selected ones as per your requirement. I prefer buying single pieces because I don’t use the other grades, so for me it is a waste to buy the entire set. Further if I use up a lead faster than the other, I keep more of those. I buy more of 2B pencils and maybe just one 6B pencil. You could do the math and in all probability it will even turn out more economical also. Just these three pencils is enough at the beginners level and even on a professional level. Once you take up pencil shading commercially or professionally you may want to invest in a complete set of any good brand suitable to your use.
Coloured Pencils: Coloured Pencils are made of a Pigment (colour) and a binding agent that binds this coloured powder. There are three types of coloured pencils based on the material they are made up of – wax based, oil-based and water-soluble. A pencil that has vibrant colour, a soft but strong lead that presses the colour well on to the paper but does not break easily while making bold strokes is considered as good quality coloured pencil. These are generally bought in a set. More the number of shades, more fun for an artist to colour the picture. 24 or 48 colours is considered a large variety but you even get up to 150 shades in a box for professionals. It is a one time investment because one box can last you for years unless you misplace a few shades. Rarely can one run out of a shade because they used it all up.
Waxed based coloured pencils have a soft lead and are slightly difficult to blend as compared to the others. I prefer oil-based coloured pencils – the lead is soft but sturdy, remains sharp, doesn’t dry out fast, pigments are nice, layering and blending can be done easily. Actually even for crayons I prefer Oil Pastels. So actually it is like the same family and works well if you use different mediums in the same Artwork. Wax based coloured pencils are less expensive than the others.
Water Soluble or Watercolour Pencils or Aquarelle Pencils : As the name suggests are water based. They can be used dry or wet. The dry version gives a lighter colour but once you use water over it, it gives an almost watercolour like finish. Once you paint something, you use a plain water brush over it and blend the strokes. Washable with water or removable, you can use these to shade or highlight in your watercolour paintings. We even get water soluble ink pens or watercolour brush pens. This combination works for those who do watercolour paintings.
We cannot use a water based colour on an oil based colour or a wax based colour. However we can use a wax based or oil based colour on a water based colour. Many people use wax based and oil based interchangeably. An important point to note here is that all three types are not manufactured by all brands. This is their point of differentiation. It means a difference in price, quality and finish. Reading up a little about the brand and which type of pencils they offer will surely help in making your selection.
Further like all Art materials even Coloured Pencils are available in two categories :-
1) Artist Quality 2) Student Quality
Most brands offer both. An Artist Quality will have better colour quality meaning more pigment less binder and will be more expensive than the student quality. So check the label and buy as per your usage. I generally prefer buying Artist Quality even if it lesser number of shades. For a school going child you may want to buy Student quality just in case the child misplaces or breaks them. The price difference can be substantial at times.
Many people feel coloured pencils are for children. That isn’t true. Adult Colouring is trending. It is a stress buster and many Adults are taking to colouring these days. Adult colouring means the colouring pages will have pictures with details or smaller colouring blocks as compared to colouring books for children which have pictures with a larger colouring blocks. There are ample colouring pages and books available in the market. Sometimes they are free. It is a good way to pass time while travelling too!
I will share about other Art Pencils – Charcoal, Pastels, Woodless Pencils in my next post. Have an Arty Weekend!

My Niece gave me a handmade Greeting Card recently. It felt so nice to know that someone thought of me and made me something special. I feel giving someone a handmade Greeting Card adds a personal touch. With the festive season approaching I thought it would be nice to share a simple and easy method to make a handmade Greeting Card using Ink Pens and Watercolours. I have shared two designs but you can always be creative and add your special touch to it. You can do traditional designs or even contemporary illustrations with the same technique.
First let us collect the Art Material that we will need :
1) Pencil and Eraser – I usually use a 2B pencil and a regular eraser
2) Ink Pens of any good brand with Waterproof Inks or Archival Inks – Waterproof will be written on the pens. These are available in different tips ; sizes, colours and brushes. A notable feature of these pens is that once the ink dries, you can easily use watercolour over them. It won’t smudge.
3) Drawing Paper or Card Paper with a minimum thickness of 180 – 200GSM. Basically a paper suitable for Watercolour Paintings. A notable feature here is that the paper absorbs the water and doesn’t peel off with use of water. Ideally 300 GSM is very good for Watercolour but it is too thick to fold for a Greeting Card.
4) Watercolours (Any colour; Tubes or Cakes) and Brushes
5) Compass, Ruler, Protractor and/or other Measuring Tools (Optional)
The process:-
1) Draw your design using the measuring tools in Pencil.
2) Use a pen with a thin tip like ‘005’ or ‘01’ and outline the Art. Do only the main outline. Don’t fill in the details yet. The idea is to block the main markings which will assist when you paint after doing the background. If you are very confident you can directly paint after the background but for most people these markings make it neat and easy.
3) Erase the extra pencil markings.
4) Use watercolours and shade the background with colours of your choice. Kindly avoid gouache paint or thick paint, it will make the steps listed below difficult.
5) Let it Dry completely. I list this as an important step. This is so that your pen tips do not get spoilt with moisture or excess colour that isn’t dried yet. It is the same reason I asked to avoid thick paint.
6) Now paint the details to your Design using the waterproof ink pens. This will be the final look.

You may use colour pencils, coloured pens and embellishments to add some aesthetic touches to your work. There you go! Last but not the least write your personal message and our beautiful handmade Greeting Card is ready! Wishing everyone a very Arty Weekend!
Pro Tip – You may also combine this with Paper Quilling and Stamping.
Very often people ask me this question “What should I draw?” Let’s solve this puzzle together today. Art is an expression, so when this question comes to your mind, it means you are thinking of how to express your thoughts. Look around you, look at your world. Your environment including the objects around you, the places you see, the people you meet and the feelings you experience – all of them can be your inspiration. I think God must have been an artist to have created such a beautiful world. Nature inspires me the most. I like drawing birds and flowers a lot.
‘ I recently visited a Park and I was amazed by the show put up by the elephants in the evening. We could play with them and even ride on them. It was a memorable evening. Do you want to capture that memory on paper?’ Just as people express themselves by sharing a talk or an essay, in the same way we artists express ourselves using pencils and paint. So a drawing is essentially what I saw and felt, making it my version of the experience – my essay. Now that I have my muse! Great! That is what I shall draw.
The process is simple. Go with the flow. Keep a diary to note pointers or rough marker sketches when an idea hits you. Over a few days short list and pick the idea you wish to take forward. Convert it to your final work. Not all ideas will get cleared. It is ok to leave a drawing incomplete, come back to it later or not pursue it further at all. It happens all the time. If you feel you don’t have an idea to pursue, it means you need to take a break and unwind. You need collect some new experiences to continue your journey. After the unwinding, when you are back to your desk you will be refreshed and ready to pick up your brushes and complete your Artwork to your satisfaction.
The biggest mistake we can make is to look for inspiration online. It is ok to look for reference on the Internet but don’t look for inspiration. Copying a drawing someone else made will mean the end of your Art Journey. It is like selecting from an already filtered bunch. Most people hit a roadblock doing this as it limits one’s scope to grow as an artist. May be you saw something which the other person did not see. Everyone reads the book but they all understand it differently. We want to see it from your eyes! A good Artist is someone who can express his or her message clearly through the artwork.
What all do people usually draw and paint? Here is a broad spectrum of possible things to draw and paint.
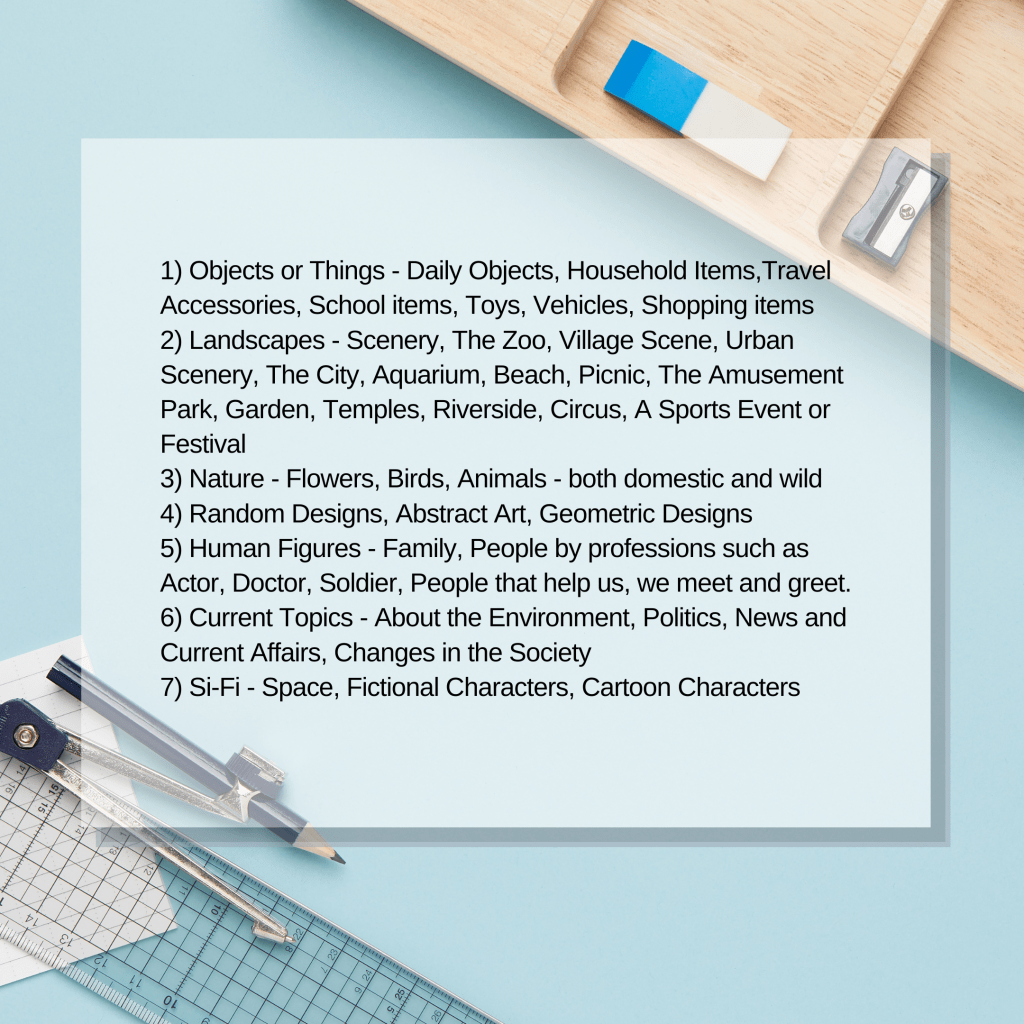
Let’s try and list some specific topics to draw. This should get the ball rolling.

This is not an exhaustive list. The purpose of this article was to share with you the process so you can do it easily all by yourself. The list is never exhaustive, it keeps changing. So keep your eyes open, look and observe! Anything could be your next inspiration, you never know!
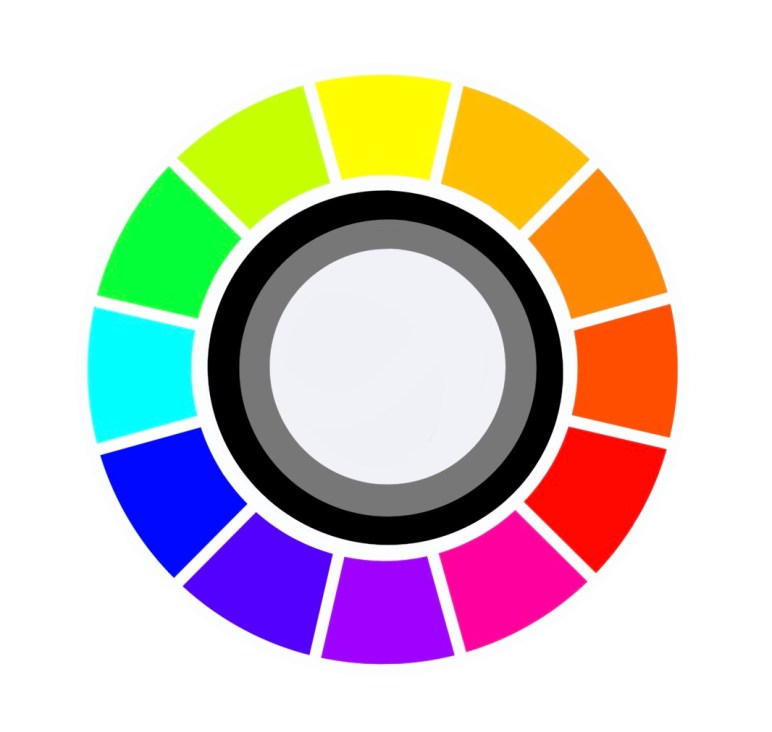
How is understanding colours going to help me? It is always helpful to know about the Colour Wheel for any common person as well as a professional. Clicking and posting pictures, decorating your home, choosing what to wear or working on good display and print graphic ; knowing your colour wheel will definitely give you an advantage over the others.
I did this story on Instagram and It was loved so much that my Insta friends wanted me to do another one on similar lines. Information on what is a colour wheel is readily available on the internet so this article is about understanding its relevance or where and how to apply this knowledge. Further instead of looking it up at different places this time you would have the information all on the same page.
Primary Colours : Red, Yellow, Blue are a set of colours that are used to mix and obtain other colours.
Secondary Colours : Orange, Green, Purple or Violet are obtained by mixing two primary colours.
Tertiary Colours : Yellow-Orange, Red-Orange, Blue-Green, Yellow-Green, Red-Violet, Blue-Violet are obtained by mixing primary and secondary colours.
RGB (Red Green Blue) the primary colours of light are used by monitors and screens of gadgets. Take a projector light, cover the screen with a translucent paper of a primary colour and cover it. Now project these coloured lights on to a white wall. You will see a secondary colour when two lights are projected at the same spot. Try it!
CMYK (Cyan Magenta Yellow Black) are primary colours of pigment. These are used in printers. See your print cartridges labelled in these. Now suppose you ask the printer to print a picture with multiple colours, the print machine prints using combination of these primary colours to get more colours.
A combination of RGB creates white while CMYK creates Black. That is why colours differ a little bit when you see them on screen and in print.
A colour box that contains primary colours and neutral colours Black and White is enough to mix and get other colours. Neutral means without any colour : Black, White, Grey. A colour mixed with white is called ‘Tint’, a colour mixed with grey is called ‘Tone’ and a colour mixed with Black is called a ‘Shade’. That is Tint, Tone, Shade of a Colour.
This should help you select colour schemes when painting your next masterpiece. So for summers if your designer says the collection is in Pastels or tints of various colours you will know it right away.
Contrasting colours are colours that are opposite on the colour wheel, that is they cancel each other and result in black or white when mixed. They are the most contrasting colours. So Red-Green, Orange-Blue, Yellow-Violet are contrasting colours. Oops! Did you get a very red pimple or scar on your face? Don’t fret, use a green colour corrector before applying the foundation. This should do the trick!
This was a quick, short tutorial on understanding colours. You must try some practical exercises or games with these concepts and you will never forget this basic understanding of colours.
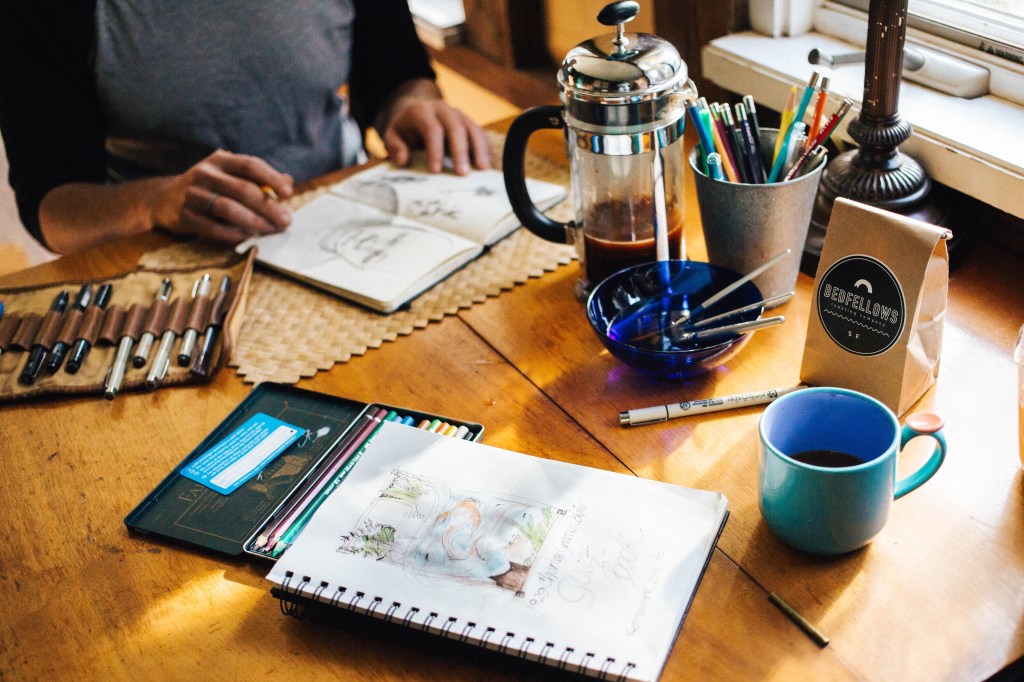
Ever since I can recollect my Art kit goes with me wherever I go. It evolved over the years, a few tools got added, a few subtracted but till date I have a pouch that has my pencils, pens and colours that go with me even if I am on a holiday trip. I don’t know how that sounds but it is like packing toothbrush and essentials for me. I guess that is what it is when you are passionate about Art.
A sketchbook or some paper sheets and some Art Tools is what my portable Art Kit includes. Initially the Art kit would include pencils in 2B, 4B and 6B lead tips and an eraser. This much is enough for making Art using the pencil shading technique.
Then I added a box of watercolour cakes with primary colours and two round brushes – one in size 2 and another in 6 or 8, a black Ink brush pen or any outliner pen that you would like to use. This much is enough for making Watercolour Art. I understand you know that a pencil and eraser to draw or make some marking before colouring are already there.
The Art kit that I now carry along with me is a combination of the two above. It includes the three pencils, a magic eraser, Ink pens for Artists in three nib sizes along with my sketchbook. Sometimes I also take along the watercolour box and a brush. All this fits in a pouch or zipper pencil case. It does not contain water or any liquids so it is suitable to carry easily in the handbag while travelling. Something like a makeup kit. Pointed objects like compass or rounder and sharpeners are not allowed when you travel by air, so make sure you don’t carry them along if you are travelling by air.
There are trips planned for artists now a days and many artists do Art on the go. So the next time you see a beautiful scenery and want to put it on paper or just want to pass time at a waiting lounge you know your Art kit will come handy.
Sharing a some pictures from my A5 sketchbook done on the go!

