‘Healing with Art – Art Therapy’ by Guest Blogger – Dr.Wilona Annunciation (MD)

Art is something that makes you breathe with a different kind of happiness.’Anni Albers

I cannot describe the emotions that Art stirs up in me! The eager anticipation of what I would take up for that Art experience, the planning for how to go about it, the gathering of supplies, the actual creation of the artwork and finally the feeling coursing through me, when I complete the piece and sit back to admire and critique what I have done! I have spent so many happy, excited, enthusiastic, unexpected, doubtful, confused, irritated, impatient moments that I have grown through each of my brushes with Art! And so, as a Psychiatrist, I find it absolutely intriguing the way people emote and express through their artistic creations.

Artworks by Dr. Wilona Annunciation

While Art began to be used in treatment as a form of Therapy as early as 1942, it started off more as a form of Catharsis for patients suffering from Tuberculosis. So as to “build up a strong defence against their misfortunes”. In mental health, Art as a form of Therapy has now evolved and come a long, long way from those early days. Today, Art based Therapists work in sync with Psychiatrists, Occupational Therapists, Remedial Educators and other Mental Health Professionals to ensure a holistic recovery of their patients.

As a young psychiatry post graduate, I was trained thoroughly in basics like history taking, mental status examination, criteria for diagnosing disorders and the medical treatment options. However I often found, that while my patients did well and improved with medicines, there would be a pause when I asked, ‘Do you feel your life is back to the pre disorder levels?’. Often patients said that they were definitely better but something was missing and another doubt that kept nagging me was, how do I help them prevent further episodes! Once I started my private practice, I actually realised the advantages that effective therapy brought to patients and I found myself encouraging patients to look at the combination of medications and therapy as the best possible mental health solution.

Over the last 10 years in Mental Health, I have seen a good number of my patients, struggling with the concept of expressing themselves in words. And here, for some, Art has been the saving hope. I have had children emote through their Doodles, teens struggling to talk about what they are experiencing draw Graphic Images, Images of their thoughts, young adults express their rage though Colours, middle aged persons showcase their anxieties through Art and elderly describe their hope in the change in their Patterns of Drawing. And this has helped me modify the medications to help them improve their quality of life.

I have been fortunate to work with an excellent Arts Based Therapist who has taught me some valuable lessons which have translated into my work and personal life. One of these was that there are no mistakes in art, only opportunities. Such a beautifully empowering idea, isn’t it? It makes you ponder about the pressure we put on ourselves not to make a mistake, but in Art every mistake is an opportunity to redefine whatever we are showcasing and an invitation to make it our own creation. This thought has made me so much kinder to myself, because I would often criticise myself if there were mistakes. In the pursuit of perfection, I would lose my sense of appreciation for what is. I am now more mindful of that.

I now look at Art Therapy as a valuable tool I can offer patients who are so inclined, to be expressive, to vent emotions and to reflect and meditate on their own goals and honestly, I have seen some wonderful transformations! Whether it is making Art or viewing others Art, this form of Therapy, believes in the expression of creativity as a means of fostering, healing and promoting recovery from some serious mental health concerns. I have seen it at work in patients with anxiety, depression, personality disorders, sleep cycle disorders and PTSD. It can be used alone or in conjunction with other forms of therapy like CBT, group therapy or the gestalt approach to bring about an increased self-awareness and shift towards self-development in the patient. But it is hard work and it requires dedication. Just like any other change you want to bring permanently in your life, whether it is healthy eating, regular exercise, better sleep hours, mental health through Art Therapy will require your motivation and commitment.

If you feel, this might be the approach for you to address your mental health concerns or goals for self-development, do consider reaching out to an Arts based Therapist. You will need someone who has studied both Psychology and Arts based therapy to work with and you may need to speak to the person before you decide the fit, but do reach out! We are in difficult times and in the process of making sense of our struggles. We may need a helping hand and it is completely ok to ask for it.

Artwork by Dr. Wilona Annunciation

Dr. Wilona Annunciation

For me personally, Art is a wonderful medium to just be ME! Imperfect, Vulnerable yet Beautiful!

Dr. Wilona Annunciation (MD) Consultant Psychiatrist at ‘Institute for Psychological Health’ & ‘Prafulta: Center for Psychological Wellness’

Serious about Art : The way ahead

In early times, people did Art to decorate their homes and objects of everyday living. It could be an individual or a group of people collectively working on something. It was mainly Designs and Patterns that could be done by more and more people. Then we came to know of better ways and did more realistic Paintings that conveyed stories. Sculpting, Photography and now Digital Art ; there is always something new and trending. Art is a way of expression. People express their feelings and experiences. Arts and Culture influence each other to a great extent. It is like they are interwoven. Internet and Globalisation made it a boundary less world. This opened up infinite opportunities in Art as well. For a creative person it is like a vast ocean. There is always so much too learn and do. I like to read up, see, learn and better my skills everyday. We are truly blessed to be able to have easy access to so many resources now.

“To practice any art, no matter how well or badly is a way to make your soul grow. So do it” – Kurt Vonnegut

Art is my passion, it’s Life. Your reason could be different : a stress buster, a hobby, a way to be social, helping your child with art at school, being a professional artist or having a part time or full time career. However if you are serious about Art, it is always better to take up formalised training. You have the talent, that’s super. Now all you need is the wisdom. I see many people write ‘Self Taught’ in their bio. It’s great! But just imagine! if you are so good when you learnt only by looking, how awesome will you be if you have a mentor, a guide or a teacher formally teach you!

I would say it is like a Tree. I was born with a liking, aesthetic sense, creativity and a good hand for Art – that would be the seed. I have to water it everyday – that would be practice. I have to add manure, fertilisers or food – that is knowledge. What I gain from this journey or growth over the years is wisdom. That makes me a full grown Tree. Don’t be in a hurry to monetise your work. Learn whatever you can, try your hand at different Art Styles. My friend told me ‘My daughter is really good at doing a flower, she keeps doing it.’ I think that’s absolutely ok but at least try the other things. How do you know if this is your best work or if you can do better unless you try?

By all means make as many mistakes as you can in the learning phase. You know what they say right ‘I didn’t make a mistake, I learnt a 100ways it could go wrong.’ It is True. Besides, being an Artist is also about letting go of the fear of being wrong. For an Artist, what makes him or her different from another Artist is himself. It is difficult to separate an Artist from his work. I could put it as ‘that one special move that you are so good at, makes your work different from the others’. That is why I feel if you are serious about Art, you would invest in yourself.

My artworks during school days

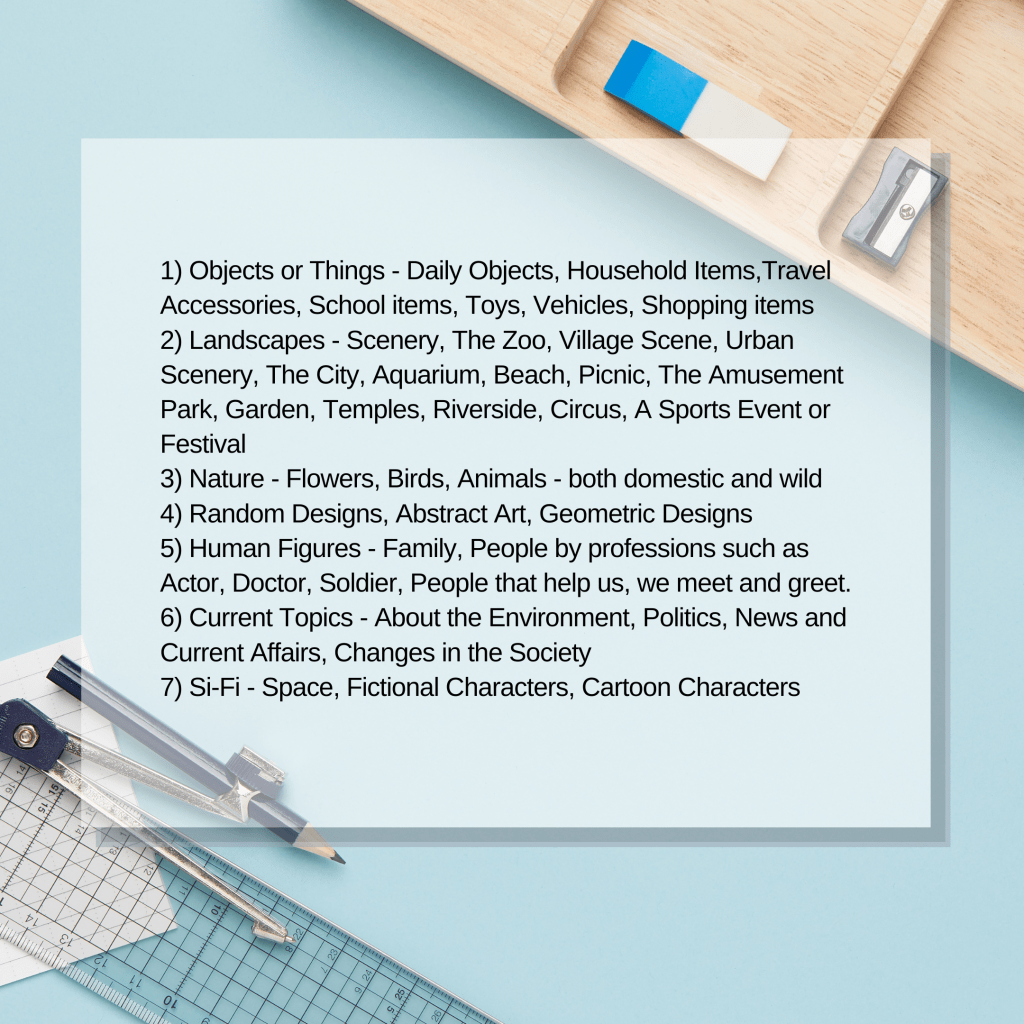
Most Art Schools and Universities have a system of grading and examinations. The format is similar for most Art Institutes. Knowing this early on can help prepare for the way ahead. Broadly these are five subjects. We can’t be selective and be very good at just one of them. Need to be relatively good at all of them. The subjects are:-

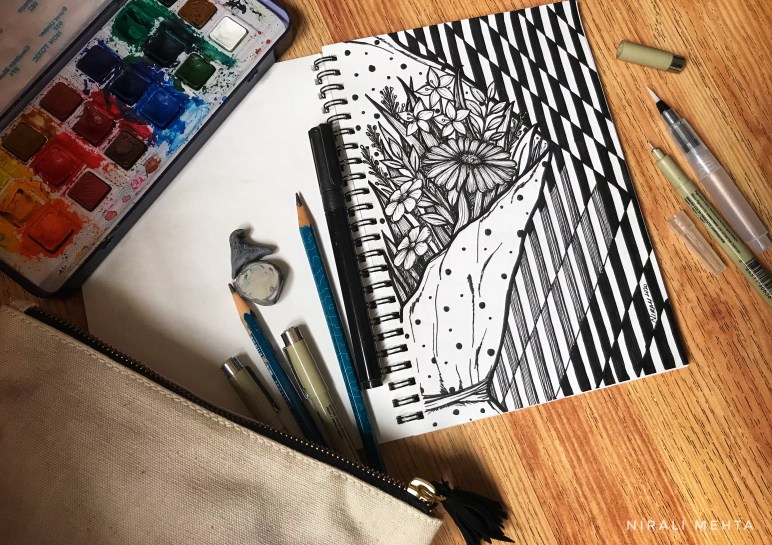
1) Nature Drawing – Drawing and Painting Flowers or Nature. They give flowers in the exams because they have to give something easily available, as there to so many students. It is about actually seeing these flowers in real and painting them. Use Watercolour. The more realistic it is with shadows and highlights, the more points you can score.

Preparing for the Art Exams

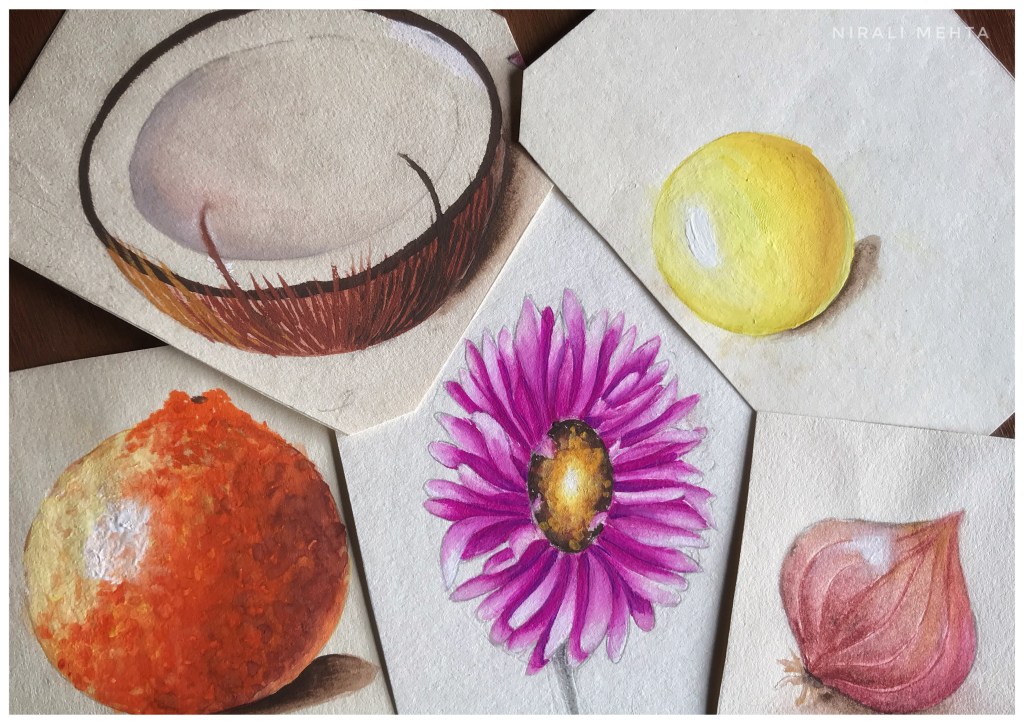
2) Object Drawing – Painting daily life Objects. Each material has a texture. Example the skin of an orange vs that of a coconut. Note and observe these details to make it look more realistic. Another way to score better is getting the right perspective. Were you looking at the objects from the front, right side, left side or extreme corner – your artwork should reflect that.

Memory Drawing – Fishermen

3) Memory Drawing – Drawing People and Places. It is called memory drawing because we are expected to draw what we saw by recollecting the memory. Select a topic which is something you have experienced or seen in real life. Obviously it becomes easier to draw that rather than something you just saw someone else draw. It will make your work more real and different. Creatively highlight your strengths by drawing what you draw best. Complete the background. A complete picture always makes a better impression.

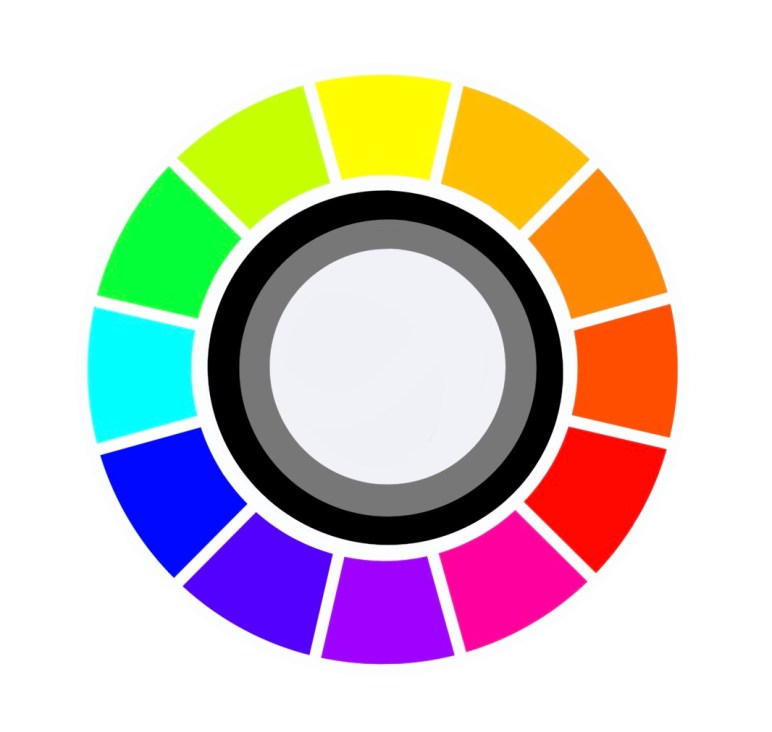
4) Design – The combinations and possibilities in Patterns and Designs are endless. Showing usability of a design or object you are designing scores a brownie point. Commercialisation and mass production of a Design is something most people look out for. For ‘Freehand Drawing’ you are given a design and asked to recreate it. Matching the colours, lines and curves becomes important. Basically the examiner wants to know how well you can replicate the design given to you.

Designs and Lettering

5) Geometry and Lettering – Geometry is about precise measurements. How well can you convey the meaning of the word, keeping it easy to read while having a unique font style? Lettering and Good Type done by hand requires a lot of handwriting practice. Commercialised version we all know as ‘Logos’. This is different from Calligraphy.

Designs and Lettering now most often are done digitally in the Industry for precision. However they will teach you to do these by hand first. It is always better to learn both methods – doing it by hand and digital.

Information is readily available on these subjects. So I thought I would share some additional tips which can help you score a few brownie points in these subjects. Use Gouache Colours for a nice neat look. Make sure you can complete your artwork in the given duration. Last but not the least practice. Try to do better than yourself each time. Taking up work that challenges you makes the learning interesting.

One request, please don’t use help from the digital tools – they will only get you followers on social media, nothing else. During my school days we were not allowed to use any measuring tools like ruler or compass except for Geometry and Lettering. We learnt how to draw without using these. There are methods how artists keep a scale with their eyes, which your teacher should be able to teach you.

I cleared my Intermediate Grade Exams in Art scoring a ‘Grade A’ and merit rank. Intermediate Grade Exams are senior level Art Exams conducted by the Maharashtra State Board and lakhs of students appear for it every year. You may or may not appear for the same exams but training in all these subjects surely helps. I scored ‘Grade B’ in the Elementary Exams (Junior). Then I had my teacher train me. The results you can see.

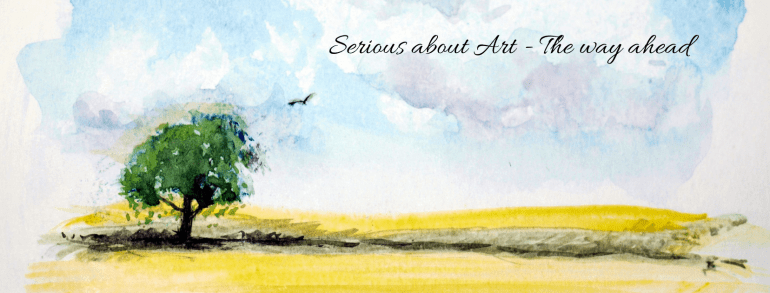
I also feel this system of training is holistic which creates a good base for taking up any specialisations in Visual Arts and Allied Arts. Once we know these, it becomes easier to pick up any new trends in Art. Further even to get into a good Art Institute we have to submit an Art portfolio on these lines or appear for entrance exams on these lines. So if you are serious about your Art, this is the way ahead! Have an Arty Weekend!

Please Note: All the artwork shared is my actual artwork I had done during my school days when I took these exams. Our references were books and previous years question papers.

Crafting Paper Flowers

Paper Flowers ; Decorate Paper Bags, Gift Tags or Greeting Cards for the Festive Season

‘For it is in giving, that we receive’ – St.Francis of Assisi

The Festive Season is coming soon. I love to select Gifts, wrap them up with fancy wrapping, add a small hand written note; thus making it special. Everyone likes to feel loved. Sometimes a thoughtful gesture and a little extra touch can bring so much joy. Today I’m sharing a very easy method to craft simple ‘Paper Flowers’. These flowers look pretty on Greeting Cards, Gift Tags or as Fancy Gift Wraps. Alternatively I have even used these to decorate Paper Bags, Pen Stands and even my School Projects. It takes just about 10mins to make these and the material required is usually available at home or can be easily purchased. You may creatively use materials from whatever is available to you, no need to buy anything.

Materials for Paper Flowers

Materials Required:

1) Sheets of Coloured Paper – Ready Packs of Coloured Paper for Crafting OR Printed Paper from discarded magazines OR Used Wrapping Paper ; As long as the Paper is foldable. Laminated thick sheets won’t work. Ready Packets are available as A4 or Square Paper Sheets in various colours.

2) Glue, Scissors and a Pencil

Optional Decorations

3) Paper Strips ( from a shredding machine) or Ready Paper Quilling Strips [Optional]

4) Embellishments [Optional]

5) Markers and Colours for any additional creativity [Optional]

Making the Paper Flowers – Part 1

Making the Flowers :-

Take a square sheet of Paper. Fold at mid length along the dotted lines as shown in the picture. Once again fold along the dotted line to get a folded square. Next fold matching opposite corners to get a triangle. Last fold, fold the triangle into half at the dotted line as shown. Draw and mark the shape of the Petal and cut along the blue dotted line.

How to fold the Paper

Please note the centre of the paper being folded becomes the pivot and centre of the flower. So all folds are made accordingly. Look at the reference picture below for help. It is shown as a green dot reference. Open up the Flower once it is cut. Make more flowers smaller and smaller each time. Layer them by placing one inside another.

Apply glue as a dot only at the centre to stick the flowers. Add a paper dot in the centre of the flower using a quilled circle or a punch hole from paper or an embellishment. Cut Leaves. I have shown two-three different leaves. Choose the ones you feel are easy. Arrange all this with optional decorations on your base Paper.

Making Paper Flowers – Part 2

Special Tip: It is always a good idea to make a bunch of flowers and leaves in odd numbers. Example 3 Flowers -5 leaves. It looks more natural.

Making it colourful and neat is more important. One does not require too much precision in this. Someone without much practice will also be able to make a flower as pretty as another. Anything natural is not perfectly in a line. The beauty lies in the imperfections. Creatively I used the extra crumbs from discarded cutouts of this paper as confetti in the background. It looks better when the background is complete. Go ahead try these and let me know if you enjoyed. Have a Crafty Weekend!

Pencil Mania – Part 2; Charcoals, Pastels and Woodless Pencils

A friend jokingly said “That is why I shop online, the Art Store displays are too tempting to resist.” I smiled and replied “Then do you end up buying all the recommended best sellers” Both of us burst out laughing. At the end of this friendly discussion we agreed that knowing your Art Material can definitely help save up some money.

In my previous post, I shared about Graphite and Coloured Pencils. Do refer to that to associate a connection with this post. In this post I will share about Charcoal Pencils, Pastel Pencils and Woodless Pencils. Woodless Pencils are Graphite Pencils without a casing. They are covered in a coat of lacquer. They are helpful in shading large areas. It is a helpful tool that you would want to add to your Art Kit, once you are confident in Pencil Shading. Similar to them are ‘Sticks’.

‘Sticks’ are like a thick block of pigment. They just have a sheet of paper wrapped around it or sometimes none. When we say ‘Pastels’ we normally refer to the stick form. If you want it in the pencil form, you need to ask for ‘Pastel Pencils’. Similar to Coloured Pencils even Pastels are pigment combined using a binder such as; wax, oil, gum, clay or water soluble.

Pastels are of two types 1) Hard Pastels 2) Soft Pastels.

Pastels

A special tip here – if you ask for crayons, you will get Wax based Pastels. Oil Pastels are also referred to as Hard Pastels in some countries. Many people call Oil Pastels as Crayons which may cause undue confusion. Pastels made using Clay as a binder are commonly called ‘Chalk’. Pastels made using Gum as a binder are referred to as Soft Pastels. Water Soluble Crayons are similar to Watercolour Pencils but are used mostly by children. Pastels are also available in the form of compressed powder palettes called Pan Pastels.

Both Charcoals and Pastels are available as Pencils, Sticks and in Powder form. Charcoals and Pastels are preferred by many Artists for sketching Portraits and Landscapes. The investment is relatively less than what an artist would have to make for doing other kinds of Paintings.

Charcoal is a form of graphite or carbon. In simple words it is ‘Soot’ or a burnt material. The lead tip of a Charcoal Pencil is made up of compressed Charcoal Powder. Charcoals made without using any binders are best preferred. This means it is a nice dark lovely black pigment. Charcoal Pencils are available as Soft-Medium-Hard. Each of these leads will create a different texture when rubbed against the paper. The smoothness of the paper also affects this texture. Just like Graphite Pencils even Charcoal Pencils will have grades like 2B-4B-6B ; higher the number, darker the pencil.

We get combo packs consisting of 2-3 different Graphite Pencils, 2-3 different Charcoal Pencils, a Sharpener, 2-3 different size Stumps, 1-2 Charcoal Sticks and a Kneaded Eraser. ‘Stumps’ are tightly wound paper sticks used as a blending tool. If you are a beginner and don’t know much about the material, you may want to go for a combo pack like this. It is enough to begin learning Charcoal Painting.

Charcoal Painting

Charcoal is mostly black as associated with coal. Can we say Charcoals are black, while Pastels are colour? No, because we get coloured Charcoal Powder as well. Just as explained in the previous post both these are available in two variants 1) Artist Quality 2) Student Quality

I thought I would first share what is available in the market and explain a few jargons and then share about selecting from these. Making a choice should now be easy!

‘Pastels Painting’ mostly refers to Soft Pastels. One box of as many shades as you like from a good brand is enough. Yes! Like Crayons, Oil Pastels and Coloured Pencils ‘more the colours, more the fun’. Hard Pastels don’t need blending while you can use your fingers to blend Soft Pastels. You can use Charcoal Pencils or Pastel Pencils for finer details because the sticks are too thick to draw a fine line. Pastel Pencils are Soft Pastels in Pencil form.

Charcoal Pencil, Sticks or Powder entirely depends on the Artist whichever form of Charcoal they are comfortable using. Some Artists avoid powders while some use only powders. For a beginner a ready small pack with three black pencils, one white pencil, sharpener and eraser is good to go. Sometimes I use black and brown Pastels instead of Charcoal Sticks. Yes! We can mix the two in the same Artwork. They work well.

If it’s only Charcoals you wish to work with, your selection will be something like this:

Charcoal Pencils, Powder, Sticks, Sumps and Kneaded Eraser

1) Three Charcoal Pencils – 2B, 4B, 6B in Black

2) A White Charcoal Pencil

3) 2-3 Stumps (a ready pack of standard sizes) or you may use cotton buds or your own fingers to blend if you are comfortable. Any brand will do.

4) A Kneaded Eraser – I call it a magic eraser. It is specially for this purpose. It is often included in combo packs or can buy it individually.

5) Charcoal Sticks – This is usually a ready pack of only sticks.

6) Sharpener for your Pencils

7) Charcoal Powder – You would need stumps to apply this. Colours like blacks and browns are most commonly used. Other colours are available but it’s up to you.

If you already have Graphite Pencils it would be better to buy only the smallest combo pack of charcoal pencils and try it out first. Even if you make the other purchases later it will be less costlier than a otherwise all included big combo. So now you know all about your Pencils. Looking forward to doing some Art next. Have an Arty Weekend!

Pencil Mania – Part 1 ; Selecting the right pencils for your Art

Ever gone to an Art store and wondered ‘To buy or not to buy’ that is the question! And if you go with your kids, they will want to buy everything they can see on that shelf. Hehe..it happens with all of us. However it is not practical to stock so much. Also, it may end up being a waste of money or material. We all want to buy tons of Art Supplies especially when the display is so attractive. So then how to keep both your art appetite and your pocket happy at the same time? Knowing your Art Materials might help make an informed decision and select a product suitable for you.

This time I’m doing an article on the different Pencils you can use for your Art. I will cover all the type of Pencils available in the market and their use. I do not endorse any brand and hence will not mention any names, just how to make your selection based on your understanding of the product. This is not a product review but a know your Art Materials post. Based on my experience of using these, I will share a few special tips too!

Graphite Pencils: Graphite or Lead encased in a cover of plastic, paper or wood. The lead is used for drawing or writing. We all know that right! These are available in different grades depending on the hardness or softness of the lead. Here in India, we use an HB pencil most often for writing. The Pencils I use for drawing and shading or sketching are 2B, 4B and 6B. ‘B’ stands for blackness while ‘H’ stands for hardness. The pencil grades meter will show this. Higher the number, darker the pencil finish, softer the lead better for shading and smudging. You could go for the ready set or buy only selected ones as per your requirement. I prefer buying single pieces because I don’t use the other grades, so for me it is a waste to buy the entire set. Further if I use up a lead faster than the other, I keep more of those. I buy more of 2B pencils and maybe just one 6B pencil. You could do the math and in all probability it will even turn out more economical also. Just these three pencils is enough at the beginners level and even on a professional level. Once you take up pencil shading commercially or professionally you may want to invest in a complete set of any good brand suitable to your use.

Coloured Pencils: Coloured Pencils are made of a Pigment (colour) and a binding agent that binds this coloured powder. There are three types of coloured pencils based on the material they are made up of – wax based, oil-based and water-soluble. A pencil that has vibrant colour, a soft but strong lead that presses the colour well on to the paper but does not break easily while making bold strokes is considered as good quality coloured pencil. These are generally bought in a set. More the number of shades, more fun for an artist to colour the picture. 24 or 48 colours is considered a large variety but you even get up to 150 shades in a box for professionals. It is a one time investment because one box can last you for years unless you misplace a few shades. Rarely can one run out of a shade because they used it all up.

Waxed based coloured pencils have a soft lead and are slightly difficult to blend as compared to the others. I prefer oil-based coloured pencils – the lead is soft but sturdy, remains sharp, doesn’t dry out fast, pigments are nice, layering and blending can be done easily. Actually even for crayons I prefer Oil Pastels. So actually it is like the same family and works well if you use different mediums in the same Artwork. Wax based coloured pencils are less expensive than the others.

Water Soluble or Watercolour Pencils or Aquarelle Pencils : As the name suggests are water based. They can be used dry or wet. The dry version gives a lighter colour but once you use water over it, it gives an almost watercolour like finish. Once you paint something, you use a plain water brush over it and blend the strokes. Washable with water or removable, you can use these to shade or highlight in your watercolour paintings. We even get water soluble ink pens or watercolour brush pens. This combination works for those who do watercolour paintings.

We cannot use a water based colour on an oil based colour or a wax based colour. However we can use a wax based or oil based colour on a water based colour. Many people use wax based and oil based interchangeably. An important point to note here is that all three types are not manufactured by all brands. This is their point of differentiation. It means a difference in price, quality and finish. Reading up a little about the brand and which type of pencils they offer will surely help in making your selection.

Further like all Art materials even Coloured Pencils are available in two categories :-

1) Artist Quality 2) Student Quality

Most brands offer both. An Artist Quality will have better colour quality meaning more pigment less binder and will be more expensive than the student quality. So check the label and buy as per your usage. I generally prefer buying Artist Quality even if it lesser number of shades. For a school going child you may want to buy Student quality just in case the child misplaces or breaks them. The price difference can be substantial at times.

Many people feel coloured pencils are for children. That isn’t true. Adult Colouring is trending. It is a stress buster and many Adults are taking to colouring these days. Adult colouring means the colouring pages will have pictures with details or smaller colouring blocks as compared to colouring books for children which have pictures with a larger colouring blocks. There are ample colouring pages and books available in the market. Sometimes they are free. It is a good way to pass time while travelling too!

I will share about other Art Pencils – Charcoal, Pastels, Woodless Pencils in my next post. Have an Arty Weekend!

Let’s make Greeting Cards with ease

My Niece gave me a handmade Greeting Card recently. It felt so nice to know that someone thought of me and made me something special. I feel giving someone a handmade Greeting Card adds a personal touch. With the festive season approaching I thought it would be nice to share a simple and easy method to make a handmade Greeting Card using Ink Pens and Watercolours. I have shared two designs but you can always be creative and add your special touch to it. You can do traditional designs or even contemporary illustrations with the same technique.

First let us collect the Art Material that we will need :

1) Pencil and Eraser – I usually use a 2B pencil and a regular eraser

2) Ink Pens of any good brand with Waterproof Inks or Archival Inks – Waterproof will be written on the pens. These are available in different tips ; sizes, colours and brushes. A notable feature of these pens is that once the ink dries, you can easily use watercolour over them. It won’t smudge.

3) Drawing Paper or Card Paper with a minimum thickness of 180 – 200GSM. Basically a paper suitable for Watercolour Paintings. A notable feature here is that the paper absorbs the water and doesn’t peel off with use of water. Ideally 300 GSM is very good for Watercolour but it is too thick to fold for a Greeting Card.

4) Watercolours (Any colour; Tubes or Cakes) and Brushes

5) Compass, Ruler, Protractor and/or other Measuring Tools (Optional)

The process:-

1) Draw your design using the measuring tools in Pencil.

2) Use a pen with a thin tip like ‘005’ or ‘01’ and outline the Art. Do only the main outline. Don’t fill in the details yet. The idea is to block the main markings which will assist when you paint after doing the background. If you are very confident you can directly paint after the background but for most people these markings make it neat and easy.

3) Erase the extra pencil markings.

4) Use watercolours and shade the background with colours of your choice. Kindly avoid gouache paint or thick paint, it will make the steps listed below difficult.

5) Let it Dry completely. I list this as an important step. This is so that your pen tips do not get spoilt with moisture or excess colour that isn’t dried yet. It is the same reason I asked to avoid thick paint.

6) Now paint the details to your Design using the waterproof ink pens. This will be the final look.

Step by Step DIY Greeting Cards

You may use colour pencils, coloured pens and embellishments to add some aesthetic touches to your work. There you go! Last but not the least write your personal message and our beautiful handmade Greeting Card is ready! Wishing everyone a very Arty Weekend!

Pro Tip – You may also combine this with Paper Quilling and Stamping.

What should I draw?

Very often people ask me this question “What should I draw?” Let’s solve this puzzle together today. Art is an expression, so when this question comes to your mind, it means you are thinking of how to express your thoughts. Look around you, look at your world. Your environment including the objects around you, the places you see, the people you meet and the feelings you experience – all of them can be your inspiration. I think God must have been an artist to have created such a beautiful world. Nature inspires me the most. I like drawing birds and flowers a lot.

‘ I recently visited a Park and I was amazed by the show put up by the elephants in the evening. We could play with them and even ride on them. It was a memorable evening. Do you want to capture that memory on paper?’ Just as people express themselves by sharing a talk or an essay, in the same way we artists express ourselves using pencils and paint. So a drawing is essentially what I saw and felt, making it my version of the experience – my essay. Now that I have my muse! Great! That is what I shall draw.

The process is simple. Go with the flow. Keep a diary to note pointers or rough marker sketches when an idea hits you. Over a few days short list and pick the idea you wish to take forward. Convert it to your final work. Not all ideas will get cleared. It is ok to leave a drawing incomplete, come back to it later or not pursue it further at all. It happens all the time. If you feel you don’t have an idea to pursue, it means you need to take a break and unwind. You need collect some new experiences to continue your journey. After the unwinding, when you are back to your desk you will be refreshed and ready to pick up your brushes and complete your Artwork to your satisfaction.

The biggest mistake we can make is to look for inspiration online. It is ok to look for reference on the Internet but don’t look for inspiration. Copying a drawing someone else made will mean the end of your Art Journey. It is like selecting from an already filtered bunch. Most people hit a roadblock doing this as it limits one’s scope to grow as an artist. May be you saw something which the other person did not see. Everyone reads the book but they all understand it differently. We want to see it from your eyes! A good Artist is someone who can express his or her message clearly through the artwork.

What all do people usually draw and paint? Here is a broad spectrum of possible things to draw and paint.

All you can draw

Let’s try and list some specific topics to draw. This should get the ball rolling.

10 Topics to Draw

This is not an exhaustive list. The purpose of this article was to share with you the process so you can do it easily all by yourself. The list is never exhaustive, it keeps changing. So keep your eyes open, look and observe! Anything could be your next inspiration, you never know!

Understanding Colours

How is understanding colours going to help me? It is always helpful to know about the Colour Wheel for any common person as well as a professional. Clicking and posting pictures, decorating your home, choosing what to wear or working on good display and print graphic ; knowing your colour wheel will definitely give you an advantage over the others.

I did this story on Instagram and It was loved so much that my Insta friends wanted me to do another one on similar lines. Information on what is a colour wheel is readily available on the internet so this article is about understanding its relevance or where and how to apply this knowledge. Further instead of looking it up at different places this time you would have the information all on the same page.

Primary Colours : Red, Yellow, Blue are a set of colours that are used to mix and obtain other colours.

Secondary Colours : Orange, Green, Purple or Violet are obtained by mixing two primary colours.

Tertiary Colours : Yellow-Orange, Red-Orange, Blue-Green, Yellow-Green, Red-Violet, Blue-Violet are obtained by mixing primary and secondary colours.

RGB (Red Green Blue) the primary colours of light are used by monitors and screens of gadgets. Take a projector light, cover the screen with a translucent paper of a primary colour and cover it. Now project these coloured lights on to a white wall. You will see a secondary colour when two lights are projected at the same spot. Try it!

CMYK (Cyan Magenta Yellow Black) are primary colours of pigment. These are used in printers. See your print cartridges labelled in these. Now suppose you ask the printer to print a picture with multiple colours, the print machine prints using combination of these primary colours to get more colours.

A combination of RGB creates white while CMYK creates Black. That is why colours differ a little bit when you see them on screen and in print.

A colour box that contains primary colours and neutral colours Black and White is enough to mix and get other colours. Neutral means without any colour : Black, White, Grey. A colour mixed with white is called ‘Tint’, a colour mixed with grey is called ‘Tone’ and a colour mixed with Black is called a ‘Shade’. That is Tint, Tone, Shade of a Colour.

This should help you select colour schemes when painting your next masterpiece. So for summers if your designer says the collection is in Pastels or tints of various colours you will know it right away.

Contrasting colours are colours that are opposite on the colour wheel, that is they cancel each other and result in black or white when mixed. They are the most contrasting colours. So Red-Green, Orange-Blue, Yellow-Violet are contrasting colours. Oops! Did you get a very red pimple or scar on your face? Don’t fret, use a green colour corrector before applying the foundation. This should do the trick!

This was a quick, short tutorial on understanding colours. You must try some practical exercises or games with these concepts and you will never forget this basic understanding of colours.

Artist on the Go!

Ever since I can recollect my Art kit goes with me wherever I go. It evolved over the years, a few tools got added, a few subtracted but till date I have a pouch that has my pencils, pens and colours that go with me even if I am on a holiday trip. I don’t know how that sounds but it is like packing toothbrush and essentials for me. I guess that is what it is when you are passionate about Art.

A sketchbook or some paper sheets and some Art Tools is what my portable Art Kit includes. Initially the Art kit would include pencils in 2B, 4B and 6B lead tips and an eraser. This much is enough for making Art using the pencil shading technique.

Then I added a box of watercolour cakes with primary colours and two round brushes – one in size 2 and another in 6 or 8, a black Ink brush pen or any outliner pen that you would like to use. This much is enough for making Watercolour Art. I understand you know that a pencil and eraser to draw or make some marking before colouring are already there.

The Art kit that I now carry along with me is a combination of the two above. It includes the three pencils, a magic eraser, Ink pens for Artists in three nib sizes along with my sketchbook. Sometimes I also take along the watercolour box and a brush. All this fits in a pouch or zipper pencil case. It does not contain water or any liquids so it is suitable to carry easily in the handbag while travelling. Something like a makeup kit. Pointed objects like compass or rounder and sharpeners are not allowed when you travel by air, so make sure you don’t carry them along if you are travelling by air.

There are trips planned for artists now a days and many artists do Art on the go. So the next time you see a beautiful scenery and want to put it on paper or just want to pass time at a waiting lounge you know your Art kit will come handy.

Sharing a some pictures from my A5 sketchbook done on the go!

My first Art

“What is the easiest drawing to begin with? I want my child to learn drawing, where and what should I start with?” This is a question I am asked often. In this article I will share two different drawings that are simple and easy for a child to begin with. These were the first pictures I learnt to draw and colour as well. Yes! I said colour and not paint. That brings me to the selecting the Art material.

Paper: Use large sheets. Drawing a small circle for an adult is often a big circle with the movement of hand for children. They tend to fill up colours better in larger drawings. Further use a sheet of paper that is prone to high erasing. I often used box board (white duplex board) sheets as my drawing paper during my earlier days of learning.

What else do I need? A good pencil and a good eraser. A new pencil that is big is better for grip. If they are still learning to hold a pencil it is all the more important to have a pencil the child would be comfortable using. Use a slightly rounded tip pencil, meaning don’t sharpen it to a very pointed tip. This would ensure the paper doesn’t have dents after erasing the extra lines. Now for the Colours – I recommend using Oil Pastels. I didn’t say crayons nor did I say paint. Oil pastels of any good brand but a large number of colour shade options. The more colourful picture they can make the better. Since they don’t know much about mixing shades, having more shades in the colour box helps the child make a nice attractive drawing. Now that you are ready with the materials let’s decide a topic.

1. Under the Sea

2. My Home

Under the Sea Drawing for Kids
My Home drawing for kids

I have shared a drawing for each topic. You may use it as a reference or idea to begin with. Once the pencil sketch is ready, colour it in your own way. Sounds easy! So let’s begin to draw 😀 Do share your finished Art piece with me, I would be happy to see it.