Drawing without using a Scale or a Ruler

“My son draws well. Look! At five he can draw so well. I couldn’t even draw a circle at his age. Do you think I should encourage him to take up Drawing? Enrolling in classes isn’t happening any time soon. But I don’t want him to waste this time either. What should I do?”

This is a common query I received, more so in the last year. There is a possibility that the parent was not all that good at Art but the child is blessed and talented in Art. With home schooling ‘Art or Drawing’ as a subject is often neglected. The concentration is more on the other book and score subjects. But if your child is good at Art, how can you help him sharpen his skills? Even if you are not very good at it yourself!

Pottery
Shaping the earthen Pot

Have you seen a potter make his earthen pots? He shapes them, bakes them and once it’s dry : the shape is fixed, it’s strong and sturdy. It is the same with any sort of training. Same with Art too! We have to ‘train the hand.’ A child’s hand at Art is exactly like that soft mud of the earthen pots that can be shaped. It then becomes important to shape it correctly. Otherwise the pot might not turn out they way you wanted it to, even if the mud was suitable and perfect for making pots. I hope you get the point. Once we learn to draw using instruments we cannot unlearn and draw without them. Most Art schools do not allow the use of scale or rulers or any instruments for that matter.

The most easy access these days is video tutorials on Art. I like them, some of them are really good. My only issue is the foundation. Online tutorials are good for additional inputs or bettering something you already know. On the other hand if you were to learn something you don’t know anything about, I’m afraid the online videos would mean learning in a haphazard manner. Skipping steps and jumping because this system of learning is about convenience and many times they don’t show all the steps.

Besides when we do something by ourselves : we do more of the stuff we like over and over again while we leave out the parts we find difficult. No! Please don’t mistake that as practice. Practice is doing anything we are learning again and again to be better at it.

If you have a good foundation and learn the basics, then learning from anywhere including video tutorials will be very quick and easy. For my calligraphy class we practiced lines and curves for a month, till I got them right. My teacher taught me how to hold the pencil while drawing by actually clasping my fingers and making me do those lines again and again for months until I could draw them fluently.

That comes naturally to me now, like it’s a part of my movement. Just like the hardened earthen pot. My hand has taken shape. No doubt it takes time and practice. And every teacher has a different method of teaching. In this post I am trying to tell you what these foundation materials are. So when your child learns to draw you can make sure they begin from step 1 and build a strong foundation. These things can be taught only in person, so it puts the onus on the parent.

It may be boring but when a drawing teacher makes the child draw lines and shapes for the first few classes, don’t be in a hurry for them to begin drawing actual meaningful stuff. It’s like running even before your learn to walk. First learn to stand, then walk and then run. In the same way draw lines, curves, shapes neatly in clear strokes. In future for anything we draw we first draw rough lines and curves and then the final shape.

Pro Tip here: Use a 2B pencil slightly blunt to draw. Use a regular pencil and not the pen-pencil or changing points fancy pencil as your first drawing pencil. Even if you use them select a 2B lead. HB lead is for writing dark and legible- not for drawing. Strokes drawn with a 2B pencil are light and can be erased easily.

Learn to draw 1
Pic 1 : Holding the Pencil and Drawing lines
Learn to Draw 2
Pic 2: This is to write. Wrong way to hold for Drawing

Consciously make a note and see how you hold the pencil when you draw. Holding it like shown in the second picture will give hard dark lines that are difficult to erase and restrict movement for large strokes. Try it! While in the first one you will be able to move the pencil freely, drawing long lines in a single stroke without lifting the pencil. We can also see what we are drawing. Can draw by lightly touching the paper and strokes can be erased without leaving any marks.

Learn to draw 3
Pic 3: Drawing different Shapes

Practice drawing different shapes. Here in one of the pictures I have drawn the axis and then the circle showing a glimpse of how we use reference lines for drawing. Next to that is circles directly drawn. The axis have to be straight because the rest of the drawing depends on it. Further most drawings are combinations of basic shapes. Practising these ensures training the hand for free movements to draw.

Learn to draw 4
Pic 4 : Drawing a straight line with help of edge

I am holding the pencil differently to draw this border without the use of a scale. It measures to about half inch border on all sides. I take the help of my drawing board or book edge to lock my fingers and steadily draw a line parallel to it. Warning!! Please be careful the edge of a new paper is sharp enough to cut your hand. Try this only under supervision of an expert.

This is about drawing lines without using a ruler or a scale. Below I am showing ‘How to measure and draw symmetrical drawings without using a ruler or scale’ or any other measuring instrument.

Pic 5 : Drawing Symmetrical Objects

I am using the drawing pencil to measure and make markings to draw a symmetrical object. Here one half side is drawn and I have to match the other side to complete the object. Following the steps :-

  • Half side is drawn and I have made axis at major turning points.
  • Measuring the distance of the intersection point on drawn side with the pencil.
  • Making the same intersection markings on the other side.
  • See all the marked points. Can make points for the length and width as required.
  • Join all the points to match the drawn half.
  • Erase or add markings and corrections till they look visually same.

This method of measuring is also used while drawing live in person. That is when the subject you are drawing is in front on you. When we draw from a picture we make a similar grid and then match points to draw alike. They say the measuring tools are in the eyes of the artist. However not everyone is so good at it and so these other methods can be helpful.

Drawing this vase also demonstrates how we use lines and curves while drawing. These are basics and the foundation to drawing. Once you learn to draw like this, I am sure you will be able to draw most of the things. Have an Arty Weekend!

Let’s get you in a Frame! Selecting a suitable Frame for your Art and Creating an Art Wall

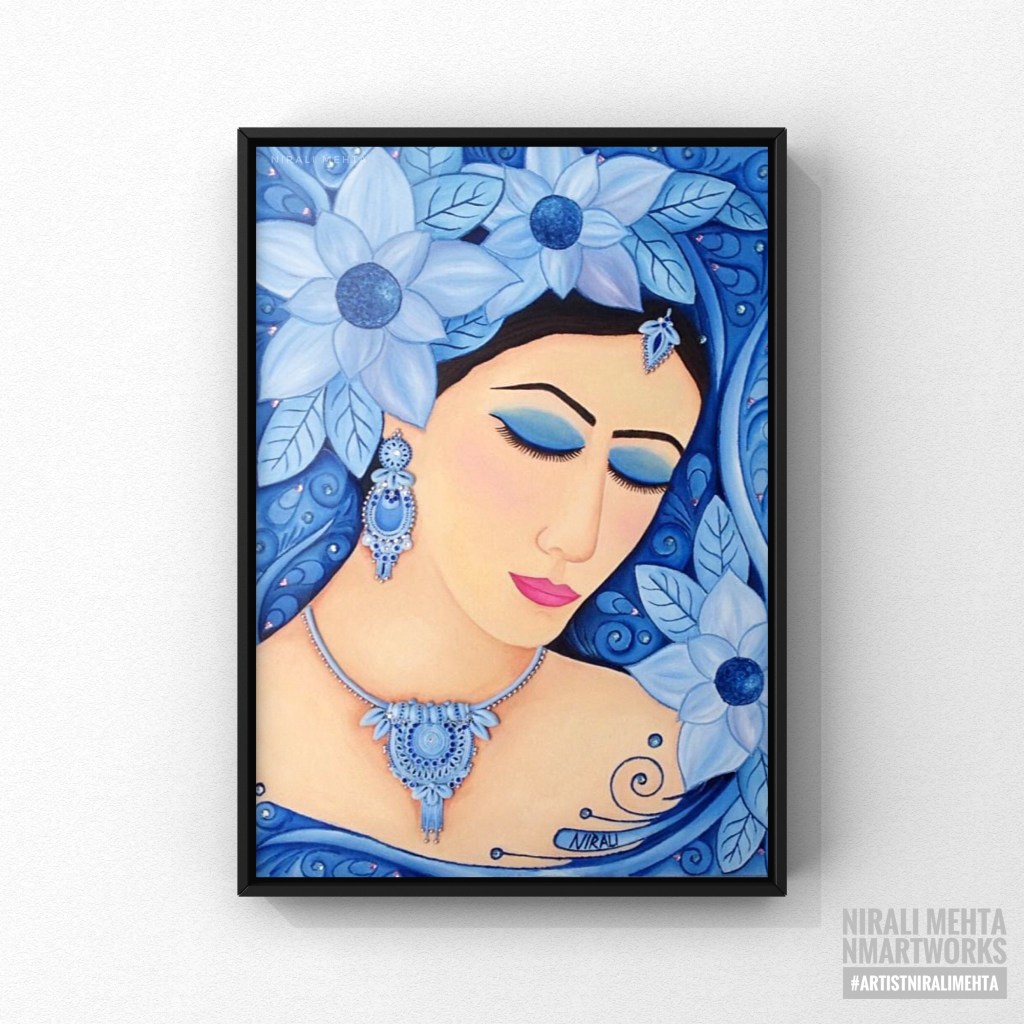
Looking for some Art to up the aesthetic appeal of your space? You did a search and found something that you just couldn’t take your eyes off. “It is so me! I think it will look fantastic on that wall in our room. Just what we needed!” Ta-da! Bought!

Now comes the difficult part – selecting a Frame that goes with it. The task isn’t as difficult as it seems but many people find it stressful to make up their minds while selecting a Frame. A lot of questions and confusion. Have I made the right choice? What if I had selected another Frame? Matt or not? Vintage or Classic? Metal or Wood? After all, the Frame can make such a big difference to the final look.

Shipping Framed Art can be difficult which is why most Artists sell their Art unframed. I am an Artist and I also sell most of my Art unframed. I do upload Framing ideas on my social media accounts regularly so as to assist potential buyers. Framing is an additional service that I provide to close friends & family as well as local buyers upon request. At online shops, my Artwork is shown with and without Frames so the onlooker can imagine how it would look once it is framed. I usually show Frames that are common and easily available or standard market Frames.

With the advent of 3D and AR (Artificial Reality) a cool new feature will soon be available – We can scan our wall or space using the camera in our phone and the software will project and show us how the Art will look framed on our wall, like on that wall in your house, like what if you bought it and put it there how would it look? All this in real-time before buying. Although it seemed unbelievable at first, this feature is currently in the beta testing phase and very much implementable.

Art is to everyone’s taste and choice. It isn’t a one shoe fits all formula. Some may like a minimal wall with just one big Art while others may want many Frames filling up the whole wall end to end. I totally agree ‘Beauty lies in the eyes of the beholder’. I am not an expert at Framing but I can definitely share whatever I have known or learnt so far about ‘Making an Art Wall and Framing your Art’.

These are basically ideas and suggestions that would help anyone make a simple ‘you cannot go wrong with this’ kind of choice. It works best for people who wish to decorate their spaces with Art but on a budget. Yup! Definitely recommend expert help from a professional if it suits you. Even then this information will help. When the Frame maker asks you questions to understand your requirements, you would know what exactly is he talking about. So here’s answering some of the questions I usually come across about selecting Frames and putting up Art on the wall.

1. Edges of the Art – A minimum of half inches on all the sides gets enveloped into the frame. Even in a plain classic thin black or white frame without matting the edges get hidden into the portion of the frame. An artist paints these edges knowing well that it will get covered up or may leave a white border edge for it.

Framing Art
Two Artworks – One painted to the end and other with white border left out. Thick white panel is the Matt Board.

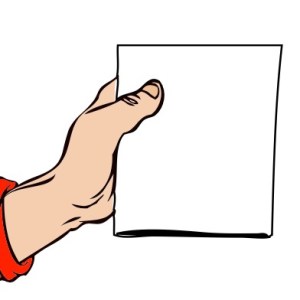
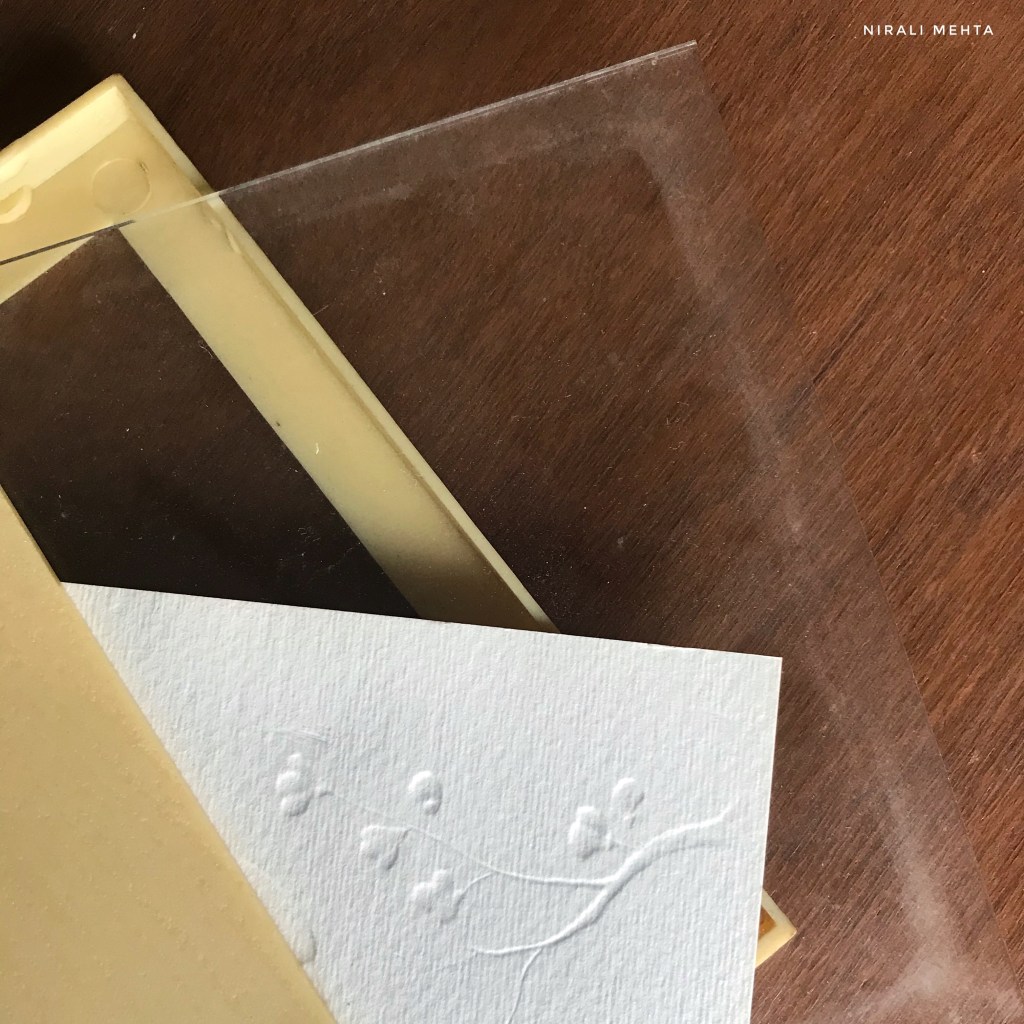
If the Art doesn’t have a blank border and you don’t want to cover up the edges then select a Floating Frame or a Sandwich Glass Frame. In a floating frame the Art is put above the matt making it look like it is floating, while in a double wall glass frame the Art is sandwiched between two glass panels. Only the glass touches the frame and the Art looks floating. See the picture below.

Wall Art
A double wall glass frame giving a floating effect.

2. What is Matt – A Matt or a Mat or a Mount is an additional border around the Art cut from a sheet of paper or board. Although it has a decorative purpose, it is more to preserve the Art by avoiding direct contact between the Art and the edges of the frame and glass. They recommend using an acid free material for it. A window for the Art is cut out. We can have any colour mat. Black, white and off – white are standard colours.

Frames that are available at shops include a mat or we can make one from paper sheets available in the market too. A mat is preferred for photos, prints and Art on paper that is otherwise small. The matt makes the frame look bigger while keeping the focus on the Art. Art Galleries and Museums have Artwork with matts.

There are double matt frames too. It means the Art encased in the first matt and then another matt and finally the frame. Looks like multiple frames inside each other. Ready Frames in the market will have only a single matt option.

Framing  your Art
Half inch Black Frame with One inch Matt on all sides

3. Size of the Art – How big is the wall? What is the size of the Art? Take a scale (ruler) and approximately measure the size of the Art that you will be putting up. How much space you want to cover or leave out? In case you are going to put up multiple Frames then space them out well. How many of them are landscapes and how many portraits? Visualise!

Placing a paper of the same size as the Art on the wall to visualise the Framed Art can help map the space for a beginner. Any Frame adds to the size of the Art and if you get a frame done with matting, it adds even more. The chances of a miscalculation in the size can be reduced if we understand this.

Explaining it with the help of an example : Let’s take an art on paper that has a finished size : 8 inches width and 10 inches height. We find a Frame of 11 x 14 inches. So for the 3 inches in width and 4 inches in height we can add a matt OR we add 3 inches equally and get a custom Frame of size 11 x 13 inches.

Art Wall
All the frames have same size plain black simple classic Frame. No Matt.

Even without the matt, it would be about 8.5 x 11 inches. The Frame moulding would add about an inch or more depending on its design, bevel and thickness. Always check the finished size written in the info when buying a standard market Frame. As for custom framing, you can control this better. This applies for all paintings on canvas or on paper, photos and prints that you can Frame.

It makes complete sense in buying the Art first and then selecting a suitable Frame. Also always calculate an approximate finished size on the wall before clicking the purchase button. We may not be able to make an exact calculation but the nearest can be rounded off to the next number on the higher side to avoid any bloopers.

4. Matching the Canvas with Frames – A board canvas needs to have a frame. With glass or without is ok, but a moulding around defines the Art. Paintings with acrylic paint can be used as wall mounting Frames. In this case the wooden frame in the stretched canvas is itself the final frame and it can be hanged on the wall directly. In case you wish to frame such a canvas you would need a Box Frame because this canvas is 1 or 1.5 inches thick like a box. For a canvas we have to consider the thickness also. The glass must not touch the canvas. A regular Frame wouldn’t fit so we would have to opt for custom framing. That is why wall mounting canvas frames are popular.

Ready standard size Frames work best for prints, art and photos on paper. They have a chart with common sizes for photos and A4 or maximum A3 size. Frames for Art larger than that may be difficult to source. The cost of framing an oil painting is the highest. It is high maintenance and must be done by a professional so that it is airtight and avoids contact with the glass. Even if it is custom framed, it needs a very experienced Frame maker or the Art can get spoilt.

5. Glass or Acrylic – Here they don’t mean the Acrylic paint. They are asking if we want the transparent panel in the frame that is made of glass or acrylic material. Acrylic is lighter in weight. It is cheaper too. A glass Frame will always cost more. The advantage with glass is that it doesn’t develop scratches. Acrylic does not break or chip off easily. Most over the counter Frames that are available for prices as low as a few dollars have acrylic panels.

Art Wall
Art Wall : All of them have a Matt and different Frames.

6. Material and Type of the frame – It can be metal, wood or plastic? Vintage or Classic? Thin or thick? This selection is based more on the look and the cost. Only thing to remember is that the Frame shouldn’t be more than the Art itself. We want to Frame the Art to preserve it longer and be able to hang it on the wall. Other than that the Frame should add to the decorative factor of the Art and not the other way around. A simple suggestion would be to consider the other factors of the space. Some frames may look too heavy or cheap and not in sync with the other things around. A simple elegant black or white Frame with or without a matt or a nice wooden Frame in dark or light brown polish that matches the rest of the room works very well.

7. Changeable – Frames where we can remove and change the inserted Art by opening them are changeable frames. If you don’t want to go through the hassle of getting a Frame and putting a nail each time, this is also a good option. Also when you want the same Frame for all the Art on that wall, one would opt for a changeable Frame. In future when you buy new Art you can use the same Frame and all of them match each other. This is because if we buy Frames over a period of time then there are chances that all will not be the same. Besides it is a one time investment. In this case the frames should be more sturdy and of good quality to last for years.

Frames for Art
Changeable Glass Frame made of Plastic.

8. Hooks to hang the frame – Don’t miss this out when selecting your frame. Some Frames have movable hooks, some have a single hook, some double and the distance between these hooks matter. The hook may be small or fitted to the same level as the frame or could be coming out a level higher. These things we can’t determine while looking at the Frame in pictures. Only when we actually go to put the Frame up on the wall we realise that the Frame doesn’t sit well in place and it is because of the hook.

That was the hook on the Frame and now to put it up on the wall, we have to put a suitable nail. Now a days we get adhesive hooks that stick to the wall. No need to put nails that damage the wall. Works best if you don’t want to put a nail in the wall but select these as per the weight of the Frame. The options are vacuum hooks, velcro hooks and hooks with tape or adhesive. They will not damage the wall and no need to drill either. They are called ‘no nail or no damage hooks’.

Photo Wall
Photo Wall with different sized Frames on a printed Wallpaper background

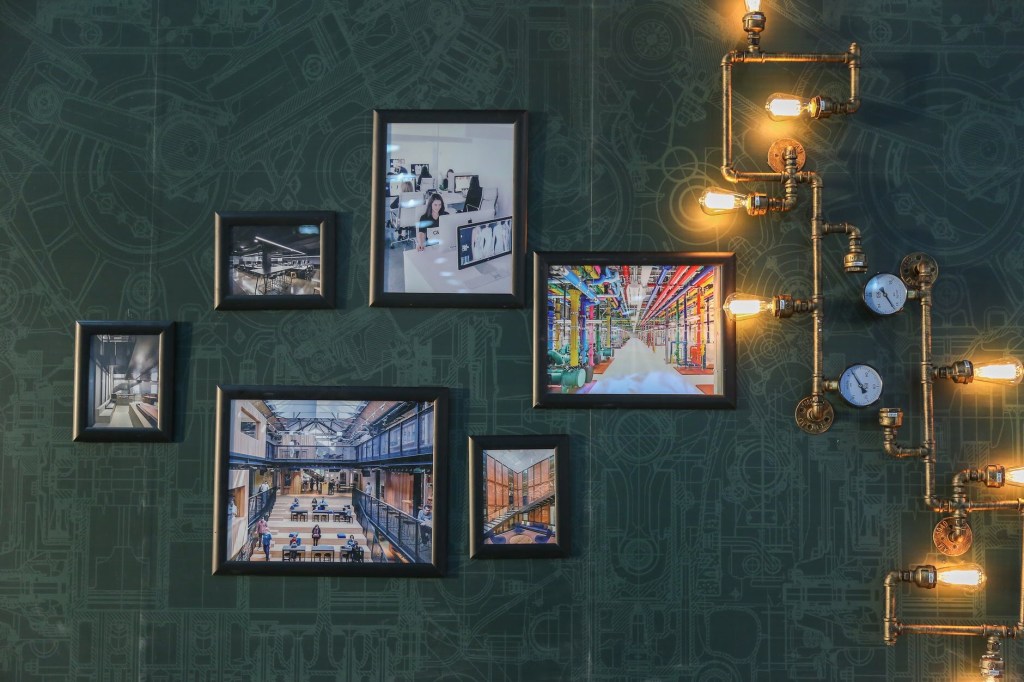
9. Selecting the Wall – What I have learnt is that the Wall stands out when it’s made into an Art Wall. Basically when you want to highlight a particular wall or want a wall to grab attention in a room, it is the wall to select and make an Art Wall. Single large Framed Artworks on a single colour painted wall work best for abstract or modern Art. These look beautiful on wall mounted canvas without any frame or glass.

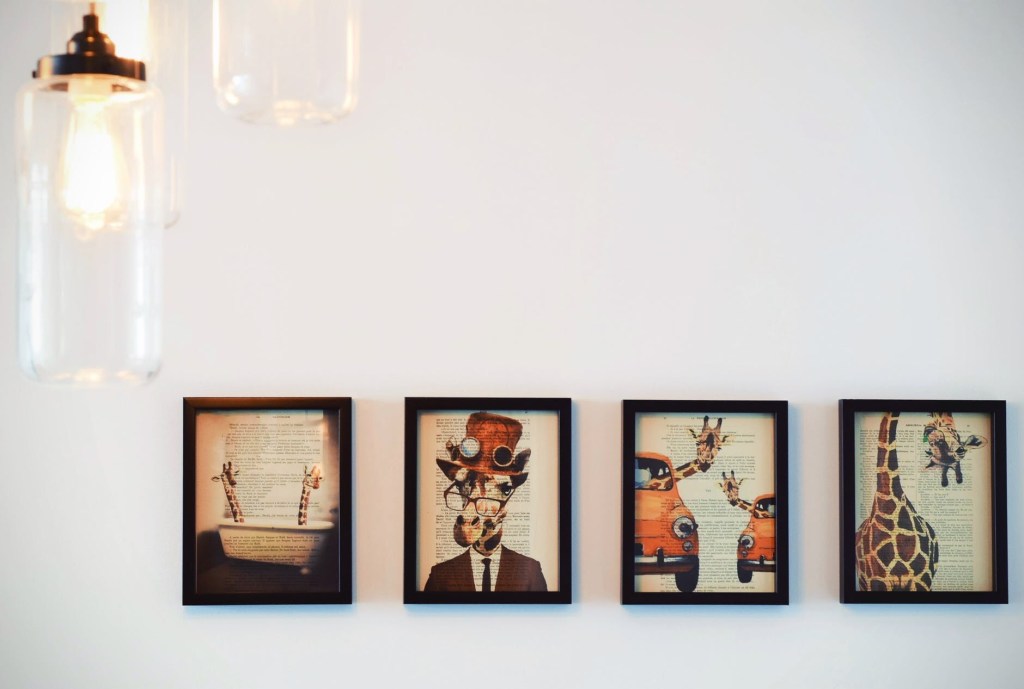
A small cluster of about two or three same sized Frames on a wall gives a classy contemporary look. The only big no-no here is having Frames on all the walls in a single room. That makes it look like a library or a museum or an Art gallery. The walls of staircases and passages are good for memory walls or photo walls. A little light that illuminates the Art is better than a dark space. Then again it is more to your taste.

10. Wallpaper and Decals : Often used for a photo wall. For a nursery or a commercial space it would be a good idea to have Framed prints or posters and decals around. Decals are vinyl stickers that we can stick on the wall. They are available in many designs. Having a nice background with a printed wall paper and Art frames on it also look good for some Art. Mixing these along with Art give a very different new look. It isn’t the traditional style and may not appeal to some.

I hope this clears most of the doubts on Framing and creating an Art Wall. If you have time, please visit my Pinterest account. I have an album for ideas on creating an Art Wall. Have an Arty Weekend!


Photo Credits: Pictures that I have clicked have my name and the others are from the WordPress Library.

Selecting Art Materials : Canvas and Paper, Paintbrushes

Most of the people I know buy brushes that are labelled as watercolour brushes and art paper that is mentioned as suitable for watercolour at the store and they are sorted. “Look! the company says I can use them for watercolour painting, so I bought them.”

They bought it either because someone told them, they saw someone using it or the brand company had written so on the product. Very few people bother to find out the product details and know if it is the right product for their use. Many a times we don’t want to stock different materials for different Art and so we use the same brush or paper for all. The selecting pattern is same for them and so I grouped canvas and paper with paintbrushes.

For beginners it really won’t matter; however artists and professionals will be equally choosy or selective about these materials. It makes a difference in their work and once we are used to a particular one, we only use that. Most artists start off with the trial and error method and once they like a particular brand or product, they stick to it.

Different kinds of brushes, what they are called and their suggested uses are printed on packs. As always a lot of information is available on the Internet. So I will not get into repeating that printed knowledge.

We have discussed ‘Selecting Art Materials’ in our previous posts. On the same lines I will share about selecting paintbrushes, art paper and canvas in this post. I do not endorse any brand and this is not an advertising or promoting post. I share about my understanding of these materials so that it helps others make an informed purchase decision.

Canvas
Selecting a Canvas

Canvas

Any surface we paint on is called the canvas. So if we are painting on fabric or wood or paper, all of them are actually our canvas. However when we go to an Art store and ask for a Canvas we usually get this fabric like drape wrapped on a board called BOARD Canvas, a stretched drape pinned to a wooden panel frame called STRETCHED Canvas and a ROLLED Canvas which is a roll of the drape. All three have the same material, only the mounting is different. Once the painting is complete we have to get it framed before hanging the painting on the wall.

The board canvas is a hard and flat painting surface, the stretched canvas is mounted on a frame and has a slightly bouncy feel while the roll canvas more floppy like a loose fabric. A stretched canvas can be directly hanged on the wall using the existing wooden frame. Hence it is also called wall mounting canvas. A canvas sheet that is cut from the roll will have to be stretched or mounted before painting.

Canvas was traditionally used more for oil painting. Earlier when I learnt mural painting we would have to apply oil and colour to prime the canvas. Now a days canvases are already coated and primed. Cotton is the main fibre of a canvas. Did you know? We also get paper sheets made from cotton linen pulp which are used as canvas for oil painting and acrylic painting. They are like a sheet cut from roll canvas: have the same texture and feel but are relatively sturdy and stiff like paper.

All of them will be acid free and primed and have some treatment or coating for protection against pests. It really won’t matter which one you buy, almost similar. Only the tension of your canvas will differ. That would be the basis of your selection. If you are using them for acrylic painting a canvas primed with gesso works well. You can use others too. If you are into oil painting you may be more selective while choosing the canvas.

Not all art supply stores stock all sizes of canvas. It is a good idea to buy the quantity together if your project uses multiple canvases. In case the size you need is not market ready, you can buy the roll canvas and get it custom made or mounted to your required size. Canvas is also used for Art prints. Digital prints of artwork is quite common. Flex banners are also a type of canvas.

Paper
Selecting Art Paper

Art Paper

We get sheets of art paper in bundles as well as bound in books. Books have perforated sheets which can be pulled out. Smaller sizes such as A4 and A5 sketchbooks are very popular and will be easily available everywhere. Art Paper is used for all mediums including pen drawing, pencil shading, acrylic painting, pastels painting, charcoal sketches, watercolour painting and oil painting.

In the info section they print the size in inches and cm. They print the thickness in ‘GSM’ or lbs. GSM stands for grams per square metre that is the weight of the paper or pulp for every square meter. It is how the thickness is measured. How does that make a difference? The thickness of the paper is an important attribute because for watercolour painting we need thicker sheets like 250-300GSM that will absorb water but will not tear while for ink art we can work with 120-180GSM.

Next we look for textured or plain. The grains on the surface. Depends on the artwork one is working on, whether they want a textured feel (a rough surface) or a plain background. For pastels and charcoals a little grain or texture is required. It helps hold the powder while for ink and watercolour art a smooth or plain surface can be selected. This gives a plain edge or a straight neat line finish while painting.

Artists usually use ‘acid free’ meaning paper that has been neutralised. In simple words if the paper is acid free it will not turn yellow with pitting and can be preserved longer. Paper made from cotton will have more absorbency for water based painting. It can be 100% cotton or mixed with other natural fibres like cellulose. I select the ones with 20-30% cotton for my artworks.

Paintbrush
Selecting Paint Brushes

Paintbrushes

Selecting paintbrushes is very simple. Each of them are built as such for a purpose or for a particular style of painting. It may sound weird but some artists manage to get fine lines with a thick brush of size 8 and a thick like with a brush of size 4. With years of practice we don’t change brushes for each size. So buying them in odd numbers like 0,2,6,8,10 is enough. For finer lines and intricate work I use finer brushes of size 0, double zero 00 and triple zero 000. These are smaller or finer than zero size brushes.

For painting on a canvas on the easel we require long handle brushes. Regular size handles are good when we are working on paper. Further we would need a mix of round and flat brushes in our art tool box. Flat brushes are used to paint backgrounds, round brushes for fills and riggers for fine lines. Filbert brushes are useful for one stroke painting or creating visible strokes and design. I even use the back of the brush handles as round stumps for dot painting.

Brushes can be made from natural animal hair or synthetic fibres. Use brushes with soft thin bristles when you want the colour to be applied evenly. It gives a smooth neat finish. Thick bristles cause an uneven finish with lumps of colour which can be left as it is or smoothened by using a roll over it. Bristles of brushes made from natural hair expand when soaked. They are best suited for oil painting. For painting using acrylic and watercolour paints we can use brushes made with natural or synthetic bristles. Watercolour and Acrylic, both being water based paints we can use a common set of brushes. No need to keep another set.

One special kind of brush is the water tank brush. This brush has a plastic body with a water tank attached to it and bristles of the brush are synthetic fibres. When we press the tank, the water drips to the brush tip and soaks the bristles. It works very well for quick sketches and on the go painting using watercolour cakes.

Paint Brushes
Just bought new Paint Brushes

I was surfing the Internet the other day when I came across a video titled ‘How it’s made – Paint Brushes?’ ‘How it’s made’ is a very popular show and I like watching it. They show how various products of our daily items are made. Helps us understand about the products, their usability and the thought process of the maker in creating it.

I understood which problem faced by artists are they trying to solve by offering a particular type of brush or why it is made the way it is. Every product is manufactured keeping in mind a certain use. Similarly they also have videos on ‘How it’s made’ for canvas, paper and many more products. If possible do take out some time and see them.

Painting
Selecting Art Materials

Links to posts related to this topic are listed below. Click on the title to open the post in a new tab. Have an Arty Weekend!

The Black and White of Pen and Ink Drawings – Ink Art

Clear lines, strokes and dots of Black Ink that make beautiful works of Art – Ink Work or Pen and Ink Drawings have been my forte. Original hand drawn Ink Art and Illustrations as well as Art Prints of my Pen and Ink Drawings are available at my Shops. I like to draw and paint Birds and Flowers the most. Sometimes I use Ink Pens along with Watercolour and Gouache colours for my Artworks. In this post I am going to share all about my favourite medium – Ink. Because it is Black Ink on White Paper usually, the Art works are also called Black and White Illustrations.

Link to the post on Doodle Art, Zentangle Art and Mandala Art

We have explored Zentangle Art, Doodle Art and Mandala Art in my previous posts. These Arts are mostly done in Ink. I have also shared about selecting Pens and Markers for your Art in another post. It is the main material for Ink Art. Ink and Paper are the only two materials required for Ink Art. For some techniques we may draw the initial sketch in pencil. Please refer to these posts for detailed information on these topics. It would be additional helpful information on Pen and Ink Drawings.

Link to the post on Selecting Pens and Markers for your Art

This time let’s take it a level higher. Explaining in simple words we can say – creating Drawings, Illustrations and Sketches using Ink Pens and/or Ink with bamboo sticks or brushes is called Pen and Ink Drawings. Very good quality Ink Pens with a variety of nibs are easily available. We don’t have to use brushes or Inks from bottles anymore. This has led to a lot of people taking up many of these Art styles.

Tattoo Designs, Ink Illustrations, Stippling Art, Mandala Art, Doodle Art and Zentangle Art are all very popular on Social Media. We have many artists sharing these works made with Ink. Botanical Illustrations in Ink are loved by many.

Click here to view my virtual Art Gallery and see more of my Artworks. You may also visit my shops (links on the homepage) to buy my Art. My works of Art would make suitable Wall Art for contemporary spaces both Residential and Commercial.

Artist Pens have Inks that are fade-proof, water-proof and permanent and are available in all major colours. ‘Archival Inks’ as they are referred to are also fade-proof, water-proof and permanent Inks.

Earlier Ink artworks would be made using brushes or bamboo sticks dipped in Inks, just like Calligraphy. If it interests you, do read my earlier post on the Art of Calligraphy. Painting with those would have surely been more difficult. Pens that are available now make it much much easier to draw and paint. These Pens have become so much a part of our Artworks that we use them even for something like just giving an outline or darkening a pattern.

Link to the post on Calligraphy

These Pens are available in a set as well as loose Pens. The ink, nibs and grip of Pens of all brands have a minor difference. I have used pens by almost all the major brands and have liked all of them. I use Micron Pens (Archival Inks) most often. I also use Pitt Artist Pens by Faber Castell for brush nibs and accented tips.

My other favourites would include Uni Pens and Winsor Newton Markers for a more Watercolour like finish. These are more like Artist choice Pens. It would be absolutely ok for students to do the same kind of Artwork with the other Pens or Markers that they regularly use. No problem at all. Permanent Ink is also available in bottles. We can still use the traditional method of writing or painting using Ink from bottles with brushes or bamboo sticks.

The Paper you select must be thick to absorb the Ink. Handmade Paper gives the authentic olden days look. If the Paper is thin the Ink bleeds or may move on the back side of the Paper too! The Pens should move smoothly and give a good finish to your bold and confident strokes.

Work in progress of an Ink Art
A closer look at the making of one of my Ink Illustrations

Black and White does not mean just a dark black tone. It is important to shade and show dark light areas even in Ink drawings. For this we can use any one of the following techniques or we can create one of our own. The shading adds depth and makes it look 3D and more realistic. Sometimes people use a black colour pencil and shade the colour, it is an easier way out though. Like me you can also do a combination of two or more of these Ink Art techniques if you want. Here are some of the techniques :-

Ink Art Techniques
Ink Art Techniques

I am completely in awe of the Japanese Art of Ink Wash Painting. Also known as ‘Sumi-e’ Painting. It is typically monochrome, meaning it uses shades of black on handmade white paper. I was told that the Ink and brush and/or bamboo sticks used for this Painting are same as those that were used for the Art of Calligraphy in China in earlier days. ‘Ink Wash Painting’ as they called it is said to have began during the Tang Dynasty in China.

It was introduced to Japan by the Zen Buddhist Monks. Sumi-e Artists paint Nature, People and Places. Their brushes are special and different from regular brushes and it is all about these clear black strokes. I have been wanting to learn this Art since a long time. Let’s hope I get a chance soon, may be sometime in the future!

If you have any questions on how to use this medium, feel free to ask them in the comments below. Have an Arty Week!

Why is Acrylic Paint the most preferred medium to paint?

If there was something like a ‘People’s Choice Award’ or an Award for the ‘Most Popular Paint’, I am sure it would go to Acrylic Paints. While the others are more natural dyes and colours, Acrylic Paint is synthetic and man made. It is easily available at stores selling Art Supplies as well as all Paint and Stationery Shops.

Acrylic  Painting  Poppy  Flowers
Poppy Flowers – An Acrylic Painting that I have done

Acrylic Paints vs. Oil Paints

Oil Paints take 7-10 days to dry completely. It is this quality of oil paint that helps in mixing colours and blending them. Any artist who has worked with oil paints will agree, it is this property that really helps in making those realistic paintings.

Oil paints have one major drawback ; by any chance if any little traces of water get trapped between the colours because of humidity then the painting develops moss. Refurbishing, Repairing or Repainting- nothing works.

Oil Painting  on Canvas
Indian Mural Style Oil Painting. The ornaments are modelled from clay

When beginning a new oil painting, the canvas needs to be seasoned (sizing) to absorb oil. The more oil it absorbs the better finish. Whereas for Acrylic Paints we only need to use ‘Gesso’ to prime the base. Gesso is like a paint which when applied to any kind of surface prepares it for the paint to be applied. Last but not the least having a glass frame and making the frame airtight ensures that the Oil Painting stays well for longer. Acrylic does not have any such requirement.

Brushes and Palettes can be cleaned with water. If we get some paint on our hands or any surface while painting, it can be easily cleaned with water or removed with acetone. It usually petals off like a plastic coating. We all know that is not the case with oil paints. We need to keep a separate set of brushes for Oil Painting which cannot be used for anything else. On the other hand it is possible to have a common set of brushes for Watercolour and Acrylic Painting since both are water based paints.

Acrylic Paints vs. Watercolour Paints

It is possible to achieve a Watercolour like finish using Acrylic paints. We can mix the colour with different mediums such as Gel, Gloss, Matt, Pearl and so on to get different effects. We can create textures and even achieve the level transparency we want in the colours of the painting with Acrylic Paints.

This image is created from stock photos for explanation

Watercolour is basically for Painting on paper. Even after a painted layer dries, water can be used to mix or blend both colours. Water can be applied on the paper and then colour drops can be added, giving this grains effect. This painting method is suitable to Watercolours. So most artists specialising in Watercolour Painting will not want to use Acrylic Paints. Watercolours are also easy to work with, portable and can be carried along. The cake form is very compact and portable. Mixing of colours to get your shade is easily workable.

I use a mix of Watercolour and Acrylic Paints for my paintings listed on the shop for sale. You may visit my Etsy Shop or Social Media pages to see those.

Here are some of the reasons I think this Acrylic Paint is preferred equally for both Arts and Crafts :-

1) It has a unique property. It is soluble in water and hence diluted with water to paint. However once the paint dries the polymers bond to give a water-resistant painted surface.

2) Acrylic Paints can be used to paint on multiple surfaces including Canvas, Paper, Wood, Glass, Walls, Ceramic and Fabric. I have personally tried them on all of these. We need to seal the completed work with varnish and we are good to go.

Recycled Pen Stand Acrylic
Recycled this old plastic container by repainting with Acrylic Paints

3) We can select the consistency of the paint. The Acrylic Paints that are available in Tubes have a slightly thicker consistency as compared to those available in bottles. The ones in the bottles are liquid like pouring consistency. Both are Acrylic Paints and can be used together on all the projects. The pouring consistency colours work well for projects like Dot Painting and Fluid Art.

Recycled Roll up Brush  case
Roll up brush case I made from my old jeans. Dot painting with Acrylic Paints

4) These paints are available in smaller tubes of size 9ml to larger tubes with 40ml to 120ml. Also available in bottles and larger cans. We even get Acrylic Sprays. Art and Craft Schools and Studios can stock large containers while people who do one off projects can buy the smaller ones. Further if we run out on a particular shade, we can buy just that single shade too!

Photos of my Acrylic paints
I use Artist quality Acrylic Paints by the brand ‘Camel’ or ‘Camlin’ because of its easy availability and reasonable pricing locally.

5) Water Resistant surface makes it easy to combine it with other art materials such as permanent markers or watercolours. Acrylic colours can be used on watercolour painted surface but not the other way around because for watercolours to work, the paper needs to absorb the water. Acrylic paints make the paper impermeable. Acrylic paints can be used alongside or as highlight on watercolour painted surfaces.

6) Acrylic Paints are preferred for creating textures. An artist can achieve the effect he wants with the colours – solid thick, translucent or transparent finish, all by mixing different quantities of mediums and/or water. It is like painting in layers. The bottom layer dries completely and then we paint the next layer. We can even paint a white on a black without the previous layer smudging at all.

Knife painting on canvas
A closer look and method for Knife Painting with Acrylic Paints

The fast drying property and thick paint consistency make it suitable for Impasto or Knife Painting. By using these methods of painting artists can create a good variety of textures. We can use ‘retarders’ to slow the drying process and increase the working time for blending.

7) Almost anything can be painted with Acrylic Paints. These paints can be used for Painting on pots, Painting Clay, Canvas Painting, Painting on Paper, Painting on T-Shirts and Tote Bags, Pebble Art, Wall Murals, Painting on Glass and Mirrors, Painting on Tiles, Mixed Media and a lot more variety of Art and Craft Projects.

Mixed Media on Canvas
Mixed Media Acrylic Painting. Flowers are modelled from clay

8) These colours remain unaffected by humidity or extreme cold or heat conditions.

9) Framing is optional. Hence we have wall mounting canvases. To clean it simply take a dry brush and lightly dust of the dirt that may have settled on it and it will be clean.

Wall mounted  Impasto Painting
Wall Mounted Canvas – Knife Painting using Acrylic Paints

10) Variety of Colours and Shades. Mixing colours might not be a good idea because it dries very fast. So buy them in the colours or shades needed. There will usually be a whole shelf dedicated to it. Any colour that we need can be bought anytime. We get neon shades and glow in the dark paints too!

The only drawback with Acrylic paint is that the colours will dry out if the water from the colour evaporates or if the bottle is left idle, so cap them well. Remove the colours in disposable containers in the required quantities instead of painting directly from bottles and leaving large containers without the lid for long hours of painting.

Acrylics are easy to work with. Rectifying a mistake is also easier when using Acrylics, so it works well for beginners as well as professionals. I really don’t know what more can they offer to make these paints better. Definitely worth buying a box and trying out some Art projects. I have shared some of the recent Projects that I have worked on using Acrylic Paints. All these are still with me and not for Sale. The paintings for sale on the shops are different. These are all from my personal collection.

Have an Arty Week!

Wildlife through my Lens: Photography – by Guest Blogger Mr. Himanshu Jain

February 2020, I embark upon a journey. A quest for the grey ghost of the Himalayas ; the elusive Snow Leopard takes me high up to the snow clad peaks of the Himalayas on the Kibber-Kaza Belt of the Spiti Valley, northern region of India. Located at an altitude of 15000 ft above sea level this area is an endless sea of snow all around during winter and the mercury level drops to as low as 30 degrees celsius below zero.

After days of battling such extreme conditions we found no signs of the elusive predator. It was physically and mentally challenging – like the worst form of punishment, particularly the splitting headaches caused by lack of atmospheric pressure at extreme altitudes. However our gracious hosts for the trip left no stone unturned in keeping us warm and motivated. They were confident we will soon find what we came for.

Blue Sheep Himalayas
While waiting for the Leopards.. it’s the Blue Sheep

Day 4, finally the news came in! Our trackers had spotted some fresh paw prints. We rushed to the spot after a difficult trek of about 2 hours. Upon reaching, our joy knew no bounds. We saw them! We saw them! Not one, not two but a whole family! A family of Snow Leopards on the opposite cliff at a distance of about 300yards. It was a beautiful sight, difficult to express in words.

Mother with her cubs – Snow Leopards all cuddled up
Male Snow Leopard
Male Snow leopard. This image was clicked at over 300 yards distance.

Photography trips to remote areas like these are a splendid learning experience. Think of it as an opportunity to live with people from very different cultures, eat their local food, learn their way of life ; and then come back home with a pot of gold- a bag that is full of memories and photographs. They say ‘A picture is worth a thousand words’ and a well taken photograph can create memories that last a lifetime- making that moment immortal. It is for these breathtaking moments that I think I took up Wildlife Photography as a hobby.

In the current era of high quality cellphone cameras, almost everyone has already been practising Photography at one level or another. Then it could be selfies, family pictures on holidays or photos for social media. Photography is a hobby that anyone can take up, at all levels, no special skills or complex technical training needed. Easily accessible most of the times a good camera phone or a point and shoot camera is enough to capture some first basic clicks.

However if you are serious about the Art of Photography I suggest you must strongly consider investing in a DSLR. Specifically for the purpose of low light Photography or Wildlife photos that need a strong zoom lens. One needs to consider the fact that despite having millions of pixels, the image sensor of a cellphone camera is about the size of a fingernail, while that of a DSLR is generally over an inch in length. A basic DSLR with dual lens (wide angle and zoom) can be purchased at most electronics stores for as low as US$400. Additional equipment can be rented at reasonable rates.

The importance of a hobby in our lives can be highly underestimated sometimes. Particularly by the city dwellers who hardly have any time, even for themselves in all the hustle bustle. I learnt this the hard way after suffering from severe anxiety and panic attacks. Thereafter, once I took up Photography; there was no looking back. The positive vibes were noticeable in my physical, mental and spiritual health. To lead a happy and peaceful life, one needs to have something to look forward to, something that brings the energy to bounce back on your feet. 

It all started with a small adventure trip to the Pench National Park, the location of the famous ‘Jungle Book’. We sighted a Tigress and managed some pretty decent photos with a point and shoot camera. Encouraged! By the next trip, I decided to buy a beginner level DSLR. This time I was lucky to spot a huge male Tiger at a close distance in perfect light. It is interesting to note that if the light and distance are in favour, even a basic DSLR and lens combination is more than enough to produce a high quality image.

Male Tiger
Male Tiger – One of the photos Himanshu clicked with a DSLR in the fully automatic mode during his early days of photography.

Imagine! Tracking down a Wild Tiger in a dense jungle can be such a thrilling experience. Pitting down your senses against the ultimate killing machine – total adrenaline rush. Known for it’s strength and enormous power ‘The Tiger’ is also the national animal of India. What makes wildlife Photography so challenging is the fact that the subjects are hardly co-operative. They hardly show themselves, specifically when the light is ideal for photography. This makes a good image a very satisfying reward.

Like every artist even a photographer wants to improve his work each time. Can’t help but think- I want a photo with better eye contact. Next, I want to photograph of the Tiger drinking from the pond of water with reflection. Until it becomes a never ending process of multiple trips to the jungle while upgrading the camera and lens kits.

Tigress
Tigress Maya Head on

Sharing some of the things I learnt with time. I think these can help budding photographers wanting to take up Wild Life Photography.

1) Do as many field trips as possible, if targeting Tigers, do multiple core zone safaris. Photography is best learned through experience on the field and not by just reading.

2) A bit of homework always helps though, like a basic understanding of concepts such as the ‘Exposure Triangle’. This consists of 3 Variables. Shutter Speed, Aperture and ISO. The way a digital camera works is; the lens casts an image onto a sensor, which has individual receptors for each pixel. These are then put together by the processor to create a digital image.

a) Shutter speed :- This is the amount of time the scene, or image is imprinted on the image sensor. Faster shutter speeds (around a thousandth of a second) freeze motion and are desirable for action shots, while slower speeds will cause a motion blur when the subject is moving, or due to vibrations of photographers’ hands. Slower speeds are desirable in situations like low light photography, or when one has to show movement in the photograph. Like flowing water, or mist effect on waves. It is called long exposure Photography and must be done with a tripod as it is impossible to hold a camera still for such a long time.

Waterfall in jungle
Waterfall – Long exposure Photography

b) Aperture :- is the opening in the lens through which the light passes. Smaller the aperture (meaning larger f number), the lesser the light will pass means a greater depth of field (more part of the image in sharp focus), while a wider aperture (smaller f number) means more light passes, a brighter image but only a small part will be in sharp focus. Wider aperture means narrower depth of field producing a bokeh effect, where only the subject is in sharp focus with a blur background. The effect is often desirable for wildlife.

Green Bee eater
Green Bee eater – Location Jhalana Leopard Park Jaipur

c) ISO :- is the sensitivity of the sensor to light, higher ISO will produce brighter images, but with low sharpness and with digital noise (those dots that appear on images clicked in low light). ISO typically shoots up in low light, super fast shutter speed or very narrow aperture.

Snow clad Himalayas  in low light
Snow clad Himalayas clicked in low light conditions

It is critical to balance these 3 factors to have enough light onto the sensor. Too much light means an overexposed image with burned overly bright pixels, and less light means an underexposed dark image. Both overexposed and underexposed images will lose out detail in the photo. Fortunately most modes on the modern camera will balance out these 3 variables to get perfect level of exposure.

Vulture soaring the skies
Vulture clicked in the clear skies

3) Discipline is the key both in terms treating the camera kit well, as well as punctuality. Reading the camera manual from cover to cover can provide invaluable tips regarding cleaning and maintenance of cameras, as well as finer details of photography. Good sleep is equally critical. Early morning hours are important, in terms of movement of the larger Carnivora, and one must be alert in these hours.

4) Most important factors for good photo in the correct order are :-

  • Light Angle
  • Distance to Subject
  • Lens
  • Camera

It is desirable to light up the subject well, specifically in wildlife to attain higher shutter speeds for a sharp image. Hence it is best when the sunlight is behind the photographer lighting up the subject. Also, in case of animals in movement, it is better to project their path and position oneself in advance to get a photo with face and eyes rather than following the animal. Against the light photos can be taken as silhouette shots.

Silhouette  of  vulture
Silhouette clicked by Himanshu

5) In case of a beginner using a DSLR, it is OK to start with Automatic mode, but when possible, get to the manual mode, experiment and see the result of different settings in terms of Shutter speed, Aperture and ISO.

6) Image composition is critical, spend some time reading about the rule of thirds. According to this guideline, the subject must be placed on left or right one third of the image, facing the negative space in the other two thirds. This composition typically draws greater attention of the viewer’s eye rather than placing the subject in center.

Tiger crossing river
Tiger crossing the River – Rule of thirds

7) Remember when we visit the Jungle, we are going to the home of the animals and birds. Let us be responsible eco tourists, and do our best not to disturb or adversely affect the inhabitants.

Photography can be a fun learning experience and a very addictive hobby, especially for those who like to travel. One may specialize in a specific form of photography based on personal interest and choice. It is a great idea to showcase one’s work on various platforms and social media, which enables interaction with like minded individuals, and provides motivation to take one’s skills to the next level.

Have an Arty Week!


Guest Blogger – Mr. Himanshu Jain

Passionate about Wildlife Photography Himanshu is a Businessman from Mumbai. He took up Photography as a hobby in 2018 and has been on a number of wildlife trips since then. His interests also include Cars and Coffee.

5 Ways to Fine Tune your Art – Drawing, Painting and Sketching

Ever looked at your finished Art and thought something is missing. Somehow I am not completely happy with it. There could be something to improve but I just don’t know what? Further sometimes we don’t even know where to look, which part of it needs to be fine tuned. If we work on one portion, something else looks out of place. I know this feeling, it happens.

So do you know how to get it right? That is the question I am going to try and answer in this post. In this article when I say Artwork: it means Drawing, Painting and Sketching. And when I say object- it refers to whatever we are drawing, painting or sketching. I don’t have a checklist of any kind but I can definitely tell you the five ways to fine tune your Artwork in order to improve and make it better based on my learnings and experience.

These are also the observations we need to make when doing Art. If you observe these and are able to check them right, not only would you be good at Art but also find it easy to understand and learn different Art styles. This is more or less an exhaustive list. It does have sub topics or points. In a way it is also 5 mistakes to avoid while making Art.

It is like a grade meter, how much fine tuning is required for each of the parameters will have to be determined by you. That is because it is to your taste. Over a period of time with observation and experience you will be able to decide your own parameters for each of these. Perfection isn’t when all of it is present, it is when all of it is in the right quantities. So let’s begin listing them.

1. Shapes and Patterns

Everything has a main outer shape and maybe more smaller shapes. It is important to observe this. First we draw this main shape and then do the details. Consider it as rough work to your final answer. This also helps decide the placement for various objects in the Picture. You can also take them as a marking of the space each object can take on the canvas. It is important to place things evenly or rather correctly space them out on the canvas. Most people make the mistake of skipping this step and begin to draw directly.

Let’s consider drawing something like ‘My House’. If you are drawing this landscape, make the large main shapes of the tree, the fence, the house, the sun or sky, the human with his pet, the ground and so on. Then add the details. Erase the rough work. It is the correct method to draw.

Some videos on the Internet will show super awesome Artists who complete one particular corner of the art with full finished details while the rest of the canvas is blank. Wow! They are super humans but we are normal humans and this is how we draw. It is mostly a digitally edited video, very rarely can anyone draw like that. They need to get into the book of records for such exemplary skill if they really can. For the rest of the normal people this is the first step for drawing anything.

Everything in nature has a pattern. So for example when you draw a flower. Look for this main shape of a circle or an ellipse. See the pattern of the petals are they – above or below, in odd numbers or even. See the shape of the petals – pointed or round, long or circular. Further see the centre of the flower and look for a shape there. The pollens will have a pattern – are all of them in the same direction, how many turn right or left. These things we need to observe and then when we draw, we match it with our reference.

2. Proportions and Scale

Many people confuse these terms. So in another words it is the size and ratio of the objects drawn. So in your landscape a bird cannot look bigger than the tree, that is scale. Now how much space of the tree is the branches and how much the leaves – that is proportion. That is what we need to observe. How the object looks in context with the other objects in the picture and what are the proportions of its own parts. When drawing a human face you would note the proportion of the eyes to the eyebrows, the nose and lips. The scale would be the size of the actual face. They are connected and not used in isolation.

3. Perspectives and Backgrounds

Which angle or point are you looking at it from? Top or bottom, right or extreme right. The distance- up close or far away. The objects which are closer are detailed, while the objects farther away at a distance in the background may not have all the details. If you draw details of all the objects in a picture, it is like keeping everyone in the front row. It will look like everyone is shouting for attention. The focus is always on some objects in the front and less on those in the background. Artworks with backgrounds look complete.

Perspective adds depth. The third dimension or 3D. This makes the object look natural as against flat image. 3D means 3 axis – X axis, Y axis and Z axis. Length, width and depth or thickness. The most common example is if you draw a rectangle. Now try imagining this as a box, as that of the wall of a house or this wall Humpty is sitting on.

Your position while looking at the object determines how it is visible to you. For example four different people looking at a car from four different spots – the top, from the right, the left and the bottom will all draw it differently based on what they see. Correct? What your view is, is your perspective. This brings about a balance in the picture.

4. Light, Shadows and Highlights

In one picture there can be one source or two sources of light. Two when there is one natural source like the Sun and two when there is a light fitted or the created source. The light coming from any point does not fall equally on all the objects. The rays fall in a straight line and not in curves. So the whole picture has be in sync with it. The Shadow of an object is determined by the direction of the light and also falls straight. Depending on the position, the size of the shadow will change. There could be a situation where the shadow of one object also falls on another.

There is something called highlight – when a significant portion of the light falls at a spot and it almost looks white. We colour or shade from light to dark or dark to light and then add the shadows and highlights. This adds depth to the painting. Also observe how an object reflects the light. The texture and surface of the object determines that.

It really looks funny when all objects have different sources of light and random shadows. There has to be a flow in the picture.

5. Colours, Shades and Tones

Tones is Dark, medium and light. This is determined by the source of light in your picture. When you do an artwork in black and white it will still have these. The gradient is smooth and blending it is important. Where we want to show it as blocks, we make sure the edges are crisp. When we colour the objects, we can try as much as possible to match the exact colour to the real object. Mixing of colours to make various tints, tones and shades can be understood with the help of the colour wheel.

There should be a contrast between the dark, medium and light tones otherwise the image will look flat. Meaning how dark the colour looks against the medium tone colour. Whether the difference is significant or very little. Sometimes all you need to do is make the dark shade a bit darker. A pro tip here is not all colours can be made lighter by adding white or darker by adding black. When you observe an object see the dark colour, does it have traces of other shades. For example the dark colour could be brown with little of green and not always necessarily black.

These topics need to be studied in detail. The only way to understand these is to observe and try it out practically. Now that you have basic information about these, the next time you are drawing, sketching or painting look and observe these things in your Artwork. Whatever you are drawing – be it a portrait, a landscape, an object, nature or design. Check for these and mark the difference with your Art as against your reference. Your artwork will show significant improvements.

If possible, take an object like a flower or a vase or a pen or a bottle or a landscape picture, keep in it front of you and then read this article once again while observing these and mentally making a marking of each. Then begin to draw. It isn’t a one time exercise, you keep going back and forth. I am sure you will be pleased with the outcome. There is a possibility that after years of practice some artists can do a mental calculation of these. After all Art is about being able to imagine that object on your canvas, so that you can draw and paint it.

Have an Arty Week!

‘Hooked on to Crochet’ – by Guest Blogger Ms. Emma Thomas

Crochet is the Craft of creating Fabrics by interlocking strands of Yarn using a Hook. Crochet isn’t just a Craft. It is a legacy – small presents of love that are passed down from one generation to another. Crochet is different from Knitting. The difference is in the tools and the stitches. How I learnt to Crochet is an interesting story in itself.

I always thought that Crocheting was for my Nana and not something I ever thought I would do. In fact I thought I couldn’t do it at all. My Nana tried to teach me once, when I was a little girl. But she either gave up on teaching me or I gave up on learning it because I just didn’t seem to grasp it. So she taught my brother, who managed to Crochet a Bunny. I must have been envious or something as I can still to this day, picture the bunny that he successfully made while I couldn’t. I am pleased to say that now I can Crochet a lot of bunnies (and my brother has forgotten how to – big smile) and I am sure my Nana, if she was here today would be pleased to know that I finally mastered her skill.

Crochet Racoon
A Baby Racoon made by Emma

I had dropped the whole idea of crocheting for a long time but I have always tried to create something or another. I have dabbled in many crafts. Although not an expert, I have definitely had a go at many Crafts. Crafting and creating are in my blood, passed down for generations on both sides of my family. That makes it really difficult not to be making something.

Once I had children, I started making things for them, mainly toys. I sewed them a bear and Knitted some dolls. The idea of crocheting would pop up from time to time but I never really listened to it until about 7 years ago. I told my Mum, “Surely, if I can manage to knit a little (very little, I might add) I can also learn to Crochet”. My mum tried to teach me but she is more of a Knitter than a Crocheter and so once again I did not understand. However this time the idea to learn Crochet grew even stronger.

Sometimes a little pressure can go a long way in getting you over the hurdle. Not many months after, my sister-in-law asked me if I would like to share a market stall with her. I immediately said Yes! But I had nothing to sell then. I had only 4 weeks to come up with something. That’s right! And that’s when I thought of turning to YouTube and learning to Crochet.

We are truly blessed to have YouTube and as it turns out, it perfectly fits my learning style. So I watched video tutorials. I would pause at each step until I understood it well. Within 4 weeks, I went from not knowing how to Crochet and having nothing to sell at the market, to having some basic little crochet bags and some ill fitting beanies. None the less, I had something! And it was just the beginning. A profound love and passion for Crocheting was born and I have not stopped crocheting, learning, creating and making ever since.

Crochet is known to have many health benefits such as reducing stress while keeping the mind calm. The colours are pleasing to the senses which improve the mood and help fight negative thoughts such as depression, anxiety and insomnia. It has been noticed that people who Crochet can not only concentrate and focus better but also multitask well.

For me, Crocheting taught me a lot about myself. I learnt that I can teach myself with the help of the resources available today, as I am a very visual learner. When you truly love something – you can do it every day for years and it will not be a chore. I like to design and create something new. I love waking up with a new idea and taking the image that is in my head and making it a reality through Crochet.

There are so many beautiful things you can make by crocheting. It is like doing magic with some yarn and a hook. From Fabrics, Household Items, Sandals, Bags, Toys, Cushion Covers, Phone Cases, Baby Outfits, Wearables, Cosies, Headbands and Hair-ties and so much more.

Crochet Photoshoot
Props for Photoshoots made by Emma

I particularly love making gifts for family and friends, Photo Outfits and Props for Cake Smash Photoshoots (another passion of mine), Bags and Toys. It has always been about making people smile.

Putting a smile on a little someones face is incredibly important to me, I once made ‘Sebastian’- the Wombat based on the Children’s Book for a child with special needs. This was pretty special. It had to be made just so or he wouldn’t have liked it. I had no idea how I was going to make it when I started off but I just started it and seemingly it all came together. I am pleased to say, he loved it!

Crochet Wombat
Sebastian – The Wombat made by Emma

Selecting your Materials : Go for good quality yarn as it will make a difference to your projects. Cheaper quality will make your job harder. We have a choice among animal based, plant based fibres and synthetic. An important point to note is that the yarn or threads have varying weights (thickness). Keep this in mind while selecting the threads for designs.

Also you might want to go for something machine washable, easily drying, durable and with fast colours. I like using the more natural yarn like 8-ply wool and organic cotton wherever possible. ‘Ply’ means strands twisted together. That means a 5-ply would mean 5 strands twisted to make that single thick bunch.

Crochet Yarn and Hook

To begin with you may want to use quality acrylic yarn often referred to as the beginners yarn or the same yarn which the tutor is using. Other than that you would need the hook or Crochet needle to spin magic and a tapestry needle for weaving in loose ends or embroidering the small details.

Just like needle sizes, we get hook sizes. This is determined by the size of the stitches or the type of project you want to create. Choose a hook that allows your yarn to slide and move without hinderance and you are comfortable holding, as it can take long hours to complete a project.

Additional tools may also be needed, like measuring tape and gauge measure. Gauge is referred to as the number of stitches per inch and rows created per inch. This is because even with the same hook and yarn no two people crochet the same and can create different number of stitches in an inch – loose or tight. Once you practically work on a project, these terms will be more clear. Select any project that you feel simple. I do share Crochet patterns on my YouTube Channel. Feel Free to check it out!

To sum it up I can say ; If you have the desire, you can learn anything. It always comes with a set of challenges and frustrations but don’t give up. It’s a life time of learning and totally worth it! The old saying ‘Practice makes Perfect’ is actually true. Do a bit every day and just enjoy the ride! Have a Crafty Week!


Guest Blogger : Ms. Emma Thomas

I love designing, making and creating new things. I am super passionate about Crochet and Photography. I love running and keeping fit. I am a Mum to 3 Boys and a Girl.

Emma is the Maker and Shop Owner at ‘Double Stitch Creations’ based in Melbourne, Australia.

Website – Double Stitch Creations

Year in a Review

In the Holiday mood, I am also going to take a break next week. Most people have already signed off till New Years. As a shop owners, we are busy making products, posting on social media, settling accounts, packing, shipping and making new and the cycle continues year round. That makes us use our phones for long hours at work. A little digital detox to spend time with yourself, family and nature can rejuvenate us.

My Desk
My Desk! It’s Christmas 🎄

And we can come back in the New Year refreshed and charged up for another year ahead. Many people also use this time to upgrade their skills, read up on books they always wanted to. I started my Blog this year in September 2020. I have 17 Posts by now. The response to the Blog has been overwhelming. It’s been a good journey with your love, support and encouragement.

So I thought I would do this year in a review post. Helps me connect with the new followers too! Here is a list of the posts I have done on Arts and Crafts so far. You may click on the title to go to the post. All these are listed on my Blog page – ‘The Art Life’

So just in case you missed out on reading any of them, you still can. Please note the Blog page shows only the last 10posts and so to see the previous ones you may use the links above or scroll to previous posts.

If you like reading my posts and wish to continue our association, you may click follow or subscribe to the Blog. This will make the posts come to your Email Inbox and you may read them at your convenience.


Wishing everyone a Merry Christmas and a Happy New Year!

December Calendar with a Christmas Wreath that I created Digitally

This is an Instant Digital Download (JPEG) File that can be purchased at my Etsy Shop NMARTWORKS Picture Format opens with any Photo Editing Software. Once you pay, you can instantly download and use.

Selecting Pens and Markers for your Art

Jingle Bells! Jingle Bells! Jingle all the way! Yay! Christmas is coming! And with Christmas comes creativity. I see such amazing Art and Craft ideas on social media. There is so much one can make and do. It is also the time for Gifts. What is the best gift for an Artist? Yes! Art Material. I did a post on Pencils and Pastels earlier. Based on that many friends asked me to do one on Pens and Markers.

We usually refer to Pens and Markers by the name of the brand. That makes it difficult to do a post without mentioning any of the names. In every country there is a particular brand that is popular and widely used by all Artists from that Country. Ink Artists, Illustrators, Manga Artists, Architects, Interior Designers, Fashion Designers, Calligraphers, Students, Crafters and maybe more – All of them use Pens and Markers for their rendering.

If you have read my previous post you would know that this is an all you want to know information post and not a product review or an endorsement post. I was thinking about how to do this post without sounding repetitive? So I thought it would be best to do this in a Q&A format. I have tried my best to answer all the questions that I think can pop up while buying Pens and Markers. In case you have more questions, please feel free to ask them in the comments.

Pens and Markers
The different nibs of Pens and Markers

These are some of my Pens and Markers I arranged to click a picture.

1. Are Pens and Markers different? Hmm, well actually not. They are called Pens or Felt Pens or Sketch Pens or Markers – different names in different countries. They are all Pens available in colours, black, white, glitter and neon shades. The terms are used interchangeably. Like I said we usually call them by the brand name and not as Pens or Markers.

2. Do we get Artist Quality and Student Quality? Technically Yes! But they aren’t really labelled as such. Pens positioned as Artist Pens are Artist quality while the regular ones are Student quality. The pigment, colour and finish for an Artist Pen is better. We also get Industrial Grade Markers. This determines the price points.

3. What mediums are used? We get Oil Based, Water Based, Alcohol Based Pens and Markers. There are Gel Pens, Permanent Ink Pens, Waterproof Ink Pens, Washable Ink and Water Soluble Ink Pens and Markers. The Ink Technology and Ink is different in all of these. That is why two Pens of different brands – both with Waterproof Inks will give different results.

4. Individual or Set? If you are trying a new brand for the first time, it is best to buy different pens individually and try them out. They have testers kept with papers to try them at all stores. I even try the fresh pack Pen before buying to check the nib and ink. The manufacturing dates, import dates and other details are not clearly visible on single pieces. This makes it better to buy them in a set. The drawback is we are not allowed to open a set and try it out. It makes complete sense to buy individual pens to try and once you short list and select which brand you want, it is better to buy them in a set.

5. Which brands are good? I have tried Pens by almost all the well known brands. All of them are good. Brand Loyalty is very strong for Pens and Markers. I have understood that each Pen has Ink that works very well for a purpose. Depending on your use and Artwork you would have to select Pens that suit you by the Trial and Error method. The Art store usually stocks more of the popular ones and of course you know why. Further your location will play a big factor in your selection. Not all brands are available in all countries. Sometimes the Pens that are being imported regularly go out of stock or are priced too high.

6. What do they mean by the numbers on the Pens? The numbers indicate the nib size: for example 01 means a nib for drawing a 1mm thick line while 03 means a nib with 3mm thick line. We also get accented nibs, brush nibs, round nibs and felt nibs. As mentioned above the construction material of the nib and the ink is different in all pens. Further some brands use the numbers for colour coding. We also get dual tip Markers – meaning two different usable nibs on both sides top and bottom.

All in all, it is best to try different Pens on the Paper, carry your own page if you like where you have tried various Pens and buy the ones you think will work best for your work. I have already explained where and how to use each of the mediums in the previous post. Like, if you want the colours to blend: use the watercolour ones while if you don’t want the ink running, best to use the permanent waterproof ink Pens. Even in a simple brush nib Pen we get a lot of variety.

Scribbles Art
My scribbles trying out Pens in rough

The sponge of a brush tip Pen is different by all brands. I usually select a Pen with a medium hardness brush nib. I would like it to turn with pressure but not fray resulting the sponge in tatters. Constantly applying too much pressure on the Pens with very hard nibs can result in sore hands. That is what I meant when I said select Pens that one feels is most comfortable using.

Another important thing to see and note is how the Ink spreads on different papers. Do we get a smooth finish line or a dented one? Does the Ink bleed and spread or create blots and spots? When we apply two strokes next to each other – does the Ink mix or create patches? Does the Ink dry fast when applied or takes hours to dry? Artists would note all this. It makes a difference to their Artwork.

These are all small points but important to check before buying. Many times Art stores mix old and new pens when stocked in the individual Pens section. These pens are expensive and nobody wants to waste money buying a damaged nib or dried up ink Pen or Marker. It takes me at least 15-20mins selecting my Pens even when I know the brands. Last but not the least I compare prices and check for discounts if I buy more pieces. I run out of pens in about three to six months depending on how many Artworks I made. The Inks dry up after about three to five years, if kept lying around.

That lists about all the points I can think of that will help you make an informed purchase decision for the Pens and Markers. Ah! That’s too much. Give me one name and one set – if that is your buying style, I suggest pick any standard well known brand with other Stationery or Art Supplies and buy a set of their Markers. You can’t go wrong. It’s the same for students. However if Art and Craft is your passion, hobby or profession – the choice is yours! Have an Arty Weekend!

Special Tip: Always check the Cap is tightly closed before you put away your Pens and Markers after Use.

Book Recommendations – Arts and Crafts

They say a good book is always a good investment. Today all material is available online but I still prefer to take a book, read and learn from it. The online material gets downloaded and saved. Later if I want to refer to it again after a while, I am unable to find it. On the contrary if it is a book ; I can pick up the book, flip to the page, refer to what I was looking for anytime.

The Human Brain does not remember everything it saw or heard at one go. We need to go back and forth to remember and understand things clearly. Besides we don’t usually learn until we actually get our hands into it. That is when the real questions pop and problems happen.

Sometimes google gives the answers but sometimes it just doesn’t seem to understand. Books on hobbies including Arts and Crafts are expensive. One of the reasons most book stores don’t keep them or keep just one or two. The helper at the bookstore would tell me “Ma’am, we have only one. People just read it here. They are expensive so people rarely buy it. If you want the other titles I can order them for you”.

There were times when I would go to the hobby section of every library I visit and check which books they have on Arts and Crafts. Coffee Shops also kept a few books; books people gave them or they collected. Sometimes I would find a good book there – Coffee Table Books.

Collecting books to learn a new Art or Craft became a holiday activity. I would pick magazines during my waiting hours at places, even if they had like just a single article on Home Decor or Crafting. I would still check it up. Another place I would get some good books was the Children’s Reading Corner at Resorts. If it’s in their library and I have been there, the chances are that I have read the book.

My mom had enrolled me for speech and drama classes. Thanks to my teacher there Reading became a habit. Even today I pack books every time I am travelling. On a holiday, you are most likely to find me at a cozy comfortable spot indoors or outdoors with a book. My folks like reading too. So my parents didn’t mind if I bought books and added them to my personal library.

In this article I share about four books that I recommend for Art and Craft Lovers. I have been collecting books for years, so I do not know if they are easily available or you would have to really look for them. We don’t get these online and recently when I checked the local bookstores they didn’t have them either. One place we are likely to find these is the book stalls at Art Fairs or Exhibitions or Art Galleries.

And after all the effort if you do get your hands on these, don’t miss your chance. I have actually managed to learn these Arts and Crafts with the help of the books.

Books on    Arts and Crafts
The Four Books that I have recommended

1) GIFT WRAPPING : The first one is ‘Creative Gift Wrapping’ by Yoshiko Hase. She is a ribbon creator from Japan and this is the 2nd Part of the series. It has 132 different tutorials on Gift Wrapping. In Japan a lot of importance is given to Gift Wrapping: the colour, the ribbon, the paper, the card everything. And they are really good at it! With the festive season coming up, who wouldn’t love some special wrapping tips from the experts!

2) SEWING : The second one is ‘SEW Step-by-Step’ by Alison Smith. She has been a Textiles Tutor at the Liberty Sewing School in London and the Janome Sewing School in Cheshire. Alison also has her own shop – Fabulous Fabrics and a sewing school – Alison Victoria School of Sewing in Leicestershire. Her school is the largest independent sewing school in England. This book really guides and takes you on a complete step-by-step process to everything you need to know about sewing on the machine. A beginners workshop at their training centre when I bought my Janome Sewing Machine along with this book was enough for me. The book has been my go to guide or sewing manual every time I want to try a new project.

3) CANDLE MAKING : Your Christmas Decor would be incomplete without Candles. If you wish to make them at home for your family and friends and need some ideas to get started, then my next book is all you need. It has 20 different projects with items you can make, by yourself at home. The book explains all the tools and materials that you require for different types of candles too. The book ‘CANDLES’ by Diana Civil is great for a holiday activity of Candle Making.

4) NAPKIN FOLDING : Inviting friends and family home for lunch or dinner? This book has 150 ideas on Napkin Folding that surely make an impressive table setting. If you are following a theme or a particular style and want something to match, this book has it all. It is called ‘The Practical Guide to Napkins and Napkin Folding’ by Rick Beech.

Have you read these? If you have read any other books on Arts and Crafts that you have loved, do share about your experience. I would be happy to hear from you and add new books to my collection too! Have an Arty Weekend!


Note: If you are looking for Christmas Gifts to buy, do visit my shops and take a look. I have shops on Etsy, Society6 and Redbubble all three by the same name ‘NMartworks’. If you like something, there are offers and discounts this weekend. Links are on the Home Page. Thank You!

Calligraphy : A Visual Art

It’s an Art, a Visual Art but it looks like handwriting – Calligraphy. In simple words humans made markings with available tools as symbols. Later as characters and scripts developed they began to write using tools available to them. As our writing tools developed, the tools for Calligraphy also changed. Calligraphy is practiced in many countries. The tools they use, the writing styles and scripts differ. I find this art quite fascinating. This one is all about practice, practice and more practice.

I learnt the European Gothic Style of Calligraphy during my school days. Did it help me in any way? My handwriting was decently good and legible. My teacher insisted I use Ink Pens till 5th Grade, after which I was permitted to use ball point pens for writing my notes. I also used Ink Pens for Calligraphy. So it seemed like more fancy writing, just additional handwriting practice in the beginning. I could use it for my school projects. My mom insisted I use my fancy writing skills on Greeting Cards, Gift Tags and Envelopes exchanged on occasions. Gained some love and appreciation there!

Calligraphy
Different Styles, Different Nib Sizes

Today, I don’t remember writing an entire page by hand in a long time. Fonts – Typography, Logos and Signatures – Lettering and Graphic Designing. Learning Calligraphy helped me here! I agree, we now use digital tools for these but the basic knowledge remains the same. It gave me finesse in holding the pen, the brush and now the digital pencil. The digital sensors correct the breaks in the strokes and make it look flawless. Even I prefer using the digital tools. I don’t think it is easy to compete against a computer opponent in this case. The computer would win! It has made Typography and Graphics much much simpler and faster. This makes a handmade version – handwritten Calligraphy by a Calligraphy Artist a rare find – unique and beautiful; just watching a Calligraphy Artist paint can be a visual treat by itself.

Now even schools are online, we don’t even use the pen for signatures. We are almost forgetting what it is like to hold a pen. Calligraphy is now mostly used to write names on wedding cards. Even for those we now use digital fonts and print them. So why should I learn it? If that is your argument, then I have to say “Learning this Art has helped me improve my creativity and artistic skills. I don’t think I could have done it any other way. I’m glad I learnt it.”

Calligraphy
Brush Pens – Ruffed Brush Tip

Brush Calligraphy is quite popular. Brush Calligraphy and Modern Calligraphy are different. Calligraphy is mostly referred to when using a Pen to write, while you use the brush or brush tip pens to write in Brush Calligraphy. I don’t want to get into the terms and definitions but say that learning one will be different from learning the other. So try your hand at Traditional and Modern Calligraphy as well as Brush Calligraphy. You could be better at one than the other.

Where to start and how to learn this? What material would I require? Is it very expensive to pursue this Art? Do you teach? Wait! Wait! I shall try and answer all these questions. They say ‘Teaching is the best way to learn’. That is why I taught some of my close friends whatever I knew about Calligraphy. It was my first ever experience in teaching. It is always better if you can find someone to teach you this Art but if you cannot then the next best thing is to buy a Book. This Art is all about practising. A teacher would also need just one or two sessions – to show you how to hold the pen, how to make the strokes, show you one or two writing styles. The rest depends on your interest and practice. A book will do that and may be show you more writing styles to practice.

Calligraphy
Calligraphy Art – My Desk

A Calligraphy Set would have one Ink Pen, changeable Nibs of different sizes and Ink Tubes. This is the smallest set. Larger sets with additional tools are also available. A ready set is most likely to include a book with at least one writing style. This will be a very basic one. Then you can download practice sheets available online. We used regular Ink Pens. We bought Calligraphy (4-6 different size) Nibs. See the loose nibs in the picture, I still have them. The Ink was permanent Blue or Black Ink (regular Ink Pot). We even got nib cutters to cut the nib. Unfortunately loose or only Calligraphy Nibs are not available anymore. So you could buy the most basic Calligraphy Set and a good book with different writing styles and practice sheets.

Wow! Why are these Ink Pens expensive? The nib of a Calligraphy Pen is accented. It gives a thin upstroke and a thick downstroke. For larger font size one needs a broader or larger nib size. To begin with nib sizes 1& 2 are good to write in regular handwriting books. The red blue ruled books we use when we learn handwriting are perfect to learn Calligraphy too. Then of course you would just need a single line ruled book or no lines as you progress. This part is similar to our handwriting practice books.

Calligraphy
Calligraphy with Markers

We get sketch pens or markers with accented tips too. These are used for Calligraphy. The difference is the tip is much softer and so the pressure to be applied is different. The pressure applied to write with a writing instrument that has a metal tip, wooden tip or fibre tip will always be different. Similarly brushes are used for Brush Calligraphy. We get Brush tip markers too. It is cheaper to get markers and we can always use them for other Arts and Crafts. One of the reasons Brush Calligraphy is popular. If Calligraphy really interests you and you wish to take it to another level, you may want to invest in a Traditional Calligraphy Pen and perhaps get trained with a professional Calligraphy Artist.

One special tip here : All these pens will be labelled as Calligraphy Pens on their pack at the Art Store. So the onus is on us to select what we are looking for. We definitely don’t need all of them. Best to buy a book and then the Pens if that makes more sense. Choose the writing instrument you are most comfortable using.

The Ink, the Paper, the Writing Instrument and most importantly your Style of Writing. All of this matters in Calligraphy. Even if I write the same thing, with the same pen on a different paper or with different ink or by applying different pressure, the result will be different each time. Hence only with practice and experience an Artist will be able to create those amazing works.

All said and done. This amazing Art seems to be dying out and getting replaced with digital forms. It may be difficult to find a tutor but don’t give up. In the end it will all be worth it – an enriched learning experience. Have an Arty Weekend!

Rangoli Art

Diwali is here! Diwali is an Indian Festival celebrated for 4-5days. Like every other Indian Festival this one has a story too. It was a celebration when Prince Rama returned home after completing 14yrs in exile and defeating his strongest enemy Raavan. So his whole Kingdom – The Kingdom of Ayodhya (then included India) was decorated with lights and colours to celebrate his arrival and victory. We also celebrate a New Calendar Year. Everything is closed for the Holidays just like Christmas- New Years. We exchange gifts, sweets, wishes and celebrate.

Rangoli Art
Diwali theme Rangoli – Ram Sita

My favourite thing about Diwali is ‘Rangoli’. These are artistic designs we create on the floors with materials like rice paste, flowers, coloured salt, white or coloured stone powder or paints. Almost every home and office makes these designs at the entrance. It is believed to attract positive vibes. Different types of Rangolis :-

1) Floating Rangoli with Flowers and Floating Diyas

2) Rangoli made using petals of different Flowers

3) Rangoli from Quartz or Stone Powder

4) Kolam – White Powder usually but can be coloured also

5) Alpana – White Paste from Rice flour or Paint

6) Readymade Rangoli

They are different in terms of the material used and the designs. I have tried my hand at all of these at some point of time. Beginners can try the flower ones and floating ones. They are relatively simpler. With a higher level of difficulty one can try Kolam and Alpana and then of course the traditional regular colourful designs done with coloured powder. Shading and making realistic paintings are of the highest difficulty level.

Rangoli Making
The making of my Ram Sita theme Rangoli Art

We get various tools that help us in making the Rangoli. We also get stencils to assist the process. More so we even get ready made stickers or Rangoli pieces to assemble. One such variety is the the one with decorated acrylic pieces or cardboard pieces. These are just to be placed on the floor as per your choice.

‘Art remains, only the tools keep changing’

However I don’t get my creative satisfaction until I make one like the traditional ones with coloured powder. The Internet is overflowing with tutorials and designs for Rangolis. I do browse through to find some ideas and inspiration, then add my hard work and special touch to them. That is why I say ‘Art remains, only the tools keep changing’. Sharing my Rangoli Art works.

Rangoli Art
Rangoli Art – I made these too 😀

Wishing everyone a very Happy Diwali and a Prosperous New Year! I do have some Digital Downloads at my Etsy shop with Diwali designs. Creative Adults are all children at heart. So here’s wishing everyone a very Happy Children’s Day too! Have an Arty Weekend!

Be Creative! Do Not Copy – Copyrights in Artistic Works

Looking up something! Type in your query in the search bar and within seconds, a million responses to your query will pop up. During my school days my teacher would collect drawings and paintings from various places to show me and ask me to practice. As they say ‘No one is born knowing it all. We have to see, learn or experience it to know better.’ That task in today’s world can be done from the comfort of our homes with just a click of the button. Very little effort or almost nil compared to earlier days. Then again there is a universal truth that no one likes to be copied – not even someone who themselves copied. I have read the ‘Do not Copy’ disclaimer on pages of Artists who have otherwise copied Artworks of other Artists.

Well then, is it possible for everyone to draw from their mind? Are they really inventing and innovating something totally new each time? All these arguments happen. They ask me ‘So are you really for or against Copyrights?’ I would say both. And the Copyright Law was also works like that. It means a person who has put in their hard work, time and money into creating something must receive their due credits for it. Nevertheless people must be encouraged to learn from one another to build on something existing for the development of the society as well. Hence certain permitted use of copyrighted works.

The Berne Convention is the International Agreement governing Copyrights and 179 nations are Parties to it. It formally mandates the details of the Copyright Law. The Digital Millennium Copyright Act intended as anti-piracy law also needs to be read alongside the Copyright Laws. If I continue talking in the formal tone or legal language, not many people will understand. I wanted to simplify it so that even a person who is not from the field can easily understand.

Here is what I learnt studying The Copyright Law :

It is not necessary to register your work, although registration makes it easy to prove your right in the Artwork. Reading up a little about Copyrights can definitely help – to protect yours and to avoid infringing someone else’s. Website of the World Intellectual Property Organisation (WIPO) shares a lot of information for public awareness about all Intellectual Property Rights. The symbol for copyrights is © followed by the year the artwork was created in.

So if you like someone’s Artwork, appreciate it and like it. Do not call it yours! That is stealing. Of course like any other kind of stealing it is a wrong doing. The law is to protect the creators from such theft. Every Artist has the right to be called the creator for their work and no matter what rights they license or surrender, this right stays with them.

If you imitate an artist, dedicate it to them, credit your references. Always remember you will be known as an imitation and an original is always worth more. The only time it is ok to imitate is when you are learning. That comes under Fair Use. However if your account states ‘artwork for sale’ or ‘open to collaborations’ or ‘artist – do not copy’ then your intentions are clear. It is not considered Fair Use. If it is fan art or a parody, it has to be mentioned clearly. The purpose, nature, amount and the monetary effect are all considered to know the intention.

Copycat- Mindless Act of Copying

If you were inspired by someone’s Art. And you used your creativity to create something different but similar. This is determined by substantial similarity test. So if the work looks very similar to be mistaken as one for another it might be considered copied. The new image search technology is so good that works with substantial copying are shown in the ‘works similar to yours’ search results right away.

One important thing to understand is Copyrights is about protecting the right of the creator so that he earns his rightful due from his work – in monetary terms. So if you are selling and making money by copying other people’s work, it may land you in trouble. I really don’t know if you wish to put your business at stake by doing something like that.

Social Media have a ‘Report Copyright Infringement Button’ where one can report if they feel their rights have been infringed. You would have to prove your rights in the Artwork. Digital image scanning with technology like Google Lens makes it easy to spot copied artworks. There are apps and softwares for these kind of searches. Companies have full time professionals dedicated to each of these tasks. The Media and Entertainment Industry is one of the major Industries across the Globe. Their works are protected under Copyrights. I think among all the other Acts of Intellectual Property Rights the Copyright Act is very well drafted and very adaptive to the changes.

Always repost with credits. If an Artwork has a watermark or a logo, it means it was to discourage from copying. That doesn’t mean works without watermarks do not have Copyrights. Copyrights are valid up to 70yrs after the death of the author, after which artworks fall into the public domain. After extensive lobbying by Disney ‘The Mickey Mouse Protection Act’ came into effect thereby protecting works of corporate authorship till 120yrs of creation or 95yrs of publication whichever is earlier.

Last but not the least, there is a school of thought that believes in sharing their works by giving some access and rights, so that others can use their works. Creative Commons let users use their works for free to build other new works. I think these have helped many creations and innovations. Some really amazing ones.

There is also something called Open Licenses where a standardised license with pre-determined conditions is used to license Artworks. By clicking the ‘I agree button’ we agree to their Terms & Conditions. Whether the Copyrights Model works or not, whether such protection is necessary or not – I don’t know. All I know is there is something called Copyrights. So be creative and do not copy!

Have an Arty Weekend!

Three Arts that you can give a try – Doodle Art, Zentangle Art and Mandala Art

It’s been tiring juggling work from home alongside family and home responsibilities. The last few months have been difficult for all of us. We need activities to do individually or as a family. Something to refresh and take a break. In the process if we get to learn and grow, it would be a bonus – right! Stepping out is a big No-No. That leaves us with very little to do apart from the mundane daily tasks. In this article I am sharing three Arts that I feel everyone can give a try! Doesn’t need any prior training or experience and are very popular.

These are my top three because; Materials required for these would be easily available at home. In case you wish to purchase the material locally or online, it is standard and easily available. The selection is quite simple and specific. Another reason I like these is because there is no right or wrong here, just beautiful Artworks. They don’t have to look like anything or have any logical sense. Loads and loads of free online tutorials and reference material is available. Further all of them help de-stress, develop creativity, improve skills and most importantly give a sense of accomplishment – a feeling of having created something. It builds confidence, develops brain power and directly or indirectly keeps one more joyful and happy.

So here is my list :-

1) Doodle Art : All of us would have tried drawing something at some point of time. Whether it was good or bad doesn’t matter. Without making a conscious effort or scribbling while your mind is pre occupied with something else is called ‘Doodling’. The Art is called ‘Doodles’ or ‘Doodle Art’. It can help express emotions. I scribble cute animals, flowers, hearts, stars and anything else that comes to my mind in my notebooks. These were my school, then university and even office notes and not drawing books. I memorised the data with the help of those diagrams. Making doodles on otherwise boring black white pages helped me do a recap of the matter on that page. In the exam we can draw these on the rough page or if it is a fair diagram, representing it graphically gained me extra marks for the answers.

Leaves Doodle Art
Leaves Doodle Art – My scribbles

Even today when I do brainstorming for ideas, I scribble it in my notepad. I do post my midnight scribbles on social media. Emojis, Infographics and Designs are some of the applications that come to my mind. It is continuously drawing whatever comes to your mind without a logical explanation or making sense out of it. Many people often mistake it with hand drawn Art. It requires only a pen and paper. For the first time we can search the Internet to make a beginning somewhere. Draw anything you like or connect with. It will not look the same. Big ears, small eyes everything is allowed. It is your art and you decide how you want it. It is all good as long as you like it.

Zentangle doodle Art
Zentangle and Doodle Artworks that I have done

3) Zentangle Art : Patterns or Designs made by repetitive lines or curves. These are used to fill objects. We don’t need to know shapes, shade and light, perspective or any other information about drawing. For the first one,draw small equal squares using a ruler and pencil or pen on your paper. Keep a constant white border between these squares. Then draw any combination of dots, lines and squares to create patterns or designs. A simple challenge to make it interesting would be to make sure no two patterns on this page are exactly the same. They can be similar. Here again these are designs and fills. There is no need for it to look correct or real. Each piece is a work of Art. I once did these patterns on a sheet of paper, removed photocopies or prints of the Art, laminated it and used them as placemats for my home. I have made bookmarks with these too.

Mandala Art
My Mandala Art

4) Mandala Art : Mandala Art has religious significance and origin. However often people just refer to a circular pattern when they say Mandala Art. One can try this Art without any connection to the religious beliefs – just as a random circular geometric pattern. To draw this we would need a pencil, a pen, paper and measuring tools to make a grid. If you wish to make it colourful you can use colour pencils and coloured pens of your choice. We need to prepare a grid using a compass, protractor, ruler and pencil. After this there are a million permutation combinations or possibilities resulting by connecting the intersection points of the grid using lines and curves through repetitive patterns. There are patterns and designs and represent nothing otherwise. I draw a lot of these both by hand and digitally. They are considered therapeutic. Can be used to decorate different things as well.

Mandala Art
Mandala Art with white pens on black paper – Reverse

If we look carefully we will find so many patterns by Mother Nature. The number of possible combinations in patterns and designs are so vast that one can definitely find a few strokes that are easy and manageable. The Artwork can be a combination of these. There isn’t any need to follow any specific rules to classify the Art as just one of them. Many people use the terms interchangeably also. I have a lot of practice and training in these but I am sure even beginners will be able to do a pretty good job. There is nothing like right or wrong here. I understand it is difficult to know where and how to begin with when it is the first time. As we do more, our hand or our strokes develop and we grow. Keep your first piece next to something you made after a few months of practice and you will notice your growth.

DIY Zentangle  Art
DIY Zentangle Bookmark Pattern
DIY Mandala Art
DIY Mandala Art with grid making

Apart from the above, the one important thing that you will definitely need is your zeal and enthusiasm for Art. The idea was to introduce these and develop your interest in them. I hope I managed to interest you enough, so that you look up and give the Arts a try. These Arts require focus and patience. So to begin with I would suggest selecting simple projects. I have shared two DIY projects you could try. I have purposely kept them naturally imperfect to show that it doesn’t really matter. The only thing that matters is : You enjoy! Have an Arty Weekend!

‘Healing with Art – Art Therapy’ by Guest Blogger – Dr.Wilona Annunciation (MD)

Art is something that makes you breathe with a different kind of happiness.’Anni Albers

I cannot describe the emotions that Art stirs up in me! The eager anticipation of what I would take up for that Art experience, the planning for how to go about it, the gathering of supplies, the actual creation of the artwork and finally the feeling coursing through me, when I complete the piece and sit back to admire and critique what I have done! I have spent so many happy, excited, enthusiastic, unexpected, doubtful, confused, irritated, impatient moments that I have grown through each of my brushes with Art! And so, as a Psychiatrist, I find it absolutely intriguing the way people emote and express through their artistic creations.

Artworks by Dr. Wilona Annunciation

While Art began to be used in treatment as a form of Therapy as early as 1942, it started off more as a form of Catharsis for patients suffering from Tuberculosis. So as to “build up a strong defence against their misfortunes”. In mental health, Art as a form of Therapy has now evolved and come a long, long way from those early days. Today, Art based Therapists work in sync with Psychiatrists, Occupational Therapists, Remedial Educators and other Mental Health Professionals to ensure a holistic recovery of their patients.

As a young psychiatry post graduate, I was trained thoroughly in basics like history taking, mental status examination, criteria for diagnosing disorders and the medical treatment options. However I often found, that while my patients did well and improved with medicines, there would be a pause when I asked, ‘Do you feel your life is back to the pre disorder levels?’. Often patients said that they were definitely better but something was missing and another doubt that kept nagging me was, how do I help them prevent further episodes! Once I started my private practice, I actually realised the advantages that effective therapy brought to patients and I found myself encouraging patients to look at the combination of medications and therapy as the best possible mental health solution.

Over the last 10 years in Mental Health, I have seen a good number of my patients, struggling with the concept of expressing themselves in words. And here, for some, Art has been the saving hope. I have had children emote through their Doodles, teens struggling to talk about what they are experiencing draw Graphic Images, Images of their thoughts, young adults express their rage though Colours, middle aged persons showcase their anxieties through Art and elderly describe their hope in the change in their Patterns of Drawing. And this has helped me modify the medications to help them improve their quality of life.

I have been fortunate to work with an excellent Arts Based Therapist who has taught me some valuable lessons which have translated into my work and personal life. One of these was that there are no mistakes in art, only opportunities. Such a beautifully empowering idea, isn’t it? It makes you ponder about the pressure we put on ourselves not to make a mistake, but in Art every mistake is an opportunity to redefine whatever we are showcasing and an invitation to make it our own creation. This thought has made me so much kinder to myself, because I would often criticise myself if there were mistakes. In the pursuit of perfection, I would lose my sense of appreciation for what is. I am now more mindful of that.

I now look at Art Therapy as a valuable tool I can offer patients who are so inclined, to be expressive, to vent emotions and to reflect and meditate on their own goals and honestly, I have seen some wonderful transformations! Whether it is making Art or viewing others Art, this form of Therapy, believes in the expression of creativity as a means of fostering, healing and promoting recovery from some serious mental health concerns. I have seen it at work in patients with anxiety, depression, personality disorders, sleep cycle disorders and PTSD. It can be used alone or in conjunction with other forms of therapy like CBT, group therapy or the gestalt approach to bring about an increased self-awareness and shift towards self-development in the patient. But it is hard work and it requires dedication. Just like any other change you want to bring permanently in your life, whether it is healthy eating, regular exercise, better sleep hours, mental health through Art Therapy will require your motivation and commitment.

If you feel, this might be the approach for you to address your mental health concerns or goals for self-development, do consider reaching out to an Arts based Therapist. You will need someone who has studied both Psychology and Arts based therapy to work with and you may need to speak to the person before you decide the fit, but do reach out! We are in difficult times and in the process of making sense of our struggles. We may need a helping hand and it is completely ok to ask for it.

Artwork by Dr. Wilona Annunciation

Dr. Wilona Annunciation

For me personally, Art is a wonderful medium to just be ME! Imperfect, Vulnerable yet Beautiful!

Dr. Wilona Annunciation (MD) Consultant Psychiatrist at ‘Institute for Psychological Health’ & ‘Prafulta: Center for Psychological Wellness’